The cutest countdowns
Friday, November 7, 2014 Posted by BLODOX at 8:05 AM 0 commentsHey there everybody! Happy FRIDAY! Can you believe how fast the time is going? It was JUST August. It’s freaking me out.
Did you realize there are less than 50 days till Christmas? Let me repeat…LESS THAN 50 DAYS. Errrrybody freak out! OK, seriously, you won’t see much Christmas decor here till later this month but it’s become a fun tradition for me to share cute Christmas countdown ideas every year.
I share them early just in case you want to DIY one for your family – or if you just want to buy one and make sure it’s still in stock. ;)
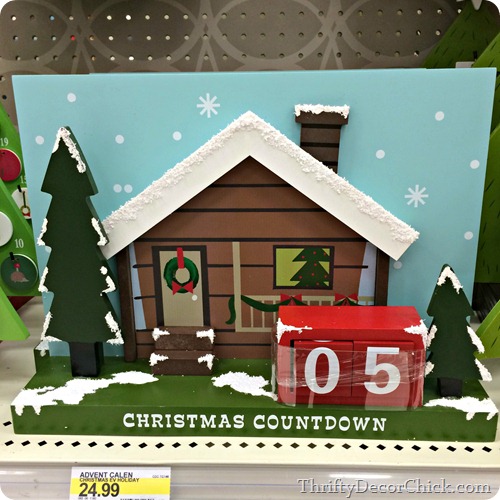
I was in Target last week and they had a bunch of countdowns and all were super cute:
I thought this little house was adorable. And it’s an easy one – no stuff, no candy. Just a countdown. :)
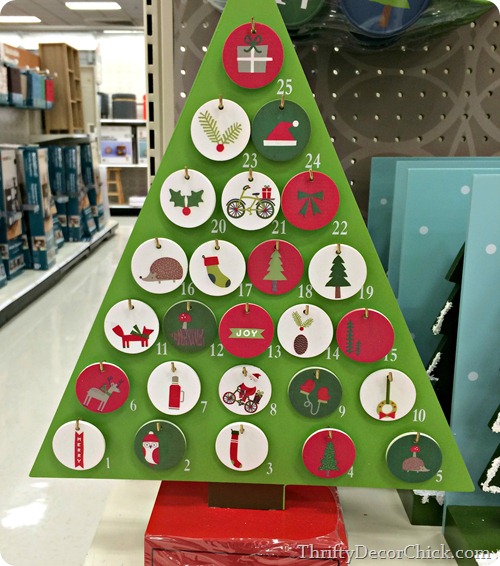
This one was cute and the back of each ornament had an event or treat you can do with the kids:
I’d check them each out just to make sure you are willing to do said things. Ha!
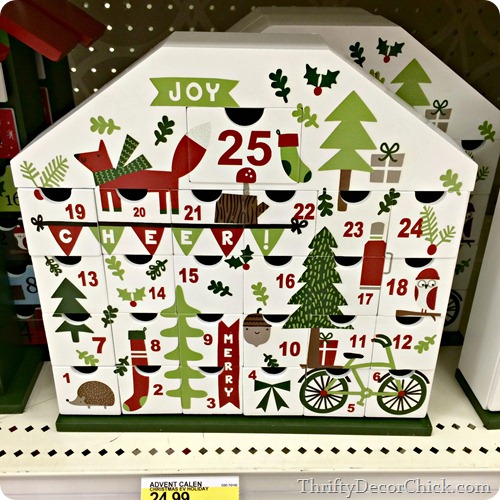
And because little trinkets and candy are just fun – this one had little drawers just for that:
They were REALLY small though. If you have more than one kiddo it may not work. ;)
I saw this one at Kirkland’s weeks ago and had to share:
I just think he is the cutest!
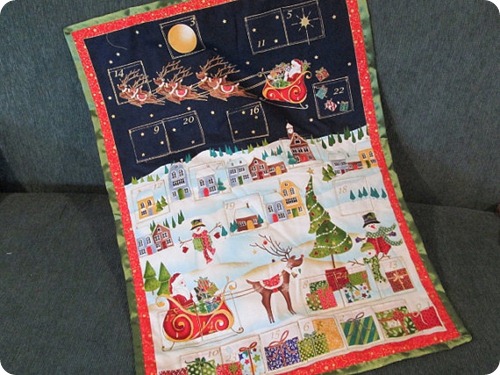
I found this beautiful hanging advent on Etsy:
There’s so many details to it! I just love this one – it reminds me of something similar I had as a child.
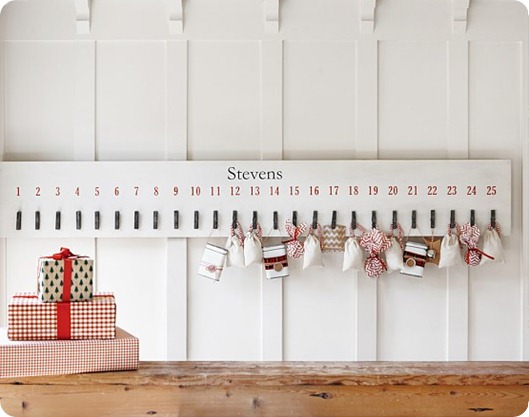
Pottery Barn never disappoints with their advent selection:
Seriously…I’m going to make this one and save myself the $150. For real. But if you don’t want to DIY I’m not mad at ya – I think this is super cute and you could add whatever you want to the clips!
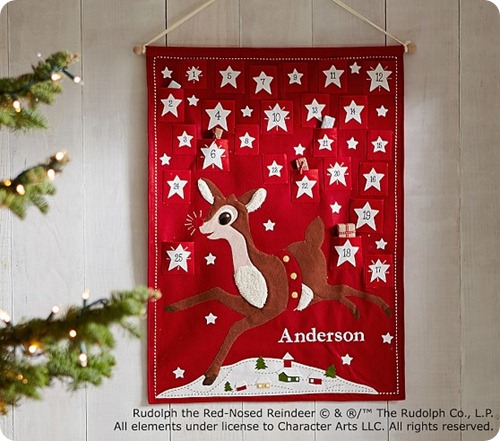
I loved this Rudolph one from PB as well:
So cute!
Let’s talk DIY versions, shall we? The easiest one by far is printing off fun projects/events for each day. Well the easy part is just printing and cutting them out – the hard part is in actually doing each event. ;) I loved these ideas you can print out and use:
The best part about these is you can determine what event goes with what day – so read a story could be a week night and movie night could be over a weekend. I love the idea of these – it’s all about being with family and making memories, right?
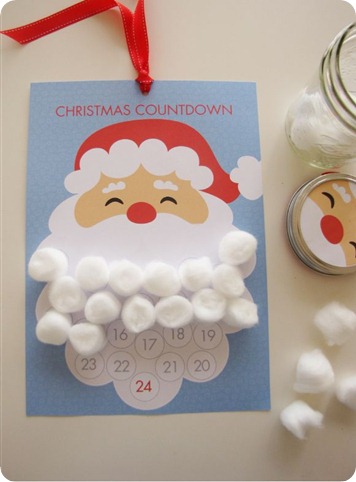
I’ve shared this idea before but it’s so dang cute I have to share a couple new versions. This one’s pretty easy too – just print out the Santa head and grab some cotton balls:
That one you can print out and let the kids color.
If you want one already ready to go check out this cutie:
LOVE the Santa face on the mason jar as well. :) Super easy right? Print it out and pile up some cotton balls!
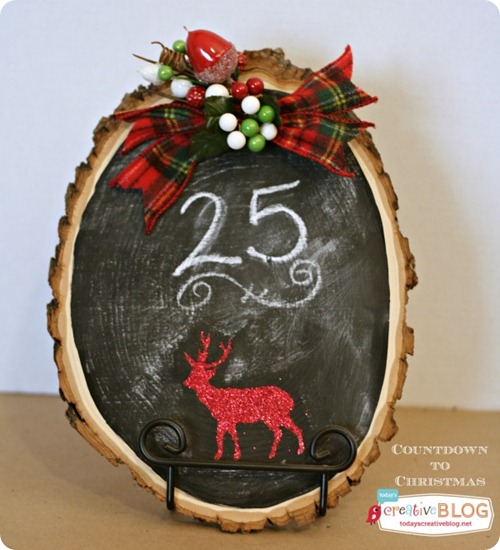
If you’re looking for a countdown that’s a little more decorative I love this chalkboard idea:
It may not be as fun for the kids but you know, I haven’t met a child who doesn’t like any kind of countdown. The anticipation is half the fun!
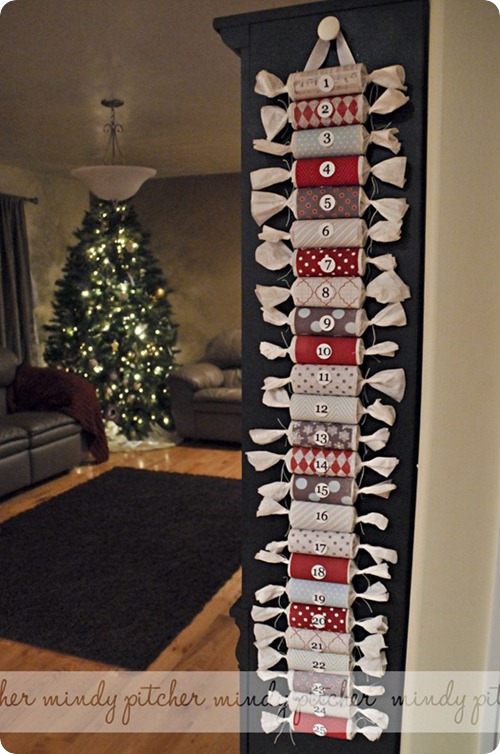
I think this idea is pretty and probably tons of fun for you the kids to open up everyday:
She used toilet paper rolls but paper towel rolls cut up would work as well. Or just simply rolling some card stock to make the tube. I like that you can use festive papers to customize it too. The kids could help decorate it after you fill them up. :)
Years ago when the Bub was just a little babe I decorated these little boxes:
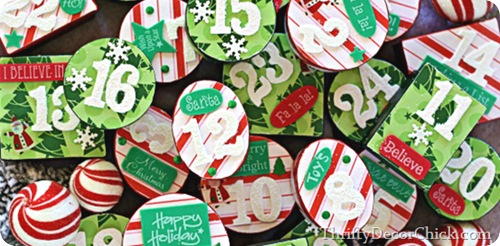 It was a labor of love – they took a while. But they are still doing great and we pull them out every year. I think they are so adorable!
We do a mix of treats and things like “drive around a look at Christmas lights” kind of things. Every year I plan on attaching them to something but I kind of like that we can put them out anywhere:
I gotta say…looking at these gets me excited. :) :) We are Christmas nuts around here so it’s hard to wait!
Do you have an advent calendar? Have you ever made your own? You can see more of my advent posts from years past here, here and here for more inspiration. Have a wonderful weekend!
Fiddle dee dee
Thursday, November 6, 2014 Posted by BLODOX at 8:57 AM 0 commentsYet again…I’m late on the trend train. Like, the train is in the next station late. Per usual for me. I’m not very trendy anyway, and on the rare times when I do get on with one I’m super late and usually on it’s way out.
I know you want to be cool like me. :)
One trend that I admired and never jumped on till this year was the fiddle leaf one. Funny that a plant can become a trend, right? But these plants with the beautiful large leaves are still everywhere:
I’ve noticed they come in two different forms – the more squatty version like this one that has much larger leaves:
And others have much smaller leaves but are taller and branch out into more of a tree shape. That one above was an IKEA find a few weeks ago and he was not in the best shape. Most of the leaves have some kind of damage but he’s doing much better so far.
The IKEA one was a super great price of only $13. I’ve never seen them for that low anywhere else, especially for the size. I got this one for our master bedroom last winter for a lot more than $13. ;) It is taller though:
This was my first fiddle leaf and I immediately started killing it. Like, right away. It’s leaves were dropping like flies and it was NOT happy in it’s new home.
So I started doing some pretty ingenious things to keep it alive…like watering it and making sure it had enough light. ;) Seriously, I think the key to these plants is LOTS of light. I’ve read they don’t like direct sun but mine looooove it.
As soon as I got this guy into the sun every morning he started doing great. Not before half of the leaves fell off though. Whomp. And now I water them about once a week – not a soak, just a good watering. Water and sun…who would have thunk it.
I’m not a clean freak by any stretch of the imagination but the leaves on this guy were grossing me out:
You can see the new leaves are bright and shiny. The old ones were filthy. I swear to you the rest of my house does not look like those leaves – I’m not sure what I did in the room that made them so dirty. Maybe because that window is open so much? I don’t know – the newer leaves that are about eight months old barely had any dust on them.
No idea but I finally decided to clean them up – I took a wet rag and wiped every. single. leaf.:
For real, I stood there and couldn’t believe I was dusting my plant leaves. Do most people do that? I don’t even know. I guess I’ve never had plants with leaves big enough to actually accumulate anything before.
I recently heard about a little trick to shine up the leaves and make them look brand new again. It sounded a little wacky to me but it worked – I just took a teensy dab of mayonnaise and wiped the leaves down:
I did this very gently by the way – the older leaves are nice and thick but I didn’t want to do any damage.
I have to admit it worked really well – the older leaves now match the glossier (more glossy?) new leaves:
Fiddle is looking pretty awesome I must say:
Excuse the cat butt.
Side note: I love green and gray together.
You can see from the older pic above that the tree lost a TON of leaves. But you should have seen it before I figured out how to bring it back. :) It has grown quite a bit since then – both out and up.
I LOVE these plants now – I’m completely hooked. If I can find more at IKEA I’d like to get one more. Their big beautiful leaves are lovely:
A few of you have asked about the cats with this plant. I waffled back and forth about getting one because I read conflicting reports over the years. But I’ve found the cats don’t touch these plants. Our palms they chomp on like food but they’ve never shown any interest in these at all. Also, when the fiddle leaf is healthy it doesn’t seem to shed leaves…this one hasn’t lost one leaf since I brought it back to life.
Have you jumped on the fig train? Are you a plant person in general or no? I LOVE them and love having plants scattered throughout the house – they give it life! I’ve blogged about plants that are safe to have around cats (and easy to grow!) here and here. I think the key to most plants is the light – pay attention to what their needs are in that area and you’ll be good. Most of our plants I water every two weeks or so and they do wonderfully.
Family room details and sources
Tuesday, November 4, 2014 Posted by BLODOX at 8:17 AM 0 commentsHello there! If you haven't seen all the inspiration at this month’s before and after link up, go check it out here. So many great projects already!
I’m back today with a few more photos and details about the family room renovation I shared last week. If you are just joining us on this project the back story is that we took down a wall between my office and our family room to open up the space. My office was a small room – ten by ten – but it made a HUGE difference!
Because I had installed board and batten on the walls of my office years ago, I realized I was going to have to keep going with that around the room. It was going to be too big of a pain to take down all the boards and repair all the drywall. I had been wanting to add some kind of wall treatment in the family room anyway, so it worked out well:
I think the room strikes a nice balance – I feel like it’s a little more sophisticated than before but still warm and cozy. The board and batten really helps keep it from getting too stuffy.
I get asked about that mirror all the time – I KNOW. It’s a beauty. It was from HomeGoods a couple years ago and there’s no identification on it. I so wish I could help source it!
One thing about board and batten, or really any wall treatment – is that it’s hard to figure out what to put above it. It’s harder than a normal wall because of the height. I went back and forth with a bunch of ideas in that corner above. The mirror used to hang above the old fireplace and I really wanted to keep it in here but it looked weird above the trim. So I went half way and had to rig it up – I put an anchor in the wall (no need if you have a stud) and cut a couple blocks of wood the same thickness as the trim around the top of the batten:
I used a really long screw to anchor those into the wall, then a smaller screw to hang the mirror. So far so good! Hope that makes sense to those of you who asked about that!
The other wall is a very small gallery of the Bub’s artwork that I took from my old office:
Those are just Goodwill frames – I had a bunch of them painted white in the office. I wanted some balance with the black dresser so I sprayed those black and I love how it all turned out!
I really wanted to complete the room and not have much left on my to do list down the road. So I went ahead ripped out the old window sills and added the new trim all around on the two windows in the corner:
I shared a step-by-step tutorial on how to do this here.
It’s a subtle difference but you can see how the window sills looked before here:
Love that you can see the passage of time by the leaves on the trees. ;)
The boards never butted up to them well and I just love the look of the thicker trim at the top and bottom! Four windows down in this house…a LOT more to go. :)
I did the same trim on the doors in the room:
Love those sconces – they are from Target! I bought one for our master bedroom earlier this year then got another one thinking I would use them on the fireplace. I had to go searching for that second one – I don’t think they are in the stores anymore but I did find them online.
I had the second one ready to return and then realized they would look great on those little walls. The candles are fake ones on timers. :)
Speaking of the fireplace, it’s my pride and joy:
It was a long process to get this baby to completion. The guys who helped with the construction part of the reno helped to make my dream set up a reality. I did all the finishing work including the trim work and color, tiling the surround with the herringbone tile, planking the wall above (for $13!) and then finishing out the cabinets on the sides for storage and electronics:
Those babies are good old inexpensive kitchen cabinets you can get from most big hardware stores. We tweaked (I almost wrote twerked) them to make them to allow for air circulation for the electronics. And yes, the remotes work through the metal screens!
I got a lot of questions about the étagère in this photo:
I got that from Joss and Main earlier this year – it was one of my only purchases from there and I am really pleased with it. It’s called the Brookfield Étagère and I got it for $40 with some credit I had there – awesome!! I plan to share more about it when I’m able to finish up the wall behind it with the board and batten – still waiting on the new back door to get finished up before I can complete that part of the room. It’s technically the kitchen now anyway. ;)
The spool chair came from HomeGoods and I can’t find any brand name of any kind on that either:
I have seen others on Instagram finding the same chairs so I know there’s more out there. It is SO comfy and so beautiful – I think it’s my favorite piece of furniture in our house right now.
I forgot that I did get a couple other small pieces for this room as well – many asked about the side table and that is from World Market:
It’s their large laptop table and it’s the hardest working piece we have in here – I use it as my desk during the week. I worried that I would miss my big desk and I have to tell you, I don’t one bit! It’s actually quite nice to be able to put it “away” for the evening.
The foyer table that used to be our sofa table that is now our hall table (whew) is the Everett foyer table from World Market:
I’ve told you of my love for that store before – they have some beautiful and unique pieces and that table is another favorite in our home. Love it. I think those green lamps are asked about more than anything in our house (other than the mirror above) and they are from…just guess…HomeGoods again. ;) It’s a sickness. I found those years ago though and haven’t seen them since.
The large mirror was a DIY project I shared here. It got the same gray color as the fireplace and built ins across the room.
I did get one other item for this space that I forgot about – the $20 coffee table that I made over months back:
It underwent quite the transformation and I LOVE how it turned out. I had issues with the wax and have been meaning to sand it down and fix it – but I’ve been too busy with other stuff. So I’m pretty sure it’s just going to stay like that forever. Adds character. ;)
Whew!! I can’t tell you how good it feels to have this space completed! Again I so appreciate all your kind comments about this room. We are thrilled with it! Hope I answered any questions you had – let me know if there are any I missed.
November before and after!
Monday, November 3, 2014 Posted by BLODOX at 6:49 AM 0 commentsWelcome to NOVEMBER! What? I can’t even believe it. I gotta tell you – I’m SO excited about Christmas and I’m one of those who loves seeing the stuff out in the stores already. But I’m already feeling behind! My Instagram feed is full of holiday projects and decor already. It doesn’t help that everything I’m seeing is beautiful and cute and I want to make every single thing. :)
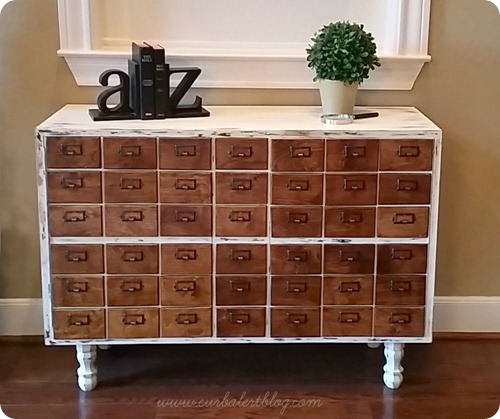
It’s time for another before and after link up! Before you check out the new links, I like to share a few that caught my eye from last month. Tami knocked it out of the park with this one – her knock off card catalog:
You won’t even believe how this one started out! (Hint: it wasn’t a card catalog.)
Here’s another brilliant project – Karen took a raised garden planter and turned it into a functional coffee table:
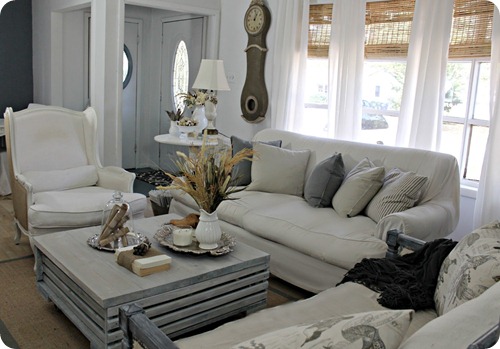 You guys are so smart!! That would look beautiful in a dark stain as well – and you can create storage inside. Awesome.
Joan DIY’d a countertop for her laundry room and it turned out so well:

You know how much I love my black interior doors! I have always loved the look of a gray door too – Sarah shows just how good they can look:

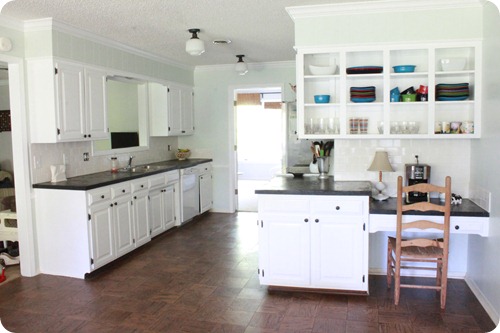
There were some bigger projects shared last month as well – Hayley shared some GREAT tips on how to paint your cabinets:
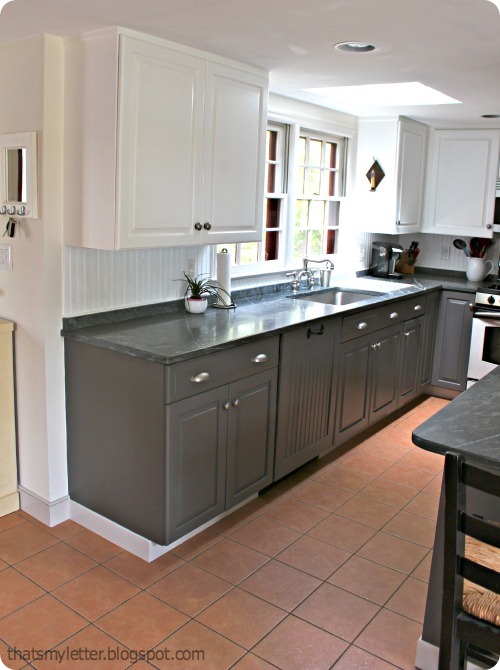
 And Jaime shared some as well – love her two toned look:
 Laura’s bathroom renovation turned out beautifully:
That tub!! Love the smart hidden storage they added when the lost a linen closet in the space, be sure to check that out.
Karah’s new rustic bathroom is a beauty too:

There you go – more fabulous projects! If you are linking up and would like to be considered for a highlight next month, go ahead and include a link to TDC or this code in your post:
<div align="center"><a href="http://www.thriftydecorchick.blogspot.com/" title="TDC Before and After" target="_blank"><img src="http://www.homestoriesatoz.com/wp-content/uploads/2012/03/beforeAndAfterButton_thumb1.gif" alt="TDC Before and After" style="border:none;" /></a></div>
And now let’s see what you’ve been up to lately! Link up your projects here:


