Christmas Home Tour!

Wednesday, December 11, 2013 0 comments

blogger christmas home tour

Hello all and welcome! If you are coming over from Donna’s tour, hello! And if you haven’t been to it yet, be sure to check it out. So much inspiration!

OH my goodness. I gotta say, this wore. me. out. When I decided to do this Christmas blog tour I was all, how fun, I’ll share my holiday decor! And then yesterday I was all, CRAP, I have to clean my whole house!

But is wonderful to have all of our Christmas decor up and done! I took a load of pics, so bear with me people. Here’s the thing – every year I get rid of more holiday decor (don’t cry for me, there’s a ton to start with) because I just don’t wait to store it all anymore. This year I’ll get rid of a bit more, but overall we have good storage for it all now so I’m not as focused on getting rid of much. I have created a new rule of one item in, one out though.

The older I get the less I want to pack up half of my house to decorate for Christmas. I don’t mind a little bit, but years ago it was like we were moving back in in January, I had to put so much back where it belonged. So, my point is, I try to use what we have an add Christmas touches to it. It’s not always in your face Christmas, but it’s fun and festive and we love it.

I’m not going to talk too much, so if you half any questions let me know and I’ll answer them in the comments. We’ll start with the kiddo’s spaces:

book nook

I had to dress up the book nook a little. :)

santa hat craft 

Every year the Bub and I set out his Christmas village. Some of it is Goodwill finds from years ago and the rest we have picked out – one a year. It’s his absolute favorite thing to set up at Christmas:

Christmas village

The cats regularly walk through the town knocking down trees and people, it’s just general havoc. :) We turn it on at night and the Bub falls asleep to the lights. It’s lovely.

The powder room got a redo this year so I had to add a few holiday touches:

  preserved boxwood wreath 

white wood planked walls

My only holiday decor purchase this year was an expensive one. Yowza. I’ve wanted the Willow Tree nativity for years and I finally bit the bullet.

It is so pretty:

willow tree nativity

Up till now we’ve only had the Little People nativity so this is a step up. :) I hope to add to it a bit every year.

I leave most of my accessories as is and just add to them. Greenery ALWAYS does the trick:

I just used pieces of Frasier Fir cut off our tree – just ask for scraps and they’ll give them to you! Keep them spritzed with water or just leave them – as long as you don’t touch them you won’t know the difference.

One of my favorite (and easiest!) additions this year is an idea I got from Ann Marie’s Instagram feed. I changed it up a bit to work for the frames above the sofa:

Easy Christmas art

I’ve had the frames up for two months without anything in them – I have a plan but I’ve obviously found more important things to do. ;) I think I’ll keep these print outs and put them up again next year! I think it’s so stinking cute.

I’ll share more about our trees next week (more on that later), but here is our BEAST:

That’s nearly 12 feet of awesome right there. We have a total of four trees in the house and this is the largest by far (by about five feet).

I didn’t do too much to the dining room -- we still have our old kitchen table in there so I put together a simple centerpiece: 

Simple Christmas centerpiece

Then I added some sprigs of greenery on half of the shelves:

DIY bookcases

And just a few touches of Christmas using ornaments:

DIY built in bookcases

And lights:

Christmas lights in jar

I had lights from IKEA (they’re years old, not sure if they still have them) that are teeny tiny and don’t burn hot, so I stuck them down in my vintage jar. It’s SO pretty, especially at night.

The kitchen got a few bits of Christmas:

Christmas in the kitchen

There’s my glittery reindeer, so pretty.

   fake snow

Dang it gets dark so early! I was running out of light. 

I got some simple white dot vinyl from my friend Shelley and went a little crazy with an idea she had:

Chalkboard with "snow"

It “snowed” on our chalk board and I LOVE it. How fun is that? I have one more thing to add to that wall that I will show you soon. :)

I shared our Christmas mantel hereChristmas mantel

And how I make my Christmas pillows on the cheap here:

placemat pillows

I went minimal with the rest of the family room:

DIY silhouette

wood box for decor

Dresser as entertainment center

I used my Ball jars (yeaaaah Ball State!) on the stairs and filled them with fake snow and a few small ornaments:

Christmas stairs

That fake snow is another staple this time of year!

Wood stairs, white risers

Of course my favorite time during the holidays is the night time. This is my view as I type:

tall chirstmas tree

This isn’t all of the decor and I still have a couple more projects I hope to accomplish, but this is most of it! As you can tell by the 200 pictures. :) I hope you enjoyed it and were inspired! NOW I can sit back and relax!

Next today head on over to Holly at Storywood Designs to see her beautiful home! Check out the others too -- I’ll update the rest of the tours as they go live:

Monday
Just a Girl
Nesting Place
Hi, Sugarplum
Tatertots and Jello

Tuesday
Life in Grace
A Thoughtful Place
Funky Junk Interiors

Wednesday
Thrifty Decor Chick
Storywood Designs
Decorchick
Southern Hospitality
Our Fifth House

Thursday
Sand and Sisal
A Place for Us
Songbird
Pretty Handy Girl 
Beneath My Heart
All Things Thrifty

Friday

I Heart Organizing
My Blessed Life
Emily A. Clark
Not Just a Housewife
Remodaholic

Curated sale at Joss & Main

Tuesday, December 10, 2013 0 comments

Hello there! I’m SO excited to tell you about a fun event I have going this evening. Well, not me personally – I mean, I’d love to have you all over but that would get a little crazy.

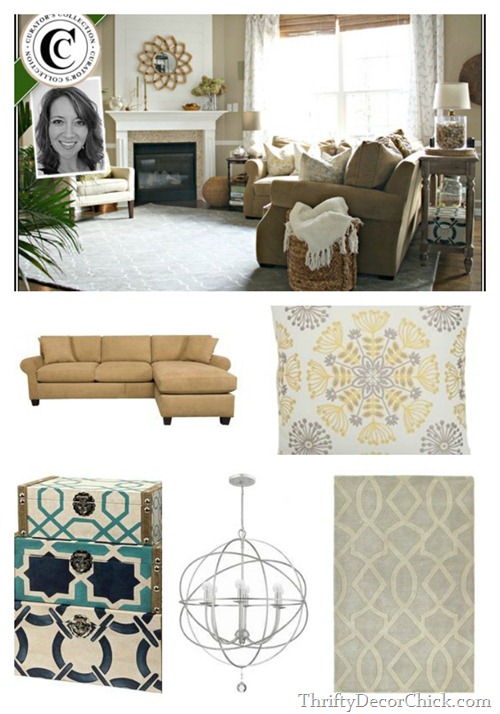
I was thrilled when Joss & Main asked me to curate a collection on their site:

Joss and Main Thrifty Decor Chick

Have you shopped Joss & Main? They are a members only online shop with AWESOME decor at great discounts. I just started shopping their site last year and it’s some serious eye candy.

I was able to pick out a bunch of fun products that I loved and felt like showcased my style for my collection. I’m not a fancy decorator – I always want our home to feel lived in, with a simple but timeless feel. I named my collection Classic Comfort because that really symbolizes what my style is all about.

Here’s a few of my favorites that will be offered in my sale:

Thrifty Decor Chick collection on Joss and Main

See those trunks above? Love those things! You can see how I used one in on the sofa table in my family room photo. You can get a better look at them on this post too. 

Here’s some more shots from the collection:

Joss and Main Thrifty Decor Chick Joss and Main Thrifty Decor Chick

How COOL! It was an honor to be asked to do this.

Joss & Main is an invite-only site, so if you aren’t signed up yet you can use my invite here. The sale is now LIVE and will be open for a week. Perfect excuse to shop for yourself family and friends!

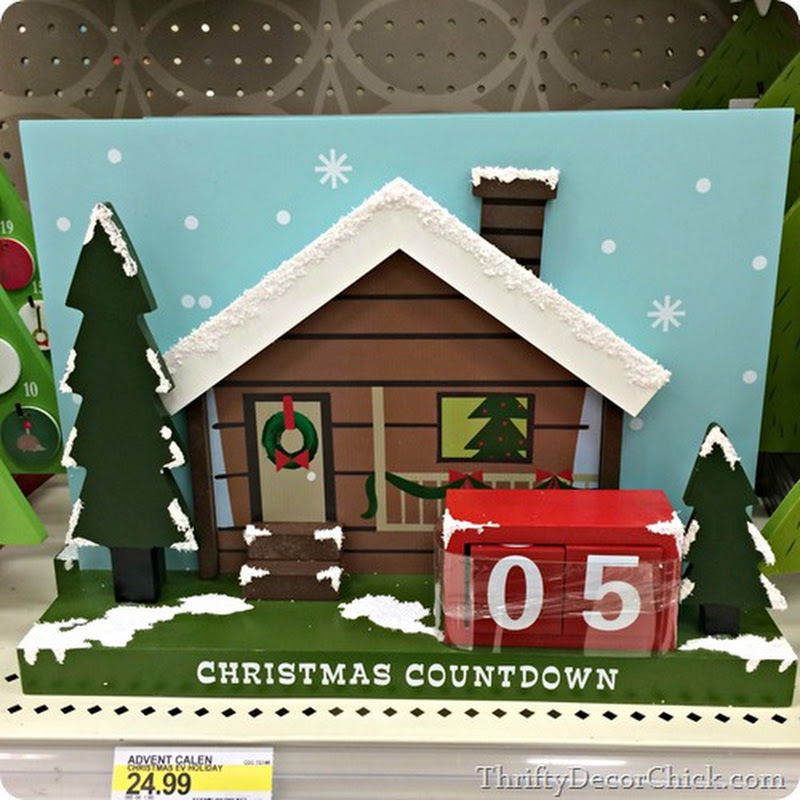
And I hope to see you back here tomorrow for my Christmas home tour! No, I’m still not done. I’m having fun with it though and I can’t wait to show you! My son reminded me this morning that there are only FIFTEEN more days till Christmas. I haven’t bought one gift…but this is normal for me. I like the thrill of the last minute I guess. :)

Again, the link to the sale is here and if you aren’t a member you can go here to sign up.

Have a great one!

Metallic (Goodwill!) mantel

Monday, December 9, 2013 0 comments

Hello everybody! How was your weekend? We celebrated my Bub’s 7th birthday yesterday – SEVEN! I still can hardly believe it, he was just my sweet baby the other day. (I guess he’ll always be, whether he likes that or not.)

Anyway, we have a big Christmas decor tour starting today – my friend Chris at Just a Girl is coordinating a Christmas tour of homes this week with nearly 25 talented bloggers showing off their holiday homes. I’m sharing mine on Wednesday and my house is far from done. Guess what I’m doing today? :)

So I did get the mantel done this weekend, and I absolutely LOVE IT. I started by placing my big fluffy garland up there, like always, and stood back…and it was just too much. I wanted something simpler this year.

So I thunk. And stood in front of my stuff in the storage room. And thunk some more. And stared, till it came to me. I grabbed the glass containers I decorated for Christmas a few years ago and started placing them on the mantel.

The candleholders (just glass from Goodwill over the years) were all silver so I needed to pull in some gold to work with our mirror. (I’m getting lazier smarter as I age and wanted to just leave that there – I don’t want to have to move everything out to decorate for the holidays!) I found a bunch more of the glass containers in my stash (apparently I’ve been hoarding them) but needed to cover them. I got an idea to look through my wrapping paper -- score! I found this gorgeous, PERFECT, faux bois paper I had picked up at HomeGoods months ago:

faux bois wrapping paper

Ugh. Perfect. It had the gold and touches of silver to tie in the other paper. I was never planning to use it as wrapping paper by the way – I always knew I’d find a use for it otherwise. I do this often.

I traced the shape of the glass on there, cut it out, then used double-sided tape to secure it:

wrapping glass containers

I had to run to the craft store to grab a couple more pieces of the silver scrapbook paper to finish off my collection, and then I filled in the empty spots with greenery and pinecones:

Elegant Christmas mantel

It is so simple, really. Wrapping the paper around will take you some time, but it’s SO easy and so dang cheap. The extra scrapbook paper I had to get was on sale, so I spent $2 to finish it up.

I really love how it turned out:

Christmas mantel with glass containers

It’s elegant and simple, and it lets the mirror shine. My fluffy garland made the mantel feel squatty and small. This opens it up quite a bit:

Christmas mantel

I used a combo of real tea lights and my fake candles/votives. I’ve had lit it all up every day and night since I finished.

The last few days have been cloudy and dreary and it looks so pretty, even during the day. But it truly shines at night:

Christmas mantel with Goodwill glass

I say this every year, but don’t be surprised if the mantel still looks like this in February. ;)

I love it that much: candles on mantel

Every one of those glass containers I've picked up at Goodwill. Well, actually I think I got a few from Hobby Lobby years ago for this table centerpiece. But most are from Goodwill over the years. I found the hobnail votives there a couple years ago too. (See how I used them for a fall tablescape here.) The few mercury votives are from Target and other stores over time.

The past couple of years I’ve used more and more real greenery to decorate for the holidays. You need to spray it every day or two (or not…sometimes I forget) to keep it from drying out but I love the way it looks and love that I don’t have to store it year to year. :)

Do you have a mantel or vignette you like to change up every year during the holidays? You can see my past mantels (and see how this space has changed over the years) here, here and here.

Christmases past and month in review

Friday, December 6, 2013 0 comments

Hello everybody! Sorry for the late post today – we had a two hour delay and things are…well, a couple hours behind. :) We’re supposed to get a ton more snow today and I’m ready – we are stocked up on good food and ready to cuddle in for the night.

Today I’m recapping the month of November and sharing a few of my favorite things (did you watch The Sound of Music last night? Thoughts?) from the past few Christmases. :)

First up, my DIY and decor projects from last month! I shared the hard project that should have been easy:

mirror on wall

I love the end result – but let this be your reminder to NEVER utter the words, “This will be easy.” Gets me every time.

I picked a fun color for the mud room door and got all the new door trim up here:

blue mudroom doorI’m narrowing down the color for the beadboard and hope to do that this weekend. The floors are done too, can’t wait to show you!

Next up I shared the new rug I found for the family room

graphic rug family room

I still can’t believe the difference it made! LOVE IT.

I showed you how to make my super easy, buttery biscuits on a rare food post:

easy cheddar biscuits

I decrapified our entire house over the course of a few months and then finished up the garage last month. It took FOREVER, but I’m so happy with it now:

garage organization

It functions SO much better for us now. You can also see the easy DIY work bench I made last month here.

I shared a simple update I make around our house (a lot) in this post:

craft caddy

Put a wheel on it! :)

I worked on my first Christmas project of the year and what started out as a project-gone-wrong ended up quite pretty:

glitter craft And finally, I reattempted my attempt at chevron, this time with a twist:

chevron painters tape SO much better know, yes? I think so. :)

I’m still working on our Christmas decor around the house and will share much of it next week for a big Christmas home tour! For now I figured I’d share a few of my favorites from Christmases past.

I finished putting my DIY card holder back up last night (it has one lonely card on it so far) and shared it on my Facebook page. It’s one of my faves because it’s so easy and cheap and holds a bunch of cards!:

Christmas card display

Last year I made a couple knock offs, including these cute nutcrackers:

nutcracker craft

And these knock off ornaments filled with “snow”:

christmas ornament crafts You can find both in this post.

And two of my favorite Christmas projects ever – the first one is the paper-wrapped candle holders:

paper wrapped candles

I think they are just so dang pretty. :)

And my cutie Santa hat craft – I think these are still my absolute faves of all the time I’ve been blogging:

Santa hat craft Have you done any fun holiday-themed projects yet? Any you are planning any? I’d love to hear about them!

Are you getting all this snow today? I hear it’s even heading down to Texas. Hope you all stay safe and have a great weekend!

Decorating the mantel

Wednesday, December 4, 2013 0 comments

Hello everyone! How your week going? We’re supposed to get some nasty weather this weekend – ice and snow I think? And of course today it’s supposed to get up to 60. Such is the life of a Hoosier.

I haven’t started decorating our fireplace mantel just yet for the holiday, but I’m planning on keeping it fairly simple this year. Simple for me still means LOTS of poufy greenery, but whatever. Simpler. ;)

I still say the mantel is one of the most difficult spaces to decorate – don’t you think? I think surfaces in general are hard – bookcases, sofa tables – those kinds of spots. That’s why when I figure out something I like on one of those areas I tend to leave it like that for eons.

Over the years I’ve a method that works for me when it comes to decorating over the fireplace:

how to decorate a mantel

I’m sharing a few of my tips today over at True Value’s blog, Start Right Start Here. (Unfortunately the link may not work for mobile users, they are addressing that now. Until then those of you using tablet or phone can see some of my tips on this post as well.) They may help as you tackle that space for the holidays and beyond. Hope you find them useful!

I’m off to tackle more Christmas decor – now I’m inspired to work on the mantel! :) Have a great one!


I was one of the bloggers selected by True Value to work on the DIY Squad. I have been compensated for my time commitment to the program as well as writing about my experience. I have also been compensated for the materials needed for my DIY project. However, my opinions are entirely my own and I have not been paid to publish positive comments.

A quick and easy holiday project!

Tuesday, December 3, 2013 0 comments

OK, I feel SO behind this year with the Christmas decor! I mean we lose a week anyway, right? (Between Thanksgiving and Christmas?) And I usually have a decent start going before Thanksgiving. We got a couple trees up before our trip last week but not much else.

I’m determined to get it done this week – I’m just going to enjoy it and take my time. Have you started? Finished?

This is a fun little decor idea that I’ve shared before, but it has a Christmas twist and it’s SO easy I wanted to share it again.

In the past couple of years I’ve fallen in love with holiday-themed pillows this time of year. I just think they’re a festive addition, and all you do is toss. Toss, toss! (Name that musical.) Throw one or two on a sofa or chair and the room instantly feels Christmasy. Try it. It works.

Well the past couple of after Christmas sales I’ve picked up a few more placemats to make my favorite pillows EVER. Yes, placemats:

Placemats turned pillows

If you’ve been around for awhile, yes – I’m making more of these. Yes, I’m obsessed. It’s SO stinkin easy people. Even if you don’t sew I promise you can do it.

You need a placemat that’s double sided, so two pieces of fabric sewed together. A seam ripper makes easy work of making a hole in one side:

Placemat pillows

I usually open up about five or six inches, enough for me to comfortably get my hand inside to stuff it.

I use this poly-fil stuff:

DIY pillows

You just pull clumps out and stuff it in the placemat. I used to kind of fluff up the filler before I stuffed but I don’t anymore. It take less than five minutes to get it stuffed – just make sure you get some into the corners.

I like them pretty fluffy so I use about 3/4 of that poly-fil on one. Then just sew up your hole:

placemat pillow

Yes, I know – this involves a needle and thread. But I believe you can do this. :) It took me two minutes to whip that back together. It’s not perfect but I promise you no one will notice.

When you’re done you have a super cute, super cheap accent pillow for the holidays:

placemat turned pillow

I have this whole process down to ten minutes now. :)

My pillow form (aka placemat) was $2 on clearance after the holidays and my filler was $2 and some change (with a coupon). Less than $5 for a fun little splash of Christmas!:

Christmas pillow from placemat

I think the selection of placemats and napkins is way cuter than most pillows I’ve seen. You can see here how I’ve done this with Pottery Barn linens to make much cheaper versions of their pillows.

And last year I used one of their placemats to knock off one of my favorite holiday pillows from Pottery Barn too:

pottery barn pillow knock off

SO much cheaper!

There you go – I may have a bit of a problem (I shop the linens section more than the pillow section), but it’s so much cheaper! Whoot! Have you tried this little trick?

P.S. My friend Kari at Ucreate had me over at her place to share a Christmas ornament craft. See what I came up with here!

December before and after!

Monday, December 2, 2013 0 comments

Hi there! Welcome back! :)

I hope you had a wonderful Thanksgiving holiday week! We had a blast – we took off for a quick trip to Disney early last week. I fell in love with it hard earlier this year and wanted to go back to see it decked out for the holidays. It was incredible! The only bad part was getting food poisoning from a waffle on Monday and the Bub and I being out of commission all day Tuesday. Being sick at Disney pretty much sucks.

The kiddo didn’t eat nearly as much of it as I did so he was over it pretty fast. It took me till Saturday to feel 100 percent again. Even so, we had a GREAT week and I am so thankful.

OK, it’s the start of the month and that means another before and after party – are you ready? I picked out just a few of the incredible projects you all linked up last month to share today.

I adore Jennifer’s pick of wallpaper for her basement bathroom:

black and white star wallpaper

Heck, I love all of it! But I love that she was daring with the wallpaper – it paid off.

Anita is a brave soul -- she spray painted her countertops:

painting countertops

They turned out SO good! They look like a solid surface material now, so crazy.

There were so many great kitchen posts! I couldn’t believe the difference taking down some cabinets made in Rachel’s kitchen:

taking down cabinets in kitchen

It was pretty before anyway, but this change made it so open and airy.

Liz’s before and after is so dramatic, you have to go see how it looked to fully grasp the change:

white kitchen blue island

Paint my peeps – it will rock your world. :)

This beautiful space at Domestic Charm was transformed with paint too:

painting built ins

I especially love how you don’t even notice the TV – she painted the backs of the built ins a dark color and now it disappears! Brilliant.

Kristen is renting and did a lovely job decorating her daughter's room without doing anything permanent: 

decorating rental

I love how that wood wall looks behind the bed!

And finally Amy painted some stripes in her entryway and I love the contrast:

how to paint stripes

Stripes are a classic and these are so well done!

Well you wowed me again everybody! I wish I could share them all. If you missed any of the projects you can check them out here.

It’s time to link up your latest before and afters! I can’t wait to see what Christmas decor you’ve been up to! (Hint hint.) ;) If you’d like to be considered for the recap next month I would love a link back or you can use my button in your post:

<div align="center"><a href="http://www.thriftydecorchick.blogspot.com/" title="TDC Before and After" target="_blank"><img src="http://www.homestoriesatoz.com/wp-content/uploads/2012/03/beforeAndAfterButton_thumb1.gif" alt="TDC Before and After" style="border:none;" /></a></div>


Now link it up!: