Island dreaming

Tuesday, August 19, 2014 0 comments

Hello all! I’m excited about our family room renovation for many reasons, but one of the biggies is that I feel like I can finally move ahead with the kitchen as well. I’ve been planning it for literally YEARS but wasn’t sure about a few things until we were able to move things around. It’s still a long way off – I won’t start till next year. But I am wanting to move ahead with the island expansion sooner than later.

Could be because it now looks like this:

Instead of this: wood counter on island

It was torn up to put the hardwoods underneath and I can live with it like that for awhile, but soon it will drive me crazy. Not there yet. Soon.

So like all big projects, I have to sit on it for awhile and daydream about what I want. I find when I do that I end up with something that functions and looks good – both are important to me when I DIY.

My plan is to expand the island two directions – length-wise and width-wise. When I say width I mainly mean extending the sides out to kind of “frame” the stools, like this:

kitchen island with sides built out

(source)

So it won’t be much wider – maybe a few inches. But I love this added detail on islands.

I loved this idea too:

extra storage kitchen island

(source)

The added storage is never a bad thing, am I right? I think that is brilliant. It’s easy to access the cabinets too, which is important.

I’ve always planned on a small bookshelf at the end of the island for cook books and other things we grab often (stop laughing…I cook sometimes):

bookcase in island

But I may not have room for those cookbooks because now I’m dreaming of having a food station for the animals in the island, like this:

dog food station

I shared a bunch of food storage ideas here and I could totally DIY this one.

But the BIG thing I want to do in the kitchen island is take the microwave off the wall and put it in there somewhere:

black island marble counter

(source)

I know this isn’t for everyone but I think it’s BRILLIANT. Of course we would need a smaller microwave that vents differently, but I love the idea. I could put a vent hood over the oven where the microwave is now.

Some are built in seamlessly:

built in microwave kitchen island

(source)

microwave storage in island

(source)

But I think I could create something that would work just as well – I don’t need it to be completely built in. Sitting there is just fine. :)

I loved this whole kitchen but this one is a good example:

microwave built in island

(source)

And this is a similar island set up:

microwave in kitchen island

(source)

Love the pretty detail on that one!

So that’s my plan – add storage, shelving, a food station and a microwave. It will be ten feet long by the time I’m done with it. ;) We were able to move the island out a bit so after it’s extended there will be plenty of room between the stove and the island. We’ll still be able to walk around it when the door is open so it won’t feel cramped.

I’m excited about this project – just not sure when I’ll tackle it since I have so much to do in the family room. But I have a plan in mind and that’s half my battle!

Do you have a big kitchen island with a ton of storage? Is your microwave down low? I’d love to hear your experience with it!

Late summer backyard tour

Monday, August 18, 2014 0 comments

Hello!! How was your weekend? Wonderful I hope! Sorry for the absence last Friday – I was traveling home from an amazing trip to Des Moines Iowa. I got to visit the Better Homes and Gardens headquarters and was pinching myself the whole time.

I’ll tell you more about that trip soon, but for now I’m enjoying no more travel for quite some time. I LOVE to travel am such a homebody as I get older. Now that I’m home for a while I feel like I can really tackle some projects I’ve been putting off.

One of those was cleaning up the outside this past weekend – we tend to let things go during the summer. Although I have no excuse for it this year since it’s been so lovely. Usually I can blame the heat and humidity for my laziness but not so much this year. Just lazy. :)

I cleaned up the patio and deck and did some fall planting in the containers and figured it was a good time to share the backyard. I shared it early summer last year and we’ve added quite a few plants since.

Our backyard isn’t tiny but it isn’t large by any stretch. And it has a big slope that made it hard to use. We had a deck installed soon after moving in and then our patio was added a few years ago as our yay-we-are-finally-out-of-debt present to ourselves. ;)

I took a lot of pictures, bear with me! I just love it! Here’s the view on the side of the house as we walk to the backyard:

black mulch gardening beds

Those tall maples to the left used to be in our front yard and we replaced them about eight years ago because they would NOT grow. They grew all skinny and weird and looked horrible. We had the landscapers put them in the side yard, not thinking they would do any better. But now they are HUGE. I mean, almost taller than the house. And the newer ones up front still won’t grow. Don’t get it. :)

My limelight hydrangea to the right is doing AMAZING this year. Gah. It’s so beautiful and still growing!:

limelight hydrangea

The burning bushes lined up on the left are doing OK considering the trauma from this winter. After one of the many heavy snowfalls we walked out to find every single one of them gnawed down to half their size:

burning bushes

They were SO big and beautiful – turns out some hungry bunnies sat on the snow (that was half way up the bushes), ate the buds, and in the process gnawed off every. single. branch. I’m surprised the plants came back, but they did. It will take a few years for them to get back to the size they were last year.

To the right are some of my (many, MANY) hydrangeas:
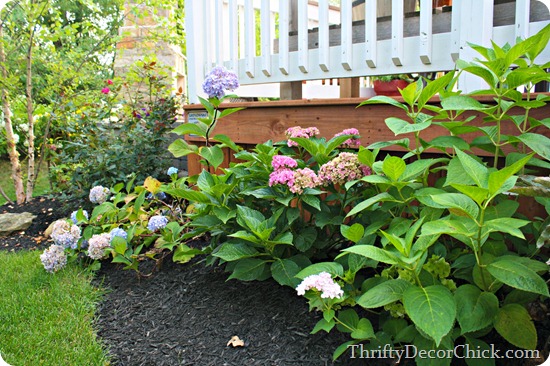
growing hydrangeas

These aren’t getting as much light with those trees blocking most of the morning sun so I may have to move them. One is only blooming underneath, which is totally weird. The other is doing well:

pink hydrangeas

Love those pink blooms!

Last year we added a few trees to the backyard around the patio. We get full sun back there all day so we’re always trying to figure out ways to add some shade. The river birch are SO beautiful!:  river birch trees

I’ve always dreamed of having them in my landscaping. I’m obsessed with their peeling bark. They are a lovely “light” tree but do shade well.

Remember, here in about a month to six weeks plants will go on sale and it’s a perfect time to purchase and plant! I got my PeeGee trees years ago on clearance --they are probably my favorites in the backyard:

PeeGee hydrangea

The one on the left has fully bloomed, the one on the right is still finishing up. See how heavy they get when they bloom? The branches bend almost to the ground and the trunk bends as well. It’s because the blooms can get as big as my head. :)

It scares me though – I feel like they might just snap, so I may stake them to take some of that pressure off:

PeeGee hydrangea

In the fall those white blooms turn the most gorgeous pinkish green color I’ve ever seen. I adore them.

Around the corner to the back I have more hydrangea and another river birch:

river birch tree

There are four hydrangeas just right there. I’m unabashedly obsessed. :)

Most of those rocks were put in when we did the patio and goodness…who knew how expensive rocks would be?? I added a few more a couple summers ago when a friend was redoing her landscaping and getting rid of a bunch. I was happy to take them.

I have a favorite rock. Is that weird?:

growing moss on rocks

This is the only rock that grows moss every year. The moss grows between the pavers on the patio too and I’m in love.

Here’s a view to the patio from the back of the yard:

stone patio off deck

See those big fat hydrangea blooms on the right? That’s happiness right there. :)

This is one of my favorite views as you come through the other side:
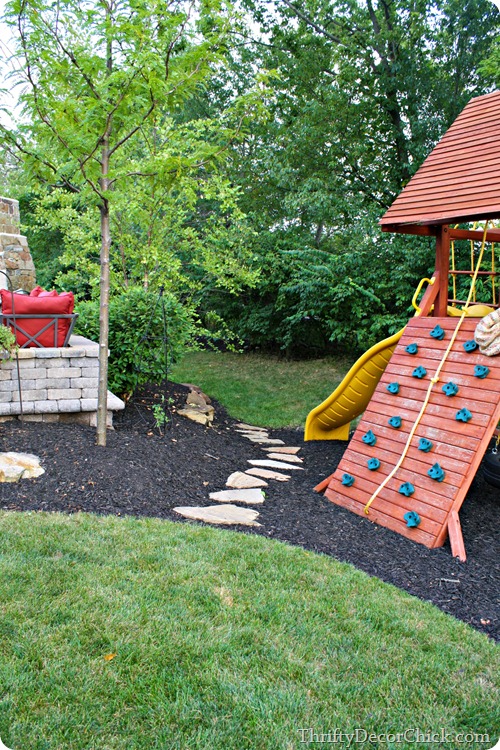
flagstones in landscaping

And as you come around the corner – two of my peonies are here and a start to a butterfly garden:

white railings red deck

We have very little grass in the backyard – it’s mostly mulch. Mulch is awesome because it’s low maintenance but the mulch bill makes me sob a little bit every year:

white railings on deck

On this side of the yard I have knockouts, some evergreen bushes and another favorite, the lamb’s ear:

knockout rose bushes

The knockouts had a rough year because of the harsh winter. They did OK, but not nearly as well as most summers.

Here’s the view from the other side of the house, looking back:

I have big plans for this side – hoping next year I can make that happen. :)

Our favorite place to be in the fall is on our patio – this past spring I found a little pergola on clearance that I placed at the entrance:
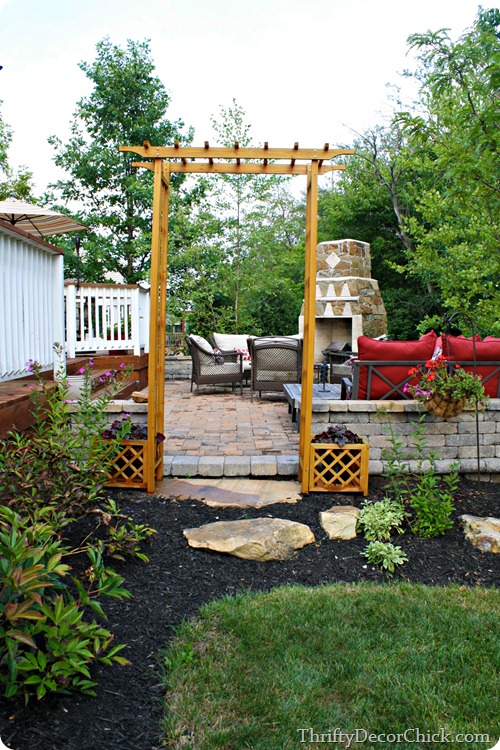
stone patio

Earlier this summer I moved some furniture around on the patio and deck and I like it SO much more this way. Now the sectional (craigslist find years ago) is down here:
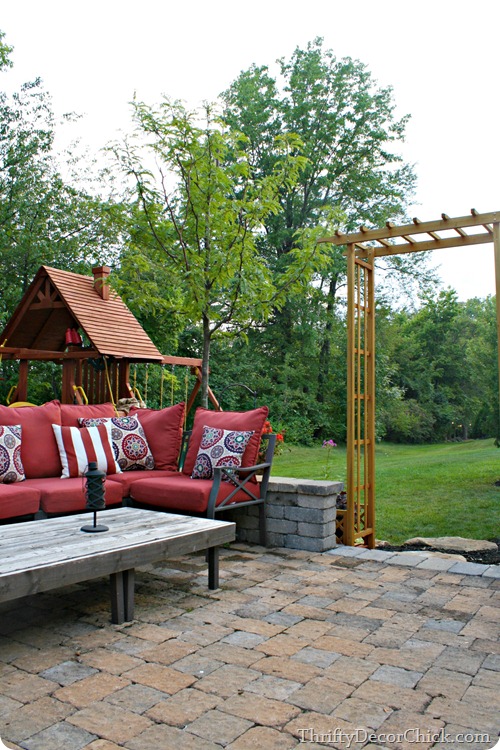
outdoor sectional

I reworked the small tables that went with it years back and now they are the coffee table in front of it – you can see how I did that here.

This weekend I moved the chairs by the fireplace around just a bit and that little change made such a big difference!:

outdoor fireplace

We used to have the chairs on the sides with the table down the middle but this is SO much more comfy. Now everyone is near the fire – love it:

outdoor fireplace seating

Sitting out here with the fire going and a glass of wine…it doesn’t get much better my friends:

outdoor fireplace on patio

You can see more of the deck in this post. I love the furniture moved around – we finally moved the potting bench up near the table so I can use it as a buffet when we entertain:
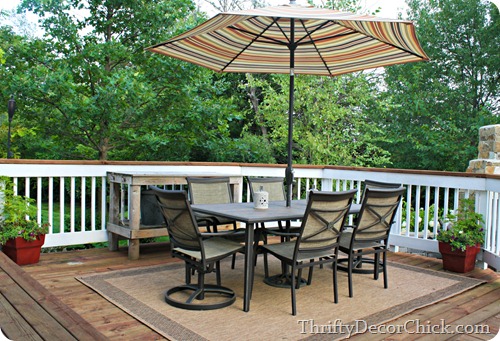
deck design

And here’s a view from the back door:

deck design

Gardening has become a passion of mine since we added the patio – I find it incredibly satisfying. The upkeep takes some time and can be hard work, but it’s worth it to me. Over the next few years I want to learn more so I can “layer” some more plants into what we already have. I love the full look of an English garden and want to try to incorporate that feel.

It’s a space I’m really proud of – the backyard is our little oasis and we absolutely LOVE our it. Can you believe fall is almost here? Even though we’ve had a pretty mild summer I’m so excited. Do you have an outdoor space you love?

A new wall color! (Kind of)

Wednesday, August 13, 2014 0 comments

OK! I left you last week with some tips on picking out paint, specifically paint at my favorite place, Sherwin-Williams. Now it’s time to get into the nitty gritty of how I picked out the colors for our family room and ceiling.

The ceiling needed to be addressed first because of all the patching that needed to be done from taking down the wall. My old office had that pretty blue ceiling that I loved:

blue ceiling

I loved that color but didn’t want to go quite so blue for such a huge room. So I decided to go a little bit lighter, and I got my inspiration from one of the paint chip booklets they had in the store:

This one is perfect when you’re looking for a white or a light neutral. It really shows the difference between all the “whites” right?:

picking out a white paint color

I wanted something with a very slight blue to it so I went with Rhinestone off that sheet, but at half – so 50 percent lighter than what the chip showed.

I’m glad I went lighter because I think the full color would have been too dark for the ceiling. This is a very light blue gray color:

Rhinestone Sherwin Williams

I think a blue tone on your ceiling will makes a room feel more airy – almost like the ceiling isn’t as noticeable because it kind of goes away.  

I think other than the color the hardest and biggest decision to make is what type of paint to use. There are a ton of options at Sherwin-Williams so it can be overwhelming if you don’t know what they all mean. Thankfully they spell it out quite well:

Sherwin-Williams paints

I talked to the manager at the store to find out more before picking out the ceiling and wall paints. Since the color we were using on the ceiling was similar to what was there before and we needed so much of it, we went the basic HGTV HOME by Sherwin-Williams paint in a flat sheen.

The sheen is SO important when picking out paints, especially on a ceiling. The only time you’ll want a shiny ceiling is if you have flat (non-textured) ceilings and you’re going for a more modern look. I don’t care for a shine on my ceiling at all, so it’s always flat for me. Even the slightest reflection drives me crazy. :)

The walls are a different story:

what paint sheen to use

I always go with a satin or eggshell for my walls. Long ago I used to use semi gloss for bathrooms because I heard that’s what you’re supposed to do for cleaning reasons. No more. I don’t like that much reflection on all the walls so the low-shine of the eggshell is perfect for me. There is one area that I use semi gloss on though -- my trim projects like board and batten. I just like the look of it and it gives a nice contrast against the walls.

Here’s the thing -- glossy paints will show a lot of imperfections in the walls – so if you have wavy walls or lots of holes that have been filled, it’s not for you. Flat hides those imperfections well but is not easy to clean. It’s also sometimes too flat with no dimension at all, so be aware of that. My go-to is eggshell (or satin, very similar) and is still scrubbable with just enough shine that it gives it some life.

I liked the other chip sheet so well I went to another one to look for the perfect wall color. I’ve had the same color on the wall for ten years! It’s time for a change. This book is called Essentials and includes a ton of their most popular neutrals:

tips for picking paint colors

It was there that I fell in love with the Anew Gray color. I got a sample from the store (see my previous post on picking out paint colors!) and tried it out on a wall. At first I wasn’t sure it would be a big difference from the previous color, but after seeing it on the wall the difference was huge:

how to pick out paint colors

It’s a lovely stone gray color…but it was a little too stone for me. Too gray and not enough warm, you know? So I kept at it with some more samples and some colors I’ve used in other parts of the house.

First I tried Amazing Gray and Useful Gray (left to right) after the Anew Gray:

picking out paint colorsThe Amazing Gray looked very similar to the Anew, so that was out. They both started to get a very slight purple tone as I compared them to the others too. The Useful was way too light. One thing I realized during this process was that I wanted to go darker than I originally thought. At first I planned on something lighter but I was drawn to the tones with more depth to them.

THEN I tried the colors I’ve already used in our home to see how I liked them. The fourth color from the left is my beloved Analytical Gray that I used on the rest of the main floor and some upstairs. The one on the end was the Agreeable Gray color that I used in the powder room.

Look how different it looks in natural light compared to that room!: Agreeable Gray Sherwin Williams

I think that’s crazy. Just goes to show you need to try your colors out – even when you’ve used them before!

I knew the second that Analytical Gray went up that it was the one. It has a bit of the gray tone but is still a warm color. And it looked great with all the light in this room! I really wanted to change things up from the rest of the main floor but when you love a color you love a color. :) 

With that decision finally made I went for it! The manager at Sherwin-Williams recommended the Harmony paint line since it has zero VOCs. I didn’t smell a thing as I was painting or after:

"greige" paint color

I used this Harmony paint in the basement as well and LOVE how well it covers.

I’m SO HAPPY to have this decision made! I love this color so much. Here’s how the corner I showed you earlier this week looks with the new wall and ceiling color:

Analytical Gray paint colorI’m most excited about that little wall with the speaker. Last week it looked like this:

Slowly but surely I’m patching the board and batten, replacing molding and getting things touched up. Still have to paint the crown but it’s almost there!:

Analytical Gray Sherwin Williams

Painting the built ins and fireplace needs to happen too. My list is long. :)

So there you have it – the process I went through to pick out the family room paint colors. NOW to get all that board and batten trim up and caulked and painted and the rest of the walls painted…I’m getting there slow but sure!

How many samples have you put on the wall before deciding on the ONE? I’m pretty sure I read that one of you has 18 on the wall right now? You’ve got me beat. ;)

*The $200 Sherwin-Williams paint giveaway is now closed.

*I partnered with Sherwin-Williams for this project but all thoughts are my own.

My new “office”

Monday, August 11, 2014 0 comments

Hey hey! Hope you had a great weekend! Ours was fun – we had drum corps finals for my husband and (because drum corps is done and we have him “back”) a family day at the Indiana state fair. We had a blast!

Slowly but surely things are coming around in the family room. If you’re just joining me on this project we recently took down a wall between my office and our family room. The end result is AWESOME. Seriously the best thing we’ve ever done in this house, hands down, no question.

My office was the brightest room in our house so not only did we get more space, we get a TON more natural light as well. It’s my favorite part. :)

But the question for me has been where to put a new desk. This was my set up in the office before:  

farmhouse table desk

The old farmhouse table was huge! I absolutely loved it as a desk although recently it was feeling a bit too big to me. I was looking into something smaller and smaller is definitely what I ended up with. ;)

Originally I planned on keeping an actual desk in that area. I even considered building out window seats in the corner for me to sit on. But when all the floors were done and I started moving furniture around I realized it was a perfectly lovely corner just as it is.

I came up with a plan for a desk space that has worked really great for me so far. It’s not going to be for everyone but I love it. Even though we have more space I still want to use it wisely and this has worked well!

The corner where my desk was now holds a comfy chair and an ottoman:

chair in corner with windows

Both of which we already had. I’ve actually bought very little for the “new” family room – the only two things are in this corner! That brass banker’s lamp is from Target and is perfect in that spot. I really wanted some soft light back there in the evenings.

By the way -- the subwoofer is a part of life that I’ve come to embrace. I may cover it someday, I may leave it as is – it doesn’t bother me like it used to. You pick your battles. ;)

Now my “desk” is a simple laptop table from World Market:

desk alternatives

Most of the time it’s used as an end table next to the sectional. When it’s time for me to work in the morning I pull it over (I have pads on the bottom so it doesn’t scratch the floors) and then sit down to work (with my feet up on that ottoman!).

I got their oversized version so there’s plenty of room for my laptop, camera, notebook, whatever:

world market laptop desk

It’s nice for when I’m sorting mail or writing checks or whatever too, although I do have to write on a paper or notepad because the top is textured. Not a big deal to me – they have smoother versions but I loved this look. 

I’m still working out the other storage in this part of the room so it’s functional for me. The dresser that was in my office is now in the living room and still has the office stuff in it. I need to switch out some of the contents to the dresser that’s in this little nook now.

The built ins next to the fireplace give us tons of new storage too so I’m considering those for my supplies as well. I have an outlet next to the built ins that I plug my computer into and just leave there so it’s always ready.

So far I’m quite loving it! It’s no big deal at all to pull the table over in the morning. And when I’m done working I put it back next to the sofa – it’s kind of nice to be able to put it all away, you know? I considered moving my desk upstairs to the loft and working up there every day, but especially in the summer when the kiddo is home I need to be downstairs where all the action is.

And I still get to work in what I think is the prettiest corner in our house: 

laptop desk as workspace

There are a few minor things that will be changed here over the next few weeks – I’m redoing all the window trim like I did in the living room. The walls will all be painted a new color (more on that this week) and I still need to do little things like touch up the crown molding and baseboards.

But for now this spot is the most completed area in the family room and I’m enjoying it! The view doesn’t hurt either:

limelight hydrangea SO many hydrangeas this year! Love!!

Oh, and a few of you have asked but we did contact two realtor friends before moving ahead with this reno project. I was concerned that getting rid of the office would hurt the value of our home but both said the bigger family room far outweighed that. (It would be different if it was a bedroom though.)

Do you have a dedicated office space? Do you need to be able to shut the door or could you handle having it out in the open? Any creative solutions you’ve used to make your own work space?