Decor steals!

Friday, November 29, 2013 0 comments

Hello friends and happy Thanksgiving/Black Friday! I hope your holiday was wonderful! Mine was just lovely, I have much to be thankful for. Today I’m thankful I’m not going out in the crowds and shopping and instead staying home and decorating and maybe doing some shopping from the comfort of my couch. :)

Are you with me? :) If so my friends at Decor Steals are back and I just realized today is their four year anniversary and we’ve been working together for all of those four years! Sniff. I remember them when they were just a babe…

decor-steals-LOGO.jpg[7]

If you aren’t familiar with them, Decor Steals is a deal a day site – you can find unique decor items you won’t find anywhere else…and you’ll find them for a great price. Let’s jump in to see a few of their latest/upcoming goodies, shall we?

This cute bunting would be pretty as is but wow, think of all the possibilities:

feedsack bunting

It would be lovely with some glittery letters on it, draped across your Christmas mantel!

I don’t think the mason jar trend is going anywhere soon, and I love these lights:

mason jar pendant lights

They’d be especially cute in a kitchen or a bathroom. They are a great mix of vintage and industrial!

And these are actually solar lights, how cool is that?:

solar mason jar lights

I love the Decor Steals boxwood wreaths – you can see how I use mine year-round here:

preserved boxwood wreaths

I would fill my house with them this time of year if I could! They are so classic and pretty!

These ladders are so functional – I love to see them used in a bedroom for extra blankets:

 vintage wooden ladder

But how about in a bathroom for towels, or for Christmas – hang ornaments from them, or Christmas cards?

Today’s deal is another versatile one – their reproduction feedsack fabric is always a hot seller and I’m sure today will be no different!:

Feedsack sewing fabric It comes in five different colors and I think it would be SO lovely as a Christmas skirt!

The best news today is that Decor Steals is giving away a $50 credit to two lucky readers. They are also throwing in a surprise box to a reader as well!

Here’s how to enter to win one of two $50 credits and the free goodies to Decor Steals:

1. Leave a comment here. What did you eat yesterday? We made prime rib instead of turkey – it’s become a tradition for us. :) SO good. 

2. Visit Decor Steals here and check out their pick steals page. Which item do you want to see offered in the future? Come back here to let us know in a comment.

3. Visit their Facebook page and “like” it here. Let us know you did in another comment. (Or let us know if you already do!)

4. Subscribe to their email list here (you’ll get email notices about the new deals) and if you do (or are already on the list), leave one more comment here.

* You can enter one, two, three or four times – it’s up to you! All options are not mandatory to win.

* Remember if you comment anonymously or you have a private blog, please include your email address in each entry, and spell it out with “at” and “dot” to avoid any spammy emails coming your way.

This giveaway is open to the contiguous US only. It will close this Monday, December 2 at 9 a.m. EST.

Have a wonderful weekend!

DIY work bench, YES!

Wednesday, November 27, 2013 0 comments

Hey there everyone! Are you ready for Thanksgiving? I’m excited to sleep in, stay in my pajama pants all day and eat with family. :) I hope yours is wonderful!

So remember last week when I showed you the massive clean out in the garage? I’m SO happy with it. There was one last project I wanted to complete in there and it was actually fairly quick and easy AND inexpensive. The trifecta!

This is the area I was planning on addressing:

I’ve had my saw on that storage cabinet for years now and it worked OK but not great. I wanted to have a lot more room to spread out. My dream has always been to have a work bench in the garage and that dream was much easier to realize than I thought. :)

I put a plan together (in my head) and gathered my supplies at True Value. Originally I thought it would be a lot more elaborate than it ended up being. I am quite sure you could do this, even if you’ve never built anything! And if you’ve never built anything I don’t know if you need a work bench, but whatever. Let’s pretend.

I got two 1 by 4’s and one 4 by 4 – all eight feet long. (I already had most of another 4 by 4 leftover from another project too.) I measured out how long I wanted the bench to be and it turned out to be right at eight feet, which was a bonus because I didn’t have to have to make nearly as many cuts.

The first step was to figure out how high I wanted the table to be – I knew I wanted it taller than the storage containers because I wanted to keep them underneath. Then I attached the board (making sure it was level) to the studs along the wall with three inch screws:

building a work bench

Next I held the 4 by 4 post up to that to see how tall I wanted them to be. I marked it at the top of the 1 by 4 on the wall, because I wanted it the same height, since my plywood would sit on both the board along the wall and the 4 by 4’s in front. Does that make sense? It will in a minute. ;)

I cut three posts down to use as supports along the front, then placed the plywood (I used a 4 by 8 piece cut right down the middle, so two feet wide) on them and started screwing them together:

I did make sure the posts were level before securing them to the top. I put four screws in through the top of the plywood into each of the posts. I used drywall screws for this part – I use those for a lot of woodworking projects since they are so easy to get into the wood.

I secured all three posts and then did the same at the back of the plywood, up against the wall:

You could easily do that part first and then the posts, it doesn't matter what order you do it in.

Here’s where I opened my mouth, stuck in my foot and said, “Wow, this is going so well!”

WHY? Do I EVER learn?

Cause then I messed up.

I used the second 1 by 4 as an “apron” across the front – I just thought it finished it off nicely and looked a little better. Then we (my sis actually) realized the storage containers wouldn’t fit underneath with it on there. So we took that off, put them under there, then started putting it back on, but realized the container doors to the right wouldn’t open with the wood along the front:

work bench in garage

So instead I used a scrap 1 by 2 I had – losing those two inches made it so I could open everything just fine. (As you can see above.)

I secured that to the posts with drywall screws too:

building a work bench

You can see in that photo how simple this whole thing was – it’s just a brace along the back wall with plywood on top and 4 by 4’s as supports in the front.

Super simple design:

DIY workbench garage

I didn’t secure the posts into the cement floor – there’s no need to. The weight of the wood keeps them where they are.

Since the table is so close to the door I knocked down the edges and corners just a bit for safety:

DIY workbench

Can I just say how much I love this?? I LOVE IT!! Why did it take me so long to do this?

I finally have space to spread out – there’s plenty of room for me to work and in my old workshop area it was impossible:

Easy DIY workbench

Plenty of room for a table saw too. ;) I got one a few weeks ago but it was messed up so I took it back. I’m going to try again soon.

Even with our slight mess up this project was much easier and quicker than I thought it would be. And that NEVER happens. The total cost was less than $50 – the main expense was the piece of plywood that was $25. (The thickness is more than half an inch for extra strength.)

It’s silly but it makes me feel like a real DIYer:

easy DIY workbench

And it looks so much cleaner and nice compared to how this spot used to look! Love.

The garage is like night and day from before – I can’t believe how much better it looks and functions now. It’s stayed clean for three weeks now – that’s how I know it finally works for us! Isn’t that a great feeling?


I was one of the bloggers selected by True Value to work on the DIY Squad. I have been compensated for my time commitment to the program as well as writing about my experience. I have also been compensated for the materials needed for my DIY project. However, my opinions are entirely my own I would have done this project anyway and I have not been paid to publish positive comments.

For more project ideas visit True Value here or their Facebook page here.

Chevron, take two

Monday, November 25, 2013 0 comments

Hey everybody! Happy Thanksgiving week! I won’t be posting much this week, and today’s post is short and sweet. I’m taking most of the week off and hope you’ll get plenty of family and rest time in too!

So here it is – my second attempt at chevron. If you remember I tried it a few months ago with my chevron Frogtape:

WELL. Funny story. When I was cleaning out the garage a couple weeks ago I realized I used the WRONG chevron tape. I work with Frogtape and they sent me their new shape tape before it even came out in the stores. This one must have been an early prototype that they didn’t use.

I grabbed this one off the shelf and didn’t even realize it was different from the others. The actual chevron Frogtape is actually much more chevron-y and less Charlie Brown-y.

I laughed out loud when I realized what I had done. Leave it to me. So last week I decided to do another little redo to that trash can.

I spray primed it and then spray painted it white…again. :) Then I played around with the tape to figure out the design I wanted. I was originally planning a thin line of chevron around the top and bottom but decided on a slightly different design instead:

chevron shape tape

I just offset the second line a bit to make it not exactly chevron.

I rubbed some gold rub n buff in between the tape and that was it!:

chevron painters tape

I decided simpler was better. :) Much better. This I love!

Their shape tape comes in three different designs – chevron, scallop and wave. (I showed you how I used the scallop design here.) As you can see you don’t have to use them as they come -- play around with them a bit to make your own look!

Want to try them out yourself? (You can see the designs here.) Leave a comment here this week and let me know which one you’d like to try! We’ll give away three of each design. I’ll announce the winner next week!

P.S. My friend Marty at A Stroll Thru Life has a lovely blog and highlighted me last week – go here to check it out!

Reindeer games

Friday, November 22, 2013 0 comments

Hey folks! I’m going to keep this one quick because I have a cold and can’t focus on one thing too long. I looked for my keys for 30 minutes last night and looked for my phone for 20 minutes this morning. My brain is MUSH.

So earlier this week I took a break and went into TJMaxx for a bit. I found this lovely lady:

decorative reindeer

I put her on Instagram and mentioned I was going to glitter her up. I got some “Noooooo's” and some “heck yeah’s” and also a “I don’t think she’s a she,” which is true but it’s just to elegant to be a boy. So I’m saying girl. ;)

Anyway, I wasn't going to glitter all of her – just his her antlers. I used the bag to cover the rest of her up and then taped around the antlers:

Christmas reindeer

To make this as quick and easy as possible I used this Krylon spray paint to glitter them:

glitter spray paint 

OK -- I bought this a year or two ago and I don’t I’ve ever used it. These came out a couple years ago and I saw blogger after blogger had issues with this spray paint. I chose to believe that my can was different.

Well, it wasn’t. ;) It was a MESS. It sprayed great for a few seconds, then started sputtering and spraying all on it’s own. Then the glitter wouldn’t come out, just the coating stuff, and it was pretty much a disaster:

wow

That’s actually the good side – the color was horrible, it didn’t cover well and just looked like butt. Not the look I was going for. I think this paint would be good to give something a light, glittery sheen, but I wanted more for this project. 

Then it wasn’t drying so I ended up trying to wipe it all off and it was just a science fair. (That’s what we say when something is a disaster. This qualifies.)

So I was on to plan B -- the more time consuming plan. I grabbed my glitter glue and silver glitter and started doing it by hand. I got this glitter tray at Michael’s this past summer and it worked AWESOME:

glitter tray

You can lay items on it to dry and then when done just take that top part off and there’s a hole in the corner so all the excess glitter goes back in the container. It worked great, I just wish it was a little bigger!

So, after about 20 minutes of glittering she ended up with some major bling:

Christmas reindeer

I actually REALLY love how it turned out! She’s beeeeautiful! Yes, it was pretty to start, but I can never leave well enough alone, you know this.

The silver is SO pretty:

glittered antlers

Who knows if it will last till next year, but for now she looks lovely:

Christmas reindeer decorHave you tried that glitter spray paint? Did you have the same problems I did? Have you started decorating for Christmas? This is my first piece – more will come out this weekend. :) By the way – have a great one!!

Give yourself a break

Wednesday, November 20, 2013 0 comments

So a couple weeks ago, I had one of those moments. I honestly don’t remember what got me so upset, but my husband had been out of town for days, I had forgotten something for the Bub’s school, I had overextended myself blog-wise and I was just feeling like a bad mom and wife in general. Just one of those days.

I was talking to myself (I do that a lot) and lamenting all the things I had done wrong that day and really just beating myself up about it. And then I started crying (just great), which is not something I do often.

So I’m standing in the middle of the bedroom, crying, and I it just hit me – I told myself (yes…out loud) to just give myself a break.

My husband was gone and during the fall that was a common occurrence (he’s retired from teaching music but as busy as ever with other stuff) and you know what – like always, I was handling things by myself and doing a decent job of it. I needed to give myself a break.

This blog is now my “job” and I love it so dang much, but there are times that it gets stressful. And then I beat myself up for even thinking that this perfectly perfect job is stressful sometimes. Like that means I’m not grateful for it. But I need to give myself a break. Every job has stress.

And although I don’t feel like a bad mom often, I do hate when I don’t stay on top of things for my son. But in the end, he’s an incredibly happy, well adjusted kid. And that night he went to bed content and without a care in the world, and that is all that matters to me at the end of the day.

I thought about all of us women – I believe the men in our lives stress just as much (you may not realize it but they do), but I think we expect every aspect of what we do to be pretty darn perfect, and our men take it a little easier on themselves.

So, as we roll into the holiday season I wanted to remind you all to GIVE YOURSELF A BREAK.

The past two years I’ve not had time to write out and send Christmas cards:

It is STUPID how bad that makes me feel. Like I failed at Christmas.

I didn’t. Santa still came. Joy was had. My friends still know we exist. :)

I always like to hand write my cards – but this year maybe I’ll print out address labels and do the photo card. Or not. Either way, life will go on.

I LOVE holiday traditions but they can get out of hand. There’s only so much time in the day people! So our Elf doesn’t get into crazy antics (although I enjoy seeing what he does at other houses):

Elf on the Shelf, my nemesis

And sometimes…sometimes, he stays in the same spot two (three!) nights in a row. Mama has stuff to do. I may not be able to pull that off this year though, the boy is getting older and smarter. (Last year was stretching it.)

I always have grand plans for baking and cooking and trying new recipes and entertaining like a BOSS…but then the day of the party comes and I end up throwing together my cheater cookies that are just as yummy and festive:

Easiest Christmas cookies, ever

And the elaborate recipe I was going to try out ends up being frozen meatballs in the slow cooker.

But you know what? Who cares?? People are fed and it’s good. Give yourself a break.

This is just a friendly reminder – think of me as the tiny voice in your head this holiday season. Take care of yourself. Try to take it easy. Cut yourself some slack. It will be wonderful, even if the Elf on the Shelf actually stays on the shelf. ;)

Put a wheel on it

Tuesday, November 19, 2013 0 comments

Hey there! I’m back today with a super easy update that I seem to like…a lot. I started thinking about all the times I’ve made this little change to an item and they added up fast.

I think it’s a fun detail that also adds some functionality to a piece you already have. If it needs a little something -- just do what I do…put a wheel on it. ;)

These small castors are so cheap at the hardware store – I think two or three bucks for two of them. If that? You can get the plastic ones for even cheaper.

I added them to a little shelf I found at Goodwill years ago:

book caddy

It’s easy to wheel it around wherever and they add a bit of height to something that may be too short otherwise.

I got an inexpensive ottoman for our basement last year that was super functional (there’s storage space inside):

ottoman with storage

But I wanted to be able to move it out of the way easily, so I picked up four of the slightly larger castors and screwed them into the bottom:

adding wheels to furniture

I love the copper color on those. :) They come in this copper color and brass. I think silver too?

Awhile back I added them to the coffee table in the family room so we could push it around if needed:

bold graphic rug

Still can’t believe the difference a new rug made in there. ;)

I’ve been thinking about adding them to my next victim for awhile. A couple years ago I made over a clearanced caddy for the kiddo’s markers and crayons in my office:

art caddy

I wanted to add wheels to this too, but it was really deep underneath (the bottom wasn’t flush), so I didn’t do it back then because I’d have to add some wood to make them work. (I thought the wheels would have looked awkward because they would be so deep underneath there.)

Well, my wheel obsession continues and I decided to make the little update to this finally. The bonus was that I found four wheels in the garage clean out, so it didn’t cost me anything!

I emptied it out (this also gave me a good reason to go through the markers that seem to multiply) and measured the length I needed for the scrap wood:

See how deep that is? That’s why I wanted to make it more flush on the bottom. And yes, there’s a cat in there. There’s always a cat.

See the paws?

He likes to “help.”

So anyway, I cut down the wood and just used wood glue to secure it to the bottom:

I could have used a nail gun but I didn’t feel like dragging it out and I didn’t want to risk the nails to come up through the bottom of the caddy. I couldn't tell how thick that bottom shelf was.

Not helping:

And yes, there were a lot of markers in there.

Here’s the little castors I used:

castors

They have more of an antique brass finish. Love it.

You’ll want to make sure the spacing is fairly equal when you install – I just eyeballed them:

Adding wheels

And that’s it! You just want to make sure you have some kind of wood for them to screw in to. If there’s not you can always add some scrap like I did to make it more secure:

craft caddy

If you don’t have to mess with adding wood or anything it should only take you ten minutes or so to install the wheels. Or 30 if you have a cat helping.

There are also locking castors so you can secure something you don’t want floating around the place. :)

Now we can easily roll the caddy around my office:

craft caddy with wheels

Or take it all the way to the kitchen table for projects. This thing is heavy so being able to wheel it around is helpful.

Cute eh? I think it’s a fun little detail. I’m always looking for ways to make store-bought pieces more unique and this does it. Do you ever do this in your home? It’s such an easy and cheap project!

P.S. If a wheel doesn’t work you could always put a bird on it.

Most epic clean out ever

Monday, November 18, 2013 0 comments

Hey there! How was your weekend? Ours was great, even though we spent the day in the basement yesterday, ready for storms and tornados going through the area. Last I heard there were about 20 tornados that touched down in Indiana, but they expect that number to drop a bit. There is so much damage – my prayers to my fellow Hoosier and those in surrounding states who were affected.

Last week I finished up a truly HUGE organizing project. After going through the entire house (except for our closet), I had one final frontier that was the garage. It was BAD people. It was even worse a couple months ago, but over the past four or five weeks I worked on things here and there. I didn’t even take photos of that before because it was really that bad. ;)

BUT. We are always able to park in the garage – we pride ourselves on that! We may risk life and limb to get to the door but we. will. park. inside.

This decrapification (really, truest sense of the word this time) took me FOREVER. I worked on it all afternoon Friday, Saturday, Sunday and Monday a week or so ago. I figured I spent about 20 hours on it total. And my sis came and helped cause hubby was out of town – she was a huge help!

OK, so keep in mind this is a garage. It’s not pretty. This is one of those posts that doesn’t have pretty pics, but man, I worked my butt off so I figured I’d share it.

We have had three tall plastic storage containers in there for awhile but I was determined to get rid of one because I was moving them to another spot. We took everything out and moved them, and ended up with this pile:

That’s actually the “nice” view of it. :) I work better by just making a big pile (even though it can be overwhelming) first and then tackling it all at once. I can’t do little bits at a time.

Yet again, I realized how much MONEY I lose when I’m not organized. It drives me crazy! This was just the extra screwdrivers – not the ones I kept:

Too much stuff!!

I mean, I’m a DIYer, so I have a good amount of tools. But seriously? Argh.

Once I was done with that pile I started on this side of the room:

GoodNESS. Too much CRAP. I have a problem hoarding tools but my husband hoards sprinklers. We all have our problems. ;)

I wanted to completely change how we have the garage set up because over the years I’ve figured out what works and what doesn’t. One thing that didn’t work was where I had our lawn tools in this corner:

That’s where my husband parks so it was a pain to get to them when we were doing yard work.

The area where I wanted to move it to was a disaster, of course:

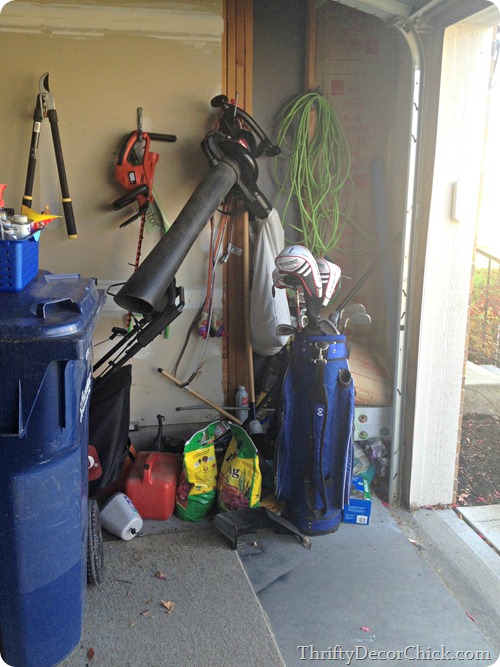
So I took every bit out of each of those areas and moved stuff around. Now that area above looks like this: 

Wall storage in garage

Hello! Much better! We can get to it now! Whoot! You may notice I drywalled that area too – I had extra insulation and drywall and used scraps to close up that spot. (See here to see how to do both!)

And the other corner I showed you now holds the trash bins – again, they will be so much easier to get to here! We still have to move a car out but it works out so much better than where they were before: Using wall space in garage

You can see how much I try to use the height in here – for stuff that’s seasonal this works great. I only need to get the sleds a few times a year so they go up high. The baseball bag lives in my car during baseball season, so the rest of the year it goes up high. It works for us and gets stuff off the floor.

And that whole side that was a disaster before:

Now looks like this:

Yard tool organization

Ahhhhh…so much better!!

Now…the other side. This is the main reason I wanted to change up where everything was. We have a bump out that I had made into my work shop. But it wasn’t working:

It was always, ALWAYS, a mess. There just wasn’t enough room, with the trash bins off to the left and the piles of crap on the floor in front of it. And I couldn’t get eight foot pieces of wood in that area to cut them down.

So we moved the two plastic storage jobbies over there instead:

Organization in the garage

If you’re super observant you’ll notice we also finished up the insulation and drywalling:

insulating garage

I’m glad you can’t see detail in these pics cause that top piece…not so good. ;) But it’s up! And warmer!

Here’s a view of some of the storage we added back in there last year, more on that in a bit:

garage built in organization

That rug peeking out is going in hubby’s basement office soon – a winter project. :)

The trash bins used to sit over in this area and now it’s where we keep the outside toys for the kiddo:

kid toy garage organizationI got that rolling storage thing from the Container Store last year and it’s GREAT for that kind of stuff!

I moved my “work shop” over to the long spot at the back of the garage:

organized garage

It doesn’t look like much but I have a plan for that area that I’m working on now – SO stinking excited about it! It will be even more organized and functional when I’m done with it.

We have plenty of room to walk around there, even with our cars pulled in, so this will work much better as a work area. I have tons of space to stretch out in! And yes, I have my pretty rug that was in the mud room in there because it’s dirty beyond cleaning now. I didn’t realize when I bought it that the light areas are raised and therefore are impossible to keep clean. So instead of getting rid of it I’m using it in here till it’s total toast. :)

Who doesn’t want some pretty in their garage anyway? Maybe it’s just me? Could be.

Last year I had an epiphany of sorts – I realized our garage, with it’s 12 foot+ ceilings, was a gold mine of storage that we weren’t taking advantage of. And since the basement was finished, we didn’t have room for big faux Christmas trees and all that stuff down there. So we had a few storage shelves built, up to the ceiling. We started with a couple earlier last year and then a couple more in the fall. They are AWESOME:

Christmas decor organization

They were mostly filled with junk up till a few weeks ago when I moved most of the Christmas bins out here. I decluttered big time and was able to put all but a couple bins up here. So for those of you who were curious, here’s where all that went! ;)

I label my bins with Frogtape – it’s easy to read, easy to change out and actually stays stuck on there:

labeling bins with frogtape

I just put the tape on, write and then to clean them up a bit I use a razor to trim up the sides. Totally not necessary to trim them up but it makes them look nice. ;)

And after all work, finding a spot for everything, moving it all around -- I realized we didn’t have room for something important that we kept on those shelves all last winter – all the outdoor cushions from the patio. Wha whaaaa. Smart.

Sooo…we have a little bit of room on one of the shelves above the garage:

storage above garage door

And I think we’ll have another one installed over on the other side, hopefully before it snows. That should hold everything.

I’m on a mission to create/find a spot for everything in my house. I’m getting closer all, getting closer. It feels GOOD. And I said it years ago when I last cleaned out the garage, (to the day, how weird!!) but this time I mean it – NEVER again will I let it get this bad. Ever. You can declutter all you want, but unless the storage is functional and works for your family, it’s just going to pile up again. These changes will work so much better for us!

Next year I’d like to work on painting the floors in here – I love the look but our cars are OLD and occasionally leak. I haven’t wanted to go through all the work just to have stains on the floor.

So, there you go – my most epic clean out EVER! Numerous Goodwill trips and Craigslist sales later, and I’m done!! It feels so good! This is a great fall project because the temps are perfect for being inside/kinda outside. Do you have an organized garage? Do you always park in it? :)