Showing posts with label kitchen. Show all posts

A window seat in the kitchen!

Thursday, October 23, 2014 0 comments

My dream is realized people – or it will be soon. For YEARS I have wanted a window seat in our home. I’ve gotten googly-eyed over beautiful photos, daydreamed about it, really dreamed about it (sad, I know)…the love is deep and true.

And we’re finally getting one. Or will be when I build it – but I’ll be able to build it, yay! I could pee my pants with excitement my friends. Pee. my. pants. Very long story short – we thought about adding on to our house, the quotes were ridiculous, we decided to knock down a wall instead and then perhaps still expand our bay window area:

bay window in kitchen

That’s when we thought the kitchen table would still stay there, but we quickly realized we were going to have way more space than we thought so the table moved over to where the sofa used to be.

The kitchen renovation will be next year (and it will probably last all year) but the new open space gives us all kinds of fun options in the room, including expanding the kitchen island.

We decided pretty early in our renovation that expanding the kitchen just isn’t needed with the new layout. But we did decide to go ahead with changing a few things that we planned from the start – the double window in the family room/kitchen will be changed to double doors. Since we don’t need two doors within feet of each other my wheels started turning and the bay window getting a little change up so that I will be able to get my DREAM WINDOW SEAT. Whoot!

I will be building it myself so I’ve been researching different looks and plans. It’s not really hard to do but I’ll need a table saw for sure.

Although I’m not picky and love just about any window seat, I’ve been searching those specifically built into bay windows. I haven’t decided if I want it to curve with the window or just go straight across:

DIY window seat

(source)

Isn’t that gorgeous? Ack!!

Heather’s turned out beautifully too and she shares the steps to their process:

DIY window seat

(source)

I don’t know yet if we’ll add a small round table or not – I don’t know if we’ll have room when the island is expanded. I’ll have to wait and see.

Here’s another version straight across:

window seat in kitchen

(source)

I love the little plant shelf behind it – I couldn’t believe I found one like that because I’m hoping to add something similar. Not sure it will work but I’m going to see!

Of course storage will be a MUST. I think I’d rather have drawers than a pull up seat – haven’t decided just yet. If we don’t have a table in front of it I guess pulling up the seat wouldn't be a big deal at all. We’d get better use of all that space that way too. I think I just talked myself out of the drawers. :)

I do like the idea of kind of curving it around too, like this:

curved window seat kitchen

(source)

Our bay window is pretty deep so I think we could do this.

Here’s a step by step tutorial on building a curved bench in a bay window:

how to build a window seat

(source)

When you break it down like that it doesn’t look that hard!

Our space isn’t this deep but this one is gorgeous too:

bay window seat

(source)

Lighting is a whole other thing – I’ve always wanted lights in that window area and I’ve come up with a solution. It involves these from Lowe’s:

coastal outdoor sconces

I think it will look pretty awesome and be wonderful additional light. (They are way cheaper in the store by the way.) Stay tuned!!

This one isn’t the shape of our window at all, but it’s what we were going to do if we added on. I’m including it because it’s just so pretty, I love it all:

built in banquet kitchen

Sigh. I can’t believe it’s finally going to happen. Happy happy joy joy!

I don’t know if I’ll get it done yet this year, but it may have to become a priority after the family room is done. That I will be sharing next week by the way, come hell or high water. :)

Do you have a window seat in your home? Do you love them? If you’ve ever built one feel free to link to it in the comments!

Follow along with me on Instagram to see the progress on this spot over the next few days!

Fall table ideas

Wednesday, October 8, 2014 0 comments

Hello my friends! I’m EXCITED – first of all because this is my first chance to show off some of the Better Homes and Gardens products (a super cool opportunity I told you about here) but also because I finally did some fall decorating!

My mission this month is to show you how to use these pretty products to get your home holiday ready – and I’m focusing on the kitchen table. I’m SO thrilled to have a big beautiful table to sit at for Thanksgiving this year! I showed you the unfinished table we purchased a few weeks ago and asked for your advice on keeping it’s natural beauty. A few folks on Instagram recommended a liming wax – something I had never tried. I looked up examples of it and LOVED the look of it. So I tried it out…and hated it. :) Wah wahhhh.

The table is too light to begin with – it just basically white washed it and I quickly realized that was not the look I was going for. In photos I’ve seen of this wax it really shows off the beauty of the wood, but it made our table look really bland. I was so disappointed.

So I sanded down the section I worked on and just went with a wax – which was my gut reaction to do anyway:

wax on unfinished wood

You can see there how it really pulls the grain out and shows it off!

I just used a basic furniture wax – it’s easy to do but it takes some time. I tried two methods – a rag and then this wax brush:

waxing unfinished wood

The brush worked much better – it was just easier to get it deep into the wood and I could get plenty on there.

After applying it you’ll want to let it sit for a bit and then wipe/buff it down:

buffing wax on table

As you buff (this takes some muscle) you’ll see that shine come through – I used the light from the windows to see where I needed to buff some more. It came out SO well and at least for now I love the natural look of the table. What’s great is if I ever change my mind I can sand it down and start over. :)

Because the table is so pretty as is I wanted to go with a simpler, natural fall table setting as well. I picked up these pumpkins at Walmart and gave them a little makeover:

painting pumpkins painting pumpkins white

I’ve seen so many chalk paint pumpkins in blogland but man – it was taking FOREVER to paint them. So I went with my trusty spray paint. It never fails me. ;) I sprayed a couple coats of primer and then a very light coat of the Heirloom White color so they weren’t stark white. It warmed them up nicely.

I found this natural runner in the BHG line and knew right away it would be perfect:

jute table runner

I actually layered two on the table since it’s so long – a nice problem to have. :)

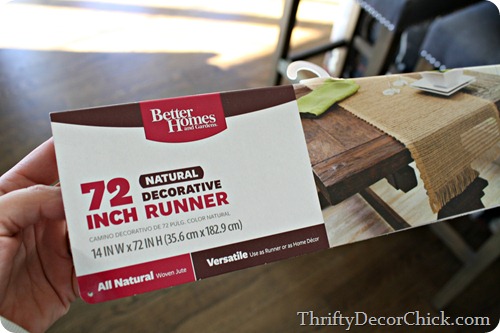
I took a picture of the packaging on a couple items since some of them aren’t online yet. This is what you can look for in the store:  better homes and gardens natural runner

The runner was the perfect backdrop to the more subdued table setting. I’m OBSESSED with the BHG hobnail plates (on the bottom):

natural fall place setting

I’ve looked at these EVERY year and admired them. They were just starting to stock them in my local store so I grabbed the beige color plates (these are called Arlington) and topped them with bowls I already had. These are really beautiful – I just love them and they are SO much more affordable than the high end versions out there.

I love how BHG incorporated owls and foxes into their fall line this year – the cream owl salt and pepper shakers had to come home with me:

owl salt and pepper shakers

This pumpkin cookie jar matches them perfectly – I used it as a centerpiece to hold my fall hydrangeas:

 pumpkin bowl

You can see the cute lid to the left. It’s labeled a cookie jar but I think it would pretty holding rolls or other foods on a Thanksgiving table too.

I sprinkled some pine cones along the runner as well – they smell amazing!:

owl salt and pepper shakers walmart

The bags came with leaves and little bitty pumpkins as well – this is the perfect fall filler:

scented pine cones

And it can easily stick around till Christmas! Bonus.

Because I can’t ever resist a cute placemat pillow – I picked up a couple of these and made quick pillows for the parson’s chairs:

placemat pillow fall

These placemats weren’t the kind you can open up and fill so I just sewed some basic muslin I had on the back and then filled them. They were less than $2 each – can you believe that? They’re not just a print either, it’s all woven. I couldn't believe the price.

I LOVE how it all came together! It makes the whole family room and kitchen feel so warm and cozy. I want to bake a turkey right now:

natural fall table

The plates and glasses will be put away till the big dinner but I’m keeping the rest out until then. It’s too pretty not to:

fall hydrangeas

There’s still a lot that will happen in this area – the board and batten will go up on that back wall after the new doors are installed (hopefully by the end of the month?): And eventually a big window seat will sit in the bay window – can’t WAIT!:

natural fall table setting

But for now I’ll focus on the pretty, finished parts of the room – like a big table ready for big meals!:

easy fall table setting ideas LOVE it! Anymore I don’t like my table settings to be too fancy – I like it to feel welcoming and warm and a spot where people want to sit and stay awhile. You don’t have to spend a ton of money or go crazy with the decor in order to do just that. (You can see my fall table from last year here.)

Keep a look out online and in Walmart stores for the fall and Christmas Better Homes and Gardens entertaining items! I was able to find everything I used in my local store. Will you be hosting Thanksgiving this year? The older I get the more I like the holiday – it’s such a fun, relaxing day for us.


better homes and gardens products at walmart

I received compensation from BHG at Walmart for my time and participation in the BHG Live Better Network. All experiences and opinions are my own. Follow BHG on Twitter, Facebook, Instagram or Pinterest.

Simple fix: The disposal

Tuesday, September 30, 2014 0 comments

Hello there! Thanks so much for all the love on the finished fireplace, I appreciate it more than you know! We’re so happy with how it turned out and I hope it inspires you someway in your home.

As you know, I like to do things myself if I can. I have mixed emotions when I have to call someone to fix something for me – if it’s something stupid and little I’m annoyed. If it’s a biggie I’m totally cool with it. ;)

This past weekend we had a stupid little something and I was determined to get it fixed myself. Long story short we got lots of little bits of stuff that shouldn’t be down a drain…down our drain. It involved an obnoxious cat. It always involves an obnoxious cat. Not knowing the little bits were down the drain, I turned on the disposal and the “rarrarrarrarrar” of death started up. Actually it’s more of a “grrrrrrr” when it’s not working.

If you know what I mean by “long time listener first time caller” right now than you are my favorite person. If you don’t look up “Mr. Obvious, the critter” for a laugh.

OK, back to the post. The little bits had gone down the disposal and it was stuck. There’s a few things you can do to fix this situation on your own. First things first, turn the disposal off at the breaker box.

If something gets stuck in the actual sink part you can usually get it out of there on your own. I’ve used the handle of a wooden spoon and kind of swirled it around in there and then you can put on rubber gloves and reach in and grab it if you get it loose. Or if it’s tons of little things like glass you can put your wet vac hose down in the sink and try to pull them up that way.

If it’s gone down into the disposal like ours did than you need to move to the next option. The bottom of your disposal will look like this:

how to fix a disposal

There’s two areas that are important. The red button on the right is the reset button. Sometimes you can just push that in after clearing out the drain part and it may work. (The button will be out if it needs to be reset. If it’s already pushed in it doesn’t need reset.)

The area in the middle is how you’ll fix most issues with disposal. You’ll need the key that came with it -- it’s just an allen wrench basically:

disposal key easy disposal fix

If you don’t have the specific one that came with your disposal you can usually find one that works on an allen wrench set:

allen wrench

Although when I fixed ours the set did not work – I had to use the disposal key to do it. The allen wrench wouldn’t grab enough.

You stick the key inside and turn it – you may hear everything inside moving around. This is a good thing. I could hear ours grinding. Every few turns I would try the disposal again – if it doesn’t work on the first try or two keep turning. You’ll want to hit the reset button again if it’s sticking out and then things should be moving again. It took about three attempts to clear ours out but it worked! fixing garbage disposal

It just takes a few minutes and you’ll usually be able to fix yours on your own. Have you ever tried this? It’s a GREAT feeling to save hundreds of bucks! Or at least $75-$150 for a service call so the repairman can do the same thing. 

Now go look up Mr. Obvious. :)

The new kitchen table

Thursday, September 18, 2014 0 comments

Oh my! I am so excited about not only the new space in the family room (after taking down the wall), but the fact that we have so much more space in our kitchen as well. Because everything shifted down towards the old office our kitchen space has doubled. It is DREAMY.

A couple months back (I can’t believe it’s been that long!) I asked your thoughts on moving our table and we did end up moving it between the sectional and the kitchen island. I had the light moved over and we LOVE it this way.

Because we have way more space there compared to when it was over by the back door and pantry we were able to consider a new table for the space – I’ve always had to work with a much smaller area so this was pretty exciting for me.

I’ve spent the past two months trying to find the perfect table. I went back and forth between buying and building a table. I did a combo of both on the previous kitchen table (we are moving that one down to the basement) and this time I was considering building from scratch. I had a definite look in mind and it involved these legs:

1190

I am obsessed with the curved look of them. I wanted to go a little more “pretty” this time (compared to the more clean lines of our previous farmhouse table). Honestly though, I just couldn’t pull the trigger and start building – sometimes when you DIY a lot you like to just BUY something. :) So that’s what I started looking into next. I stalked Craigslist for solid month and almost drove three hours round trip to pick up an old table I was going to refinish. It was a basic turned leg table and I liked it…but not enough to drive that far, especially for a Craigslist table. What if it wasn’t in great shape or didn’t look like it did in the pictures?

So I started looking online but everything I liked was so expensive. It was when I was finally going back to plans of building it when I found THE ONE. I happened upon it one evening and fell in love with the shape and the legs and the size and everything…and the icing on the cake was when I noticed it came unfinished.

WHOOT! I couldn’t believe it! I never thought in a million years I’d find the table I wanted for a decent price and unfinished – I guess that’s why it cost less than others I was looking at. Most people probably want a table they don’t have to mess with. ;) But that’s great for me because it’s an empty canvas to work with:

rubberwood table

This table is a smidge wider than our old one and much longer – about 15 inches longer with the leaf in the middle:

unfinished kitchen table

We’ll keep the leaf in pretty much all the time – it gives us plenty of room. At the old table the chairs were closer together so this gives us space to spread out. I’m considering chairs for the ends of the table too but not sure about that just yet.

The best parts are the details along the apron and the gorgeous legs:

french country table

I adore it. So beautiful. I cannot believe I found exactly what I wanted, seriously. The legs are nice and thick – the whole table is incredibly heavy – 100 percent solid wood. It’s made of rubberwood which has a similar finish and hardness to maple. The difference is the top is made in more of a butcher block look, not full planks.

I love that it’s a harder wood so it won’t be an issue when doing homework and writing out bills. Our pine-top table was softer and sometimes the writing would transfer. I was fine with it but would prefer something a little stronger. AND there are no grooves – it’s nice and smooth. I looked at so many tables that had those blasted grooves in the top!:

french country kitchen table

So now I’m trying to figure out what to do with it! I’ve always been a dark top/white leg kind of girl but I have to tell you I’m kind of loving the lighter look. I love the lighter wood against the chair color – and I don’t want dark legs that will match the floor too much: curved leg table

At first I was considering a gray wash on the top and white legs, but we already have so much gray going on in the room. It would match the chairs and the light and the built ins and the fireplace… I did wipe on some dark stain underneath and it looks SO good, but again I think I want to go a different direction with this one.

So now I’m leaning toward just waxing it or brushing on some poly to seal it. I am loving the more natural wood look right now, but I’m not sure if I’d like this bare look long term. I think it needs something – a wash perhaps?:

french country dining table

As it is now you can really appreciate all the curves and pretty lines on it and I feel like those stand out more in this lighter state.

Any ideas for me? It’s a blank slate but I don’t want to do anything that’s going to be a pain to sand down and redo any time soon. I do want to do something soon though – it’s making me nervous to use it without any kind of protection on it.

I’m excited about the potential! I think it’s a beauty. :) Oh, by the way, I got it from Wayfair – my first purchase from there and I was really pleased with it and the delivery process. Plus free shipping!

Let me know if you’ve done a lighter or natural finish you love! I’d love tips!

Simple decorating

Thursday, August 28, 2014 0 comments

Hello there! I got to thinking after my last post about the trip to Better Homes and Gardens -- how one of the editors made things look so effortless. She threw together a few different centerpiece ideas for us in minutes, just using regular plates and items from the store and nature. Fruit and pinecones showed up a lot. :)

Simple decor really resonates with me – it’s one of the reasons I write this blog. A lot of the DIY projects I do are hard work and take some skill, but most of the decor in our home is simple and quick. It doesn’t need to take a lot of money or time to make pretty little spots around your home! I took a look around the family room and kitchen to share a few of my favorite simple ideas.

I get comments on my corks and candle often: 

simple decorating -- corks around candle

The vase was from HomeGoods (but I’ve also purchased similar containers at Goodwill) and I just plopped a candle inside and filled around it with wine corks. I didn't drink all that wine – just some. ;) I bought a bunch of the corks off Ebay a long time ago and still have some to play with.

If you follow me on Instagram you saw this one recently: 

simple decorating -- plants in pitchers

The vintage pitchers were $15 for the set at a local antique shop – I stuffed some plastic shopping bags down inside the bigger two and then placed the plants in. The small one holds an air plant. I LOVE the combo of the white and green! As I type this I’m noticing that most of these examples have green in them. Interesting. It gives a room life for sure!

I saw this simple idea on a blog and can’t remember which one it is! I’ve had the vintage baguette tray hanging on the wall for years and never really loved it there. The fake apples were sitting in a basket above the cabinets. Together it’s totally cute and EASY: 

simple decorating -- apples on tray

I don’t know where I got those apples but I’ve had them forever. They are SO REAL looking. They’re heaving like real apples too. They fool everybody. And you don’t need a vintage anything – a wood tray lined up with them would look just as pretty.

I love our pantry area – as you can tell I love to put plants in things other than just pots. I think it adds some interest – this one is a old crock:

simple decor -- boxwood wreath

And I hung that boxwood wreath up last spring and it’s never come down! I just wrapped some burlap around it to hang it and then nailed that into the top of the door. Bonus is that it works for Christmas too. ;)

All of these are easy and quick! To me it’s about looking at things in a different way – and taking inspiration from blogs. ;) Do you have any simple decorating tricks? Feel free to link some if you’d like.

**To find more info on the pantry door, go here.

Island dreaming

Tuesday, August 19, 2014 0 comments

Hello all! I’m excited about our family room renovation for many reasons, but one of the biggies is that I feel like I can finally move ahead with the kitchen as well. I’ve been planning it for literally YEARS but wasn’t sure about a few things until we were able to move things around. It’s still a long way off – I won’t start till next year. But I am wanting to move ahead with the island expansion sooner than later.

Could be because it now looks like this:

Instead of this: wood counter on island

It was torn up to put the hardwoods underneath and I can live with it like that for awhile, but soon it will drive me crazy. Not there yet. Soon.

So like all big projects, I have to sit on it for awhile and daydream about what I want. I find when I do that I end up with something that functions and looks good – both are important to me when I DIY.

My plan is to expand the island two directions – length-wise and width-wise. When I say width I mainly mean extending the sides out to kind of “frame” the stools, like this:

kitchen island with sides built out

(source)

So it won’t be much wider – maybe a few inches. But I love this added detail on islands.

I loved this idea too:

extra storage kitchen island

(source)

The added storage is never a bad thing, am I right? I think that is brilliant. It’s easy to access the cabinets too, which is important.

I’ve always planned on a small bookshelf at the end of the island for cook books and other things we grab often (stop laughing…I cook sometimes):

bookcase in island

But I may not have room for those cookbooks because now I’m dreaming of having a food station for the animals in the island, like this:

dog food station

I shared a bunch of food storage ideas here and I could totally DIY this one.

But the BIG thing I want to do in the kitchen island is take the microwave off the wall and put it in there somewhere:

black island marble counter

(source)

I know this isn’t for everyone but I think it’s BRILLIANT. Of course we would need a smaller microwave that vents differently, but I love the idea. I could put a vent hood over the oven where the microwave is now.

Some are built in seamlessly:

built in microwave kitchen island

(source)

microwave storage in island

(source)

But I think I could create something that would work just as well – I don’t need it to be completely built in. Sitting there is just fine. :)

I loved this whole kitchen but this one is a good example:

microwave built in island

(source)

And this is a similar island set up:

microwave in kitchen island

(source)

Love the pretty detail on that one!

So that’s my plan – add storage, shelving, a food station and a microwave. It will be ten feet long by the time I’m done with it. ;) We were able to move the island out a bit so after it’s extended there will be plenty of room between the stove and the island. We’ll still be able to walk around it when the door is open so it won’t feel cramped.

I’m excited about this project – just not sure when I’ll tackle it since I have so much to do in the family room. But I have a plan in mind and that’s half my battle!

Do you have a big kitchen island with a ton of storage? Is your microwave down low? I’d love to hear your experience with it!