Showing posts with label Mud room. Show all posts

Barn light love

Wednesday, June 4, 2014 0 comments

Hey hey all! I’m back today with a little progress in the mud room. I am SO excited – I love when things come together the way they look in my head. :)

Because this space used to be a laundry/mud room combo, and it drove me absolutely mad, and was always a disaster:  pit of despair

We had outlets in that little nook where the washer and dryer were. I kept them when I added the DIY bench and the beadboard. I’m not sure what we’ll ever use them for, but I’m not one to ever cover up an outlet: DIY mud room bench

You never know when you might want them!

So because the two outlets were perfectly spaced on the wall I got an idea a few months back, and it finally came to fruition:

barn lights

Sconces baby! Yeah!

Our electrician friend has been crazy busy so I figured I would do it when he was available. He was free a few days ago so for $150 I had these installed in a couple hours!

Did you know if you have an outlet, you can add a sconce above it? You just need to tie into the electrical and add a switch – no biggie. ;) Actually, it doesn’t seem that hard, so I’m determined to figure out how to do this on my own. I have so many spots in the house I’d like to add some wall lighting.

I am so thrilled with how they look! Ack, I just love them:

mud room beadboard

I was so happy I celebrated by painting the door trim in the room! Everything still needs one more coat of glossy white, but I’m just happy to not have the bare wood staring at me every day.

The galvanized barn lights were from Lowe’s:

galvanized barn lights

They don’t match the hardware in there exactly, but I’m not worried about it. It’s the same lighter tone. It is SO nice to have added light in here: The main light in the room is a fluorescent light, and while it is very bright, it’s so dang ugly. :) I’m thinking of replacing it so it will be nice to have another light source.

I just think they are adorable:

bench made of kitchen cabinets

That little mark on the wall above the pillows needs to be touched up – that was where he was going to put the light switch but our old dryer vent was there, so it’s on the right instead.

It’s coming together! This room has undergone a HUGE transition and it’s functioning so well for us. I’m so grateful we were able to move the washer and dryer to the basement.

Our cats LOVE that bench cushion, by the way. One of them is laying on it every time we walk in the door:

DIY mud room bench

Even our elusive Maine Coon came out for photos. ;) He doesn’t show up here on the blog often.

I’m getting closer to the end of the DIY list for this room…a little more painting, touch ups, the storage on the wall above the bench, crown molding…and then some fun final touches like art and a few accessories. Can’t wait!!

Have you added sconces anywhere in your home? I’ve used plug in versions a few times in our house – in our master, the basement and two in the Bub’s room. Love the look of them!

No sew bench cushion

Monday, March 24, 2014 0 comments

Hello everybody! Hope your weekend was great – I was SO sick most of it which was a bummer. I get a horrible cold every year this time of year and I think they’re getting worse as I get older. This one was a doozy. I felt a little better in the evenings and like a new person last night, so I got this project done during those times I wasn’t on the couch. :)

I’ve been working on our mud room a lot this year and I’m loving it. It’s different for me – lately I’m going for lighter, more subdued colors on the walls, but this room is FULL of color. I like to start with some sort of inspiration for each space and this one was based off a rug I found at HomeGoods:

I picked the blue color on the beadboard from this rug (Reflecting Pool by Ralph Lauren). I LOVE all of these colors and love them together.

These thin rugs come in so many fun designs (I’ve seen quite a few of them at HG) but I don’t actually use them as a rug just because of how thin they are. Even with a rug pad they don’t stay put for me and I end up tripping all over them.

So I had a plan all along to use this one in a different way – as an upholstered cushion for the bench. If you’re really good you know how to make a real cushion, but I do it the cheater way. :) I’ve done this a few times and it always works well.

I grabbed some scrap mdf from the garage and cut it down a little smaller than the rug – it was already about 19 inches wide and I cut it down to 42 inches. Instead of using expensive, thick foam from the craft store, I used my egg crate foam that you use on the bed:

no sew bench cushion

I showed you how I use this on my upholstered headboards here too.

In the fall the twin foam pads will go on clearance and you can get them for super cheap. WAY cheaper than thick foam from the store. I used hot glue to secure it to the wood, then used an electric meat knife to trim it down:

cutting foam

I think I saw that idea like ten years ago on Trading Spaces and it works GREAT. Cuts like buttah.

I put another layer on top, this time with the textured part facing down:

no sew bench cushion

You can see I had to piece it together – since the rug is so thick you don’t even see where they were put together when it’s all done.

To make it nice and smooth I wrapped the whole thing with scrap muslin that I had:

no sew cushion

You don’t want to pull too tight because the edges won’t be even. If you pull it crazy tight you’ll have bumps in between where you stapled on the back.

I did the same with the rug and made sure to center it right on top:

rug on upholstered cushion

I did the two short ends first, then the sides, then the corners last. I knew the corners would be tough with this because it’s so thick. I had to cut a lot of the corners down under there so it’s not pretty – but nobody will see it. :) It’s secure and staying put and that’s all that matters.

It turned out just as I saw it in my head all those months ago:

cushion from a rug

It doesn’t go the whole length of the bench and I knew that going in – I wanted some of the bench to be open so we can set stuff down if needed. I don’t know if we’ll keep the cushion off to the side or in the middle, but for now I’ve got it here:

mud room with beadboard

No, the door trim is still not painted. I’m getting myself amped up to do it. :)

The aqua pillow was one I found at World Market a few months ago and the other one is an outdoor pillow that used to be up in the loft. That one probably won’t stay but the colors are perfect match too: DIY no sew cushion

Now that I see this aqua with that blue I want the door to go more that direction. Now it’s just a light blue I had in my paint stash. I think a slightly more aqua color would be fun. Who knows – I’ll decide when I get the trim painted white.

I’ve mentioned before how AWESOME it has been to have this space finished now – it’s such a night and day difference from the mess that used to be here. The coats are not hanging now because I’ve hung them in the closet. We only need them for three more days this week and then I think spring will actually be here. (!!)

I refuse to look at them anymore so they’re out of sight:

beadboard mud room

I thought I knew what I wanted to do on that big wall above the bench but when we tried it out it looked goofy. So I’ve come up with a new plan for all that wall space that I hope to work on soon: DIY bench mud room

Stay tuned for more on that. Other than that and the door trim I still want to install a new light fixture (we have a long fluorescent light in there now), perhaps add some additional lights (I need to see if my idea will work) and install crown molding. And then figure out what to put on the walls to add more of “us” to this room.

I’m so happy with how it’s coming together so far! Have you ever used a rug for something unexpected like this? Can you sew a cushion or have you tried a DIY version like this?

Mud room bench, done!!

Friday, January 31, 2014 0 comments

HELLO! It’s Friday and the bench is done! Can I get an AMEN?

Last I left you it looked like this: DIY built in bench

Not bad but not done.

Like I said, it felt like all I had to do was paint those cabinets and slap on the hardware and I’d be done. But there was more. Lots more.

I’ve shared how to paint cabinets here but I’ll share the basics again today. Cause I’m in a good mood. :) I was starting with unfinished cabinets so I didn’t use a special primer, just a basic one:

tinted primer

So I experimented this time with a different color primer. Every time I prime unfinished wood it takes SO many coats to get nice coverage on it. So I tried using my tinted gray primer this time, thinking it would coat better at first, giving me a better base.

It did! But it still took three coats of white paint like usual. :) So it was a wash. But I learned. Something.

Anyhoo, after applying one coat of primer, be sure to sand everything lightly between coats:

painting cabinets

The primer and paint (mostly the first coat or two only) will pull up the grain on the wood:

painting cabinets

So you want to knock that down a bit.

So I used my basic white paint (off the shelf) I use for all of my trim and built ins but I could tell it was getting old. I noticed on the basement kitchenette that it was getting thick and hard to work with. So after attempting one coat on the bench I went out and got some new white paint, this time from Sherwin Williams:

proclassic sherwin williams

This ProClassic is AWESOME – I used this on our kitchen island and it’s held up GREAT. It’s their base white called Extra White and it went on SO easily and so smooth. Love it! (And no, I’m not paid to say that, I have just become a die hard SW fan over the past couple of years.)

I did three coats of white on the cabinets, then put the doors back on. It was then that I realized that the bottom trim looked like poo:

built in bench

It was flush in the middle and but not on the sides so it looked weird. I had some scrap trim that I used for the base so I just placed that right over it and I’m so much happier with it!

IMG_8207

Another big project was installing the trim around the top of the beadboard. Once I was done I knew I had to address the corners. I don’t have a table saw so I scored my beadboard down to make cuts to fit into the inside corners and outside corner. The result was crappy but I knew I would fix it:

 beadboard cornersbeadboard corners

See the big gaps? I use dowel rods to fill those in. I shared how I did it years ago on the kitchen island here. It’s the perfect solution since it just looks like the “bead” of the beadboard.

Now with the dowel rods and some caulk you can’t even tell there were gaps there:

IMG_8210 IMG_8211

After all that, and touching up some more paint, it was time to poly the bench:

poly on wood

I did one coat, sanded lightly and then did one more.

And here’s the final result…finally:

beadboard and built in bench in mud room

I still need to paint the trim around the doors, and a ton of other stuff. But the bench area is D.O.N.E. And I am H.A.P.P.Y.

I’m really proud of myself for making this happen. For the months years that I was planning this room I didn’t think I’d be able to do the bench myself. I knew I could build a bench, but a bench with storage I figured I’d have to hire out. I’m SO pleased with how it came together:

Bench made out of kitchen cabinets

That center panel I was worried about between the two cabinets is now hardly noticeable, with a lot of sanding, spackle and paint. :) If I could do it again I’d have the cabinets next to each other (and no space between) but I couldn’t figure out how to get them secured to the wall if I did that.

I’m in love with the hardware in here too – it was all from Lowe’s. I went simple with the hooks so I could fit them on the trim:

brushed nickel hooks

I originally planned on four along the back but decided on three there and then one on each side too. I need to go back and get one more for this side:

DIY mud room bench butcher block top

I figure the back ones will be for coats and bags and the side ones can be for keys and dog stuff.

I got a shot straight on with the help of my wide angle lens:

    IMG_8219  

SO HAPPY!!

Now…to decide on what’s happening above. I thought I had something in mind but now I need to think on it more. I want lots of storage up there so I’m just figuring out how much I want to be open and how much closed. (My plan is both.)

For now I’ll take a break on this space and just enjoy it! The cost for this area was about $300 – that includes the additional beadboard, the trim, the butcher block from IKEA and the cabinets. I used scrap wood for some of it too.

I am looking forward to adding some decorative stuff in here down the line – but for now just being functional is pretty awesome! Especially considering this space used to look like this ALL THE TIME:

Have a GREAT weekend!! Whoot! 

P.S. Here’s how I built the bench and here’s an in between update if you’d like more info on how I did this project.

Mud room bench progress!

Thursday, January 23, 2014 0 comments

Well I had hoped to have so much done to show you in the mud room but the painting part took EONS. I mean, seriously. But…there’s progress and I’m stoked so I wanted to share. I can see the finish line – at least the finish line for the built in bench. Baby steps!

Last I left you I shared how I built the bench for our mud-room-used-to-be-laundry-room using kitchen cabinets:

DIY mud room bench

Built ins out of kitchen cabinets, it’s what I do. It keeps working so I keep doing it. :) It didn’t look like much like a bench yet there…but it’s looking more like one now!

Since then I’ve installed the baseboard under the cabinets:

I searched high and low for a piece of trim that was exactly four and a half inches high. They basically don’t exist. Except this one – I don’t know what it was called but it had this cut out at the end:

Score! I don’t have a table saw and the hardware store won’t cut down smaller pieces of wood (length wise) so I’m glad I found that!

The trim comes almost flush with the cabinets, which I wasn’t planning on. I wanted it to be a little recessed, I just like that look. Now it looks like the base is part of the bench which won’t be a bad thing really – I’ll just need to do some spackling to make it seem like one piece.

I mentioned before I was going to try to get this trim piece in the middle looking seamless and I’m almost there:

I need to sand down the bottom where it meets the base and then fill it with spackle one more time and I am pretty sure you won’t see it when it’s painted. Crossing my fingers! If it’s noticeable I have a plan.

When I got the cabinets in I was a little worried about how much room we’d have for shoes. But we’ve started using it and there’s plenty of room:

shoe storage

See, both shoes and cats fit! We just throw our shoes in and pile them up. With our reworked closet (another project for this year), we won’t need to keep nearly as many shoes down here. That’s the plan anyway. We’ve always kept entirely too many down in this space so I’m trying to stop the madness.

My FAVORITE part so far is the long awaited butcher block on top of the bench! I got it from IKEA early last week and sent it off to get cut down. And patiently waited. You’d think I could have gone ahead and painted the cabinets while I was waiting for it, but no. That would only make sense. :)

I finally got the wood back yesterday and decided to stain it with the color they use on our floors, Jacobean by Minwax:

jacobean stain

There was plenty leftover from the floors in the mud room so the flooring guy left it for me. I showed you how I stain in this post.

Staining wood is probably right up there as my favorite DIY project – seeing plain wood transformed into beautiful, rich, luscious wood is AWESOME. I never tire of it. I used this beech butcher block from IKEA – I’ve always used the birch version and I like the way the birch stains up just a bit more. My IKEA didn’t have the birch in stock and I’ve heard they don’t carry it anymore?

Either way, when we put in on the bench last night I squealed with joy: Mud room bench with kitchen cabinets

It made it look like an actual, real bench, finally! WHOOT! I’m SO excited about how it’s coming together! The wood fit like a glove too – just perfect.

I still need to secure it with nails from the top and screws from underneath but it’s pretty secure as is. It also needs a couple coats of polyurethane. That will give it a nice finish, bring out the tones of the wood even more and protect it.

I had hoped to have the bench painted before I showed you but I was pretty happy with it at this point. I hope you can see my vision! I’m finally starting to. ;) I was trying to decide what color to paint the beadboard around the bench and you all had great suggestions. I ended up going with the peacock blue around the whole thing and I LOVE IT. The bench will be white and I think it will be beautiful.

Again, here’s how it looked a few days ago (I like before and after pics):

kitchen cabinet bench

(I shared how I made those plugs flush with the wall here.)

And here it is now:

DIY bench out of kitchen cabinets

Ack. Progress! 'Tis good.

I was going to paint those outlet covers blue but then I’d still have the white outlets, so I’m not sure what I’ll do. I hope to do some pillows or a cushion so you won’t see much of them. (I left them from when our washer and dryer were there and they are handy to have.)

Still need to do a few things to finish up this area – paint and install the trim around the top of the beadboard, paint the bench white and install hardware. Oh and touch up the wall paint – I didn’t remove the old shelf when I painted. :)

Of course that’s only half of it, I still need to decide the plan for the wall above the bench. I’ve got tons of space to work with up there and cannot wait to add more storage!

Here’s a before from a few months ago, after I painted the walls white:

white mud room

And here’s that same spot with the bench I’ve been dreaming about for ten years now:

DIY mud room bench

I hope to have at least the lower portion done next week and will be sure to share it!

Can you see my vision coming together? I’m thrilled with it so far! 


P.S. Go here to see this area completed!

How to build a mud room bench

Tuesday, January 7, 2014 0 comments

OK, so I’m super excited to share this progress with you today! Just know it’s not done yet so there won’t be any perfect after picture just yet – but I’m SO happy with how the bench in the mud room is coming together so I had to share the process so far.

I gathered my materials before this weather hit and spent most of Sunday working on it. I was in a zone and was having a blast. It’s been awhile since I’ve worked on something like this!

The only materials were two wall cabinets and a few 1 by 6’s. Oh, and some scrap wood, but more on that in a bit. Here are the cabinets I used:

wall cabinet as mud room bench

These were from Lowe’s but you can find them anywhere – Menards, Home Depot, etc. We have a little “nook” where our washer and dryer used to sit where I am building the bench, so I measured that spot and determined two 30x15x12 cabinets would work.

I think the cabinets were $30-something? The Lowe’s website says $20 and I know I didn’t pay that little. Maybe they were more than $30, I honestly can’t remember. I’ll try to find my receipt and let you know for sure.

Anyway, this isn’t my first rodeo with the cabinets-as-built-ins. I’ll share more links at the bottom of the post, but for now let’s just say this is the fourth time I’ve done this type of thing. I give all credit to my Dad who showed me how to make this happen years ago. :)

I started by flipping the cabinets over and measuring the inside area underneath. I cut down my 1 x 6’s so they made a base:

 bench out of kitchen cabinets

Does that make sense? This gets the cabinets off the ground. I knew I wanted them about 20 inches off the floor so that’s why I used the 1 x 6 size and the 15 high cabinets. They have 12 inchers too.

I used my nail gun to secure the boards to the sides of the cabinet, all around, then used longer nails in my gun and nailed down the sides of each where they meet in the corners for extra stability. You can add braces in the corners if needed too, but when I was done they weren’t budging a bit so I called it done.

I did that for both cabinets and then started figuring out how to make the bench deeper. You could make it just 12 inches deep from the wall to make it really easy, but I wanted more room for the tushes. (Not that mine needs anymore room…ahem.)

I pulled them away from the wall and hung coats and bags behind me to figure out what was comfortable. I wanted to be able to sit without having the stuff behind me pushing me off. I sat on it and then had hubby do the same so I could figure out a good distance. I determined 20 inches out from the wall was best, so this is where the scrap wood came in:

building a mud room bench

I went around the wall with scrap wood that I measured at the same exact height as the benches. (I pushed them up against the wall and marked on the wood where to cut.)

I secured each one into studs in the wall. So now, when I get the butcher block that will be the top of the bench, it will rest right on top of those boards (with glue and nails to secure it, plus screws from inside the cabinets) and on the top of the benches as well. I hope that makes sense?

Now it was time to secure the cabinets to the walls. This is where I had to sit in front of all of it for a second and figure out what I was going to do. I knew I’d have about three inches of space left to fill between the cabinets. (Or 1.5 inches on either side if I placed them together in the middle.)

Because I wanted them really secure I went with the space in the middle of the cabinets, so I could install them into the walls. I used long drywall-like screws – these are my favorite with any woodworking project because they grab the wood so easily:

installing cabinets

I think installing cabinets is hard. I’ve done it a few times and getting every angle level is a pain in the butt, really. Sometimes it happens fairly easily (our dining room built ins weren’t bad), sometimes it takes forever. I used shims to get these as level as I could and then secured them to the wall into studs:

IMG_7866 
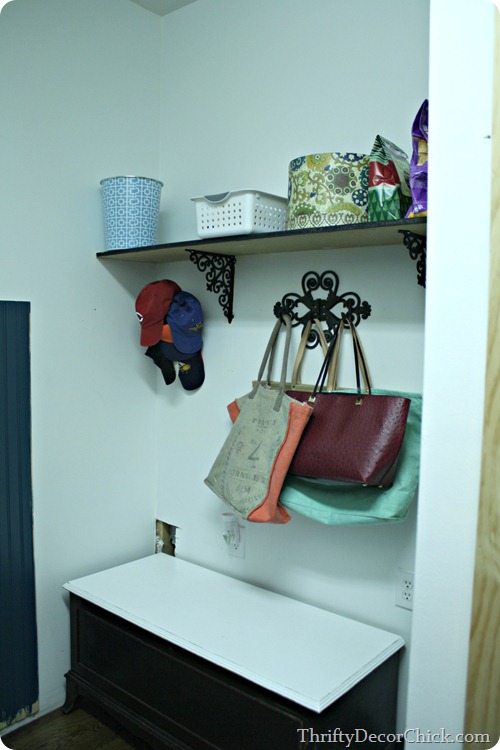
So these will be used for our shoe storage, if you haven’t figured that out quite yet. ;) It’s not a TON of space so I’ll have to be selective with the shoes we keep down here. In the summer it will be easy with sandals and flip flops. In the winter we’ll have less room to work with with boots and all.

My plan all along has been to make the doors into drawers – I was going to build drawers and install them so we could just pull them out, but I realized I’d lose a lot of space by doing that, so I think we’ll just keep them as is and throw shoes in there:

kitchen cabinets as mud room bench

So anyway, I had that area in the middle of the two cabinets to fill. It just so happened I had a piece of scrap wood that fit in exactly – YES! But I couldn’t figure out how to secure it in there. I couldn’t get my nail gun in between the cabinets to nail at an angle, and the wood had just a smidge of space on the sides so wood glue wasn’t going to hold it well enough. I could have used the long screws through the frames of the cabinets but didn’t want to risk splitting them.

So I sat and stared at it for awhile and came up with an idea. I cut more scrap wood that I nailed into the cabinets (there was a little lip I could nail into – I put arrows to show what I’m talking about) and then just placed my scrap filler piece on top of it:

filling space between cabinets

To give the bench even more stability I added another scrap piece to the back of the bench as well, as you can see above.

THIS is my favorite part of a project like this. I love sitting there and trying to figure out a solution and using what I already have to make it happen. It’s like a puzzle for me and I’m so in my element when I’m doing something like this. Love it!

So this is what it looks like from the front – still a mess but when I’m done with it it will look much better:

mud room bench with kitchen cabinets

If I can’t get it smooth with putty and sanding, I’ll just put some trim over it to hide it.

So that was it for the bench! When it was done I started on finishing up the beadboard around the nook area. I’ve finally found a fool-proof way to get a good cut around my outlets. I’ve always used a jigsaw and still do for some of it, but I can’t cut a straight line with that thing to save my life. So now, I trace around the outlet cover:

cutting beadboard around outlets

Then hold the beadboard up and mark where my cuts will be. like always:

cutting beadboard around outlets

You want the cuts to be under your outlet plate so they aren’t seen.

Then I used the jigsaw for the smaller cuts, but then hold up a straight edge and score the wood with a razor for the longer cut:

cutting beadboard around outlets

I usually do it on both sides of the wood, you don’t have to go that deep. Then I use my wrench to grab the wood and snap it off:

cutting beadboard around outlets

It works EVERY time and gives me a nice, clean cut. It doesn’t have to be perfect since it’s under the plate anyway, but this way is just easier in my opinion. It’s hard to get the jigsaw in there to cut angles.

Like I said, this is still not done, but there’s not really that much left to do (it just looks like it:

building a mud room bench with cabinets

I need to get something to use baseboard across the front. What I got is too tall, so I need to either find something that fits or have it cut down. (I still don’t have a table saw so I’m really hoping I can find something.) I need to paint the bench of course, and then I’ll just need to get the butcher block I’m using as the bench seat. Of course the only place I know of to get that is IKEA, and that’s a two hour drive away. Not happening in all of this snow, but I’m hoping I can get over there later this week. I’m SO excited to get this done!

I need to paint the rest of the beadboard now too, but I’m trying to decide what I’ll do. The painted beadboard (instead of white) has given me a bit of a problem – do I do the wall of the bench in white? The bench will be white. Will it look weird having it all the deep color, then in white there? I don’t know what to do, I’ll have to think about it for a bit. That’s what I get for trying to be all different with a color on the beadboard. Hmmm…

Anyway, what looked like this on Saturday:

Looked like this as of Sunday:

building a mud room bench

Even though the bench is almost done there’s still a lot to do in the room – I need to put spacers in the outlets so they are flush with the beadboard, install the trim around the top of the beadboard, install the upper cabinets and then most likely shelves between them.

But having this part almost done makes me feel like I’m in the home stretch! So excited!

I’ll be sure to update you when I get the bench done. :) Have you attempted this type of project? I had grand plans for awhile but decided in the end but simpler would be better (and easier!).

To see how I’ve used kitchen cabinets to make built ins before, see our wall of bookcases in the dining room here, the ones we did in my son’s room here (a video of how we made them here) and a peek at the one in progress in the new laundry room here.


P.S. Go here to see the finished product!