Showing posts with label inspiration. Show all posts

The cutest countdowns

Friday, November 7, 2014 0 comments

Hey there everybody! Happy FRIDAY! Can you believe how fast the time is going? It was JUST August. It’s freaking me out.

Did you realize there are less than 50 days till Christmas? Let me repeat…LESS THAN 50 DAYS. Errrrybody freak out! OK, seriously, you won’t see much Christmas decor here till later this month but it’s become a fun tradition for me to share cute Christmas countdown ideas every year.

I share them early just in case you want to DIY one for your family – or if you just want to buy one and make sure it’s still in stock. ;)

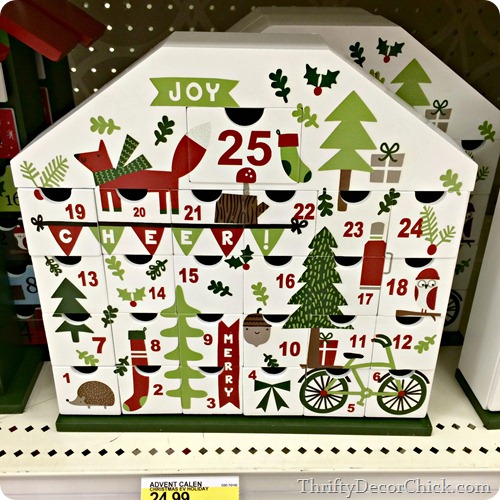
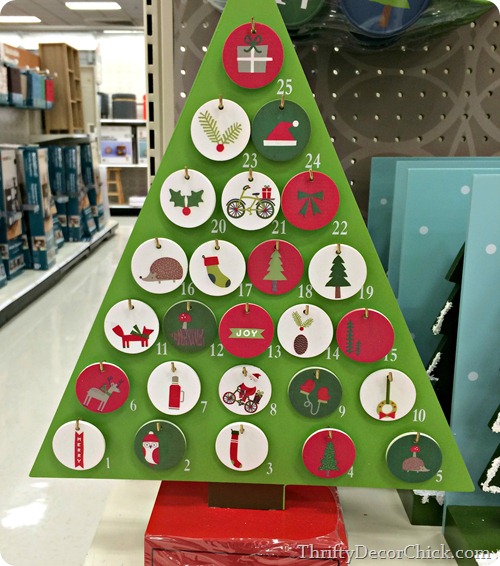
I was in Target last week and they had a bunch of countdowns and all were super cute:

target advent calendar

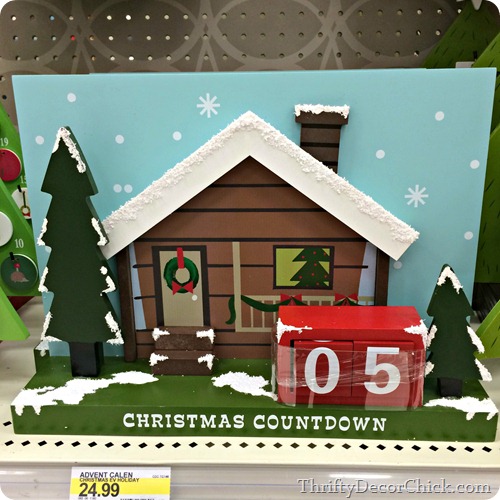
I thought this little house was adorable. And it’s an easy one – no stuff, no candy. Just a countdown. :)

This one was cute and the back of each ornament had an event or treat you can do with the kids:

tree advent calendar

I’d check them each out just to make sure you are willing to do said things. Ha!

And because little trinkets and candy are just fun – this one had little drawers just for that:

target advent calendar

They were REALLY small though. If you have more than one kiddo it may not work. ;)

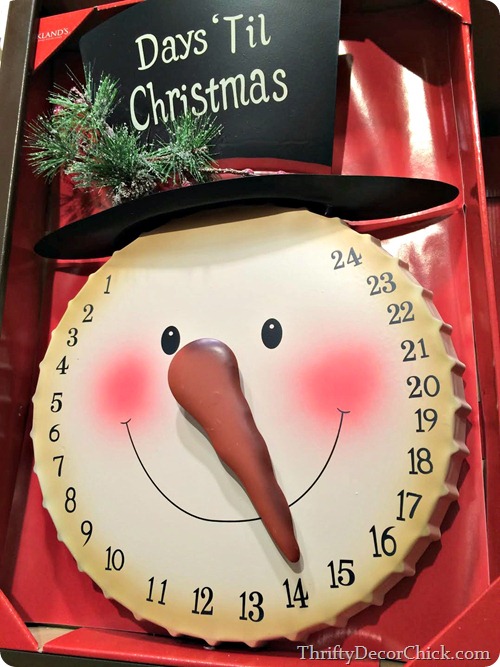
I saw this one at Kirkland’s weeks ago and had to share:

snowman advent calendar kirklands

I just think he is the cutest!

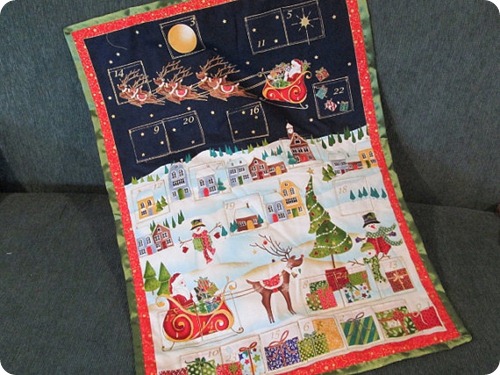
I found this beautiful hanging advent on Etsy:

fabric advent calendar(source)

There’s so many details to it! I just love this one – it reminds me of something similar I had as a child.

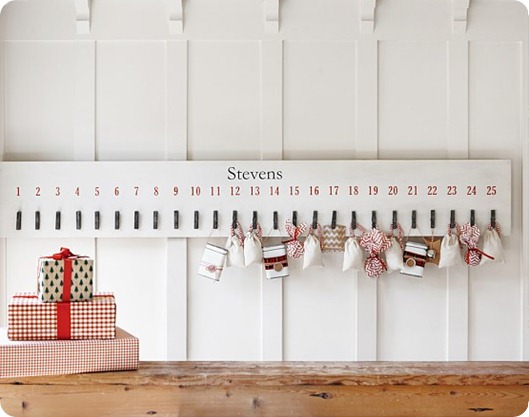
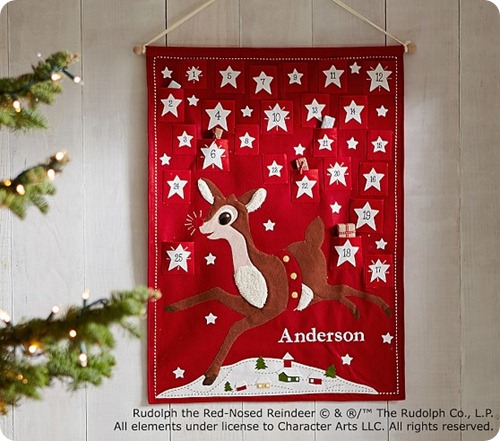
Pottery Barn never disappoints with their advent selection:

pottery barn advent calendar

(source)

Seriously…I’m going to make this one and save myself the $150. For real. But if you don’t want to DIY I’m not mad at ya – I think this is super cute and you could add whatever you want to the clips!

I loved this Rudolph one from PB as well:

rudolph advent calendar

So cute!

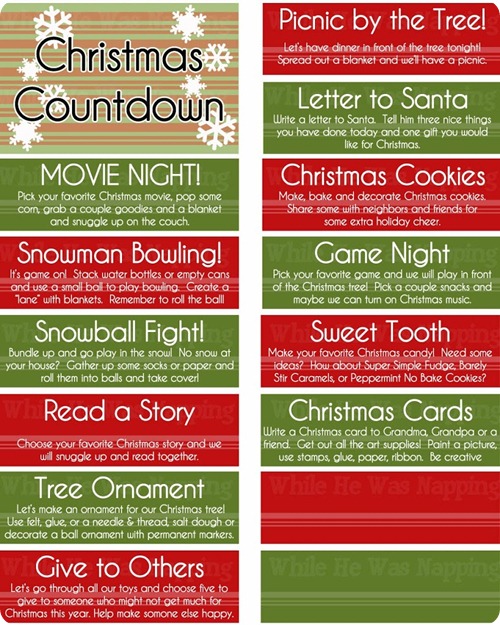
Let’s talk DIY versions, shall we? The easiest one by far is printing off fun projects/events for each day. Well the easy part is just printing and cutting them out – the hard part is in actually doing each event. ;) I loved these ideas you can print out and use:

WM-Kid-s-Activity-Jar-2blank1

(source)

The best part about these is you can determine what event goes with what day – so read a story could be a week night and movie night could be over a weekend. I love the idea of these – it’s all about being with family and making memories, right?

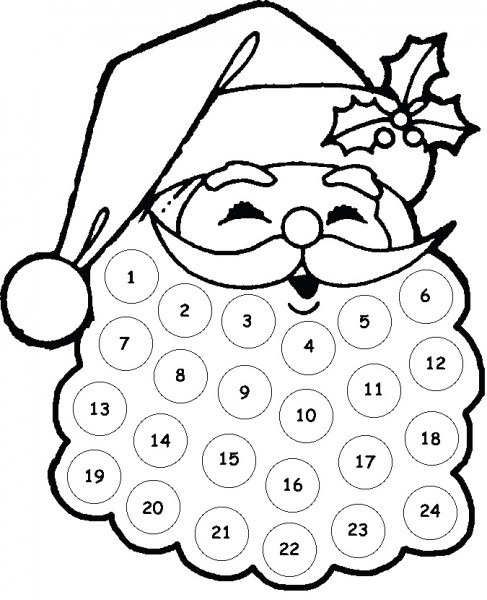
I’ve shared this idea before but it’s so dang cute I have to share a couple new versions. This one’s pretty easy too – just print out the Santa head and grab some cotton balls:

santa beard advent printable

(source)

That one you can print out and let the kids color.

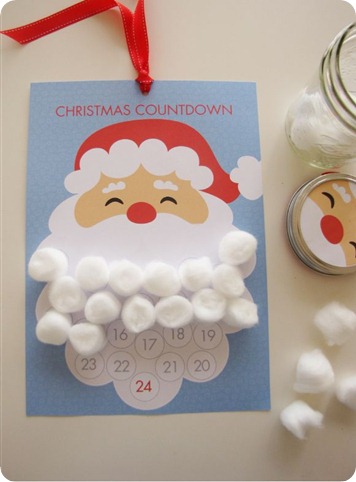
If you want one already ready to go check out this cutie:

santa beard advent printable

(source)

LOVE the Santa face on the mason jar as well. :) Super easy right? Print it out and pile up some cotton balls!

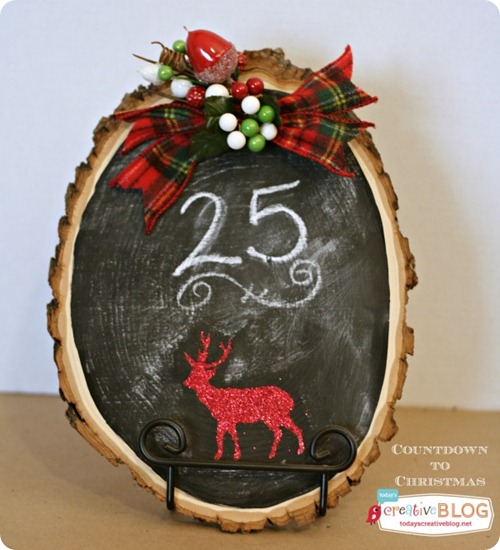
If you’re looking for a countdown that’s a little more decorative I love this chalkboard idea:

chalkboard advent calendar

(source)

It may not be as fun for the kids but you know, I haven’t met a child who doesn’t like any kind of countdown. The anticipation is half the fun!

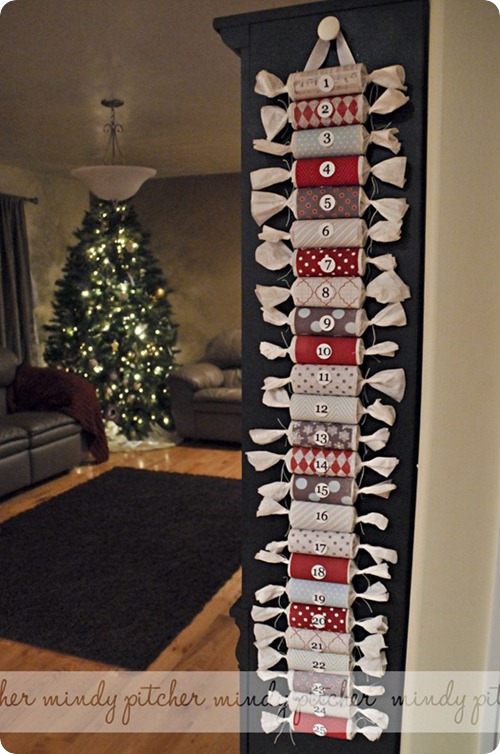
I think this idea is pretty and probably tons of fun for you the kids to open up everyday:

DIY roll advent calendar

(source)

She used toilet paper rolls but paper towel rolls cut up would work as well. Or just simply rolling some card stock to make the tube. I like that you can use festive papers to customize it too. The kids could help decorate it after you fill them up. :)

Years ago when the Bub was just a little babe I decorated these little boxes:
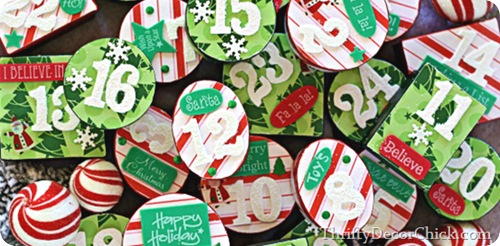
DIY Christmas advent boxes It was a labor of love – they took a while. But they are still doing great and we pull them out every year. I think they are so adorable!

We do a mix of treats and things like “drive around a look at Christmas lights” kind of things. Every year I plan on attaching them to something but I kind of like that we can put them out anywhere:

advent box craft

I gotta say…looking at these gets me excited. :) :) We are Christmas nuts around here so it’s hard to wait!

Do you have an advent calendar? Have you ever made your own? You can see more of my advent posts from years past here, here and here for more inspiration. Have a wonderful weekend!
A window seat in the kitchen!

Thursday, October 23, 2014 0 comments

My dream is realized people – or it will be soon. For YEARS I have wanted a window seat in our home. I’ve gotten googly-eyed over beautiful photos, daydreamed about it, really dreamed about it (sad, I know)…the love is deep and true.

And we’re finally getting one. Or will be when I build it – but I’ll be able to build it, yay! I could pee my pants with excitement my friends. Pee. my. pants. Very long story short – we thought about adding on to our house, the quotes were ridiculous, we decided to knock down a wall instead and then perhaps still expand our bay window area:

bay window in kitchen

That’s when we thought the kitchen table would still stay there, but we quickly realized we were going to have way more space than we thought so the table moved over to where the sofa used to be.

The kitchen renovation will be next year (and it will probably last all year) but the new open space gives us all kinds of fun options in the room, including expanding the kitchen island.

We decided pretty early in our renovation that expanding the kitchen just isn’t needed with the new layout. But we did decide to go ahead with changing a few things that we planned from the start – the double window in the family room/kitchen will be changed to double doors. Since we don’t need two doors within feet of each other my wheels started turning and the bay window getting a little change up so that I will be able to get my DREAM WINDOW SEAT. Whoot!

I will be building it myself so I’ve been researching different looks and plans. It’s not really hard to do but I’ll need a table saw for sure.

Although I’m not picky and love just about any window seat, I’ve been searching those specifically built into bay windows. I haven’t decided if I want it to curve with the window or just go straight across:

DIY window seat

(source)

Isn’t that gorgeous? Ack!!

Heather’s turned out beautifully too and she shares the steps to their process:

DIY window seat

(source)

I don’t know yet if we’ll add a small round table or not – I don’t know if we’ll have room when the island is expanded. I’ll have to wait and see.

Here’s another version straight across:

window seat in kitchen

(source)

I love the little plant shelf behind it – I couldn’t believe I found one like that because I’m hoping to add something similar. Not sure it will work but I’m going to see!

Of course storage will be a MUST. I think I’d rather have drawers than a pull up seat – haven’t decided just yet. If we don’t have a table in front of it I guess pulling up the seat wouldn't be a big deal at all. We’d get better use of all that space that way too. I think I just talked myself out of the drawers. :)

I do like the idea of kind of curving it around too, like this:

curved window seat kitchen

(source)

Our bay window is pretty deep so I think we could do this.

Here’s a step by step tutorial on building a curved bench in a bay window:

how to build a window seat

(source)

When you break it down like that it doesn’t look that hard!

Our space isn’t this deep but this one is gorgeous too:

bay window seat

(source)

Lighting is a whole other thing – I’ve always wanted lights in that window area and I’ve come up with a solution. It involves these from Lowe’s:

coastal outdoor sconces

I think it will look pretty awesome and be wonderful additional light. (They are way cheaper in the store by the way.) Stay tuned!!

This one isn’t the shape of our window at all, but it’s what we were going to do if we added on. I’m including it because it’s just so pretty, I love it all:

built in banquet kitchen

Sigh. I can’t believe it’s finally going to happen. Happy happy joy joy!

I don’t know if I’ll get it done yet this year, but it may have to become a priority after the family room is done. That I will be sharing next week by the way, come hell or high water. :)

Do you have a window seat in your home? Do you love them? If you’ve ever built one feel free to link to it in the comments!

Follow along with me on Instagram to see the progress on this spot over the next few days!

Showing off Jenna Sue

Tuesday, October 14, 2014 0 comments

OK everybody. Get ready. Sit down, busy the kids, turn off your phone. Cause I’m about to keep you occupied for hours. HOURS people.

I am introducing you to my latest blog crush today and if you are like me you’ll be hooked as well. This girl is good. I’ve been reading Jenna Sue’s blog for a while now and I keep going to back to read older posts because I love her style so much. Finding a blog that I love is so. much. fun. I am excited to share her with you today because I think you’ll love her home too!

Let’s start at the foyer of her California home, shall we?:

black interior doors

All I have to say is white planked walls, wood accents and a black door. That is all. No other words needed.

Jenna Sue runs her business from home and has pretty office with beautiful view. I love how she’s organized the space:

wood crate hanging organization

She has a lot of supplies but everything is put together so well! My drawers stuffed with crap are looking mighty sad in comparison. ;)

OK. The kitchen. You have to see the before pics to appreciate it. I take that back – you can appreciate it just fine as it is: built in bench kitchen

I love built in anything and but benches make my heart sing.

You’ll notice planked walls everywhere – the ceilings with wood beams as well. It adds so much warmth to her house:

gray cabinets kitchen

I now want to plank ALL THE WALLS in our house.

I knew I would love her style when I saw the dark gray wall behind her bed. :) Love the mix of rustic and traditional in her master bedroom:

rustic bedroom planked walls

Love those bedside sconces!

Her family room is undergoing a renovation right now but this corner of the room is looking fantastic:

white planked walls

I’m usually a dark hardwood girl but those floors are so pretty! They serve as a perfect backdrop to her neutral decor.

I love the fall touches she’s been sharing lately as well:

natural wood cabinet

You can see how she made over that cabinet here.

And last but certainly not least, you HAVE to see her deck:

outdoor chair no arms

Seriously dreamy. I mean, the views?

Ridiculous. Love it!:

modern outdoor furniture deckSo there you go! I told you her house was awesome. I love Jenna Sue’s style and am happy to share her with you today.

Blogs are awesome. :) So much free inspiration – it’s truly amazing the talent out there.

When you do what I do

Tuesday, September 9, 2014 0 comments

The reason I blog (and love blogging) is to inspire others to try to do what I do. Not only for women to experiment with a tool and try something out for themselves, but just for everyone in general to love their homes and make them more “them” -- no matter what home they’re in.

So I LOVE getting photos from readers sharing the projects they’ve done that were inspired by one of mine. Of course it’s not always the exact project – I’d be thrilled if you hung a picture on the wall for the first time. Go ahead and send me a picture of that too. ;) But these are some that were inspired by specific projects I’ve done.

My DIY tufted headboard is king-sized and cost less than $100 to make:

DIY tufted headboard

I don’t think I have a full shot of it against the dark gray wall and I’m not going to make my bed this morning to take a picture so this is best I’ve got:

gray paneled wall

;) Have I mentioned I hate making the bed?

Mario used the tutorial and created this navy and white beauty for less than $60!:

DIY headboard instructions

Gorgeous! It’s hard to see but it’s tufted with navy buttons too – so pretty.

Lauren wrote all the way from Australia and shared her gorgeous version:

modern tufted headboard

I’m going to see if I can get a better shot from her but I had to share it because it looks SO good. The rectangle shape and all those tufts give it a more modern look.

I hear from a lot of folks who use my bookcases made with kitchen cabinets as their inspiration:

DIY built in bookcases

Vicky’s husband made a similar set and they turned out so well!:

DIY built ins with beadboard

I LOVE the shelves trimmed out in the same stain as the butcher block and the beadboard on the backs. You can see more of their version on her blog here.

Tammy emailed me with her version recently and I fell in love with it. So many homes have the fireplace in the middle of the wall like hers:

white brick fireplace

Using the cabinets as bases they created a really beautiful wall with lots of storage:

fireplace with built ins

She did such a lovely job decorating too!

A lot of you get the guts to tear your carpet off your stairs after you read how I did the same to mine: painted risers stained treads stairs

Those are some of my favorite emails. ;) Jen has a very similar stair layout to ours and they look SO good: stained stairs

Oh my – I will never tire of painted risers and stained treads. Classic.

She did the same wall treatment as mine on her big walls that are hard to figure out:

molding squares on wall

She sent this to me near Christmas by the way – she’s not decorating this early. At least I don’t think. ;)

Spray paint is one of the EASIEST and cheapest ways to update fixtures, accessories, whatever. Lynn saw how well the spray paint held up on my outdoor light fixtures:

spray painting outdoor lights

And decided to try it out on her shower fixtures! Whoot!!:

spray painting faucet

She sanded, primed and then sprayed them oil rubbed bronze and said they are holding up well – at least as long as it had been since she emailed me. Lynn said she also let them sit out in the sun to “bake” after she sprayed them – good idea. I love how she used the rock tiles in her shower too!

Goodness, this kind of stuff makes me all puffy and proud for you all. LOVE it. I try to keep track of your projects that you send but if you’ve emailed me one and I didn’t share it, let me know!

Have you tried something inspired by a blog? If you have be sure to let them know – it’s such a huge compliment to hear from you! :)

Ready for fall!

Tuesday, September 2, 2014 0 comments

Hello my friends!! It’s SEPTEMBER! I’m so happy – it’s the best time of the year. Well, it will be the best time of the year soon, when Mother Nature starts acting right and cools it with the humidity.

We have a couple more really hot days this week and then I’m hoping we’ll be home free – I see nothing but temps in the 70’s in the forecast after that. Whoot! And yes, I KNOW…fall doesn’t start for another 21 days. But the start of September is official enough for me. I’m burning a pumpkin candle right now to celebrate.

Because I’m so excited about this time of year I decided to share some of my favorite fall projects from years past – looking through these makes me all cozy and lovey and make me want to go put on a sweater and some boots.

I’ve made quite a few fall wreaths over the years but this simple pumpkin wreath is one of my favorites:

fall front porch

It’s crazy easy – stick the (half off!) fall fillers from Hobby Lobby into the wreath and you’re done.

I kept it over our fireplace in the back one year too:

fall pumpkin wreath

I LOVE the red and orange colors together. I don’t use these colors in our home any other time of the years but I LOVE them right now.

This felt wreath took forever, not gonna lie. But I love the texture:

felt fall wreath

Next time I’d like to do it in reds, browns and orange as well – but it will be awhile before my fingers can face all that cutting again. ;)

And my all time favorite wreath was also my cheapest -- this one was made with dollar store leaves:

dollar store fall wreath

I made it four years ago and just had to get rid of it a few months back. :( It held up pretty darn well considering it was put into storage every year! I don’t know if the dollar store still carries these pretty leaves but I hope so. I’d like to make another one.

I always pick up a bunch of tiny pumpkins to decorate with this time of year. I shared a few quick and easy ideas heredecorating with pumpkins

They are cute, cheap and you don’t have to store them year to year!

I’m still in love with the fall tablescape I put together last year:

fall tablescape

Those flowers are my Pee Gee hydrangeas – they start out white in the summer and are just now starting to turn a light green. They’ll be this gorgeous greenish pink soon:

fall entertaining

LOVE them.

Speaking of tablescapes – my DIY wood trough-thingy is awesome when it comes to decorating for any season. Drop the stuff in, fluff and you’re done:

wood fall centerpiece

I think it would be beautiful in the middle of a dining room table!

Last year I got crafty with some fall scrapbooking supplies and created some fall art:

fall leaf printable

You can download that printable to use yourself here.

Our fall mantel was simple and pretty last year – it didn’t scream fall but that’s why I loved it:

candy corn bunting

You can see how I made that candy corn bunting here.

I made a few other candy corn crafts years back too:

candy corn crafts

I don’t like the taste of them, but I think they’re darn cute for decorating. ;)

I LOVE decorating outside this time of year too. It’s the simplest decorating ever – pumpkins and mums and a some candles and you’re done:

outdoor fall decor fall table

pumpkins and mums outside

Oh my goodness, so lovely. I’m hard at work in the family room so I can start to focus on more fall decor in the house! I’m hoping to have the fireplace done by the end of the week – it’s a beast and is a ton of work. But I think it’s going to look amazing!!

Are you ready for fall? The older I get the more I love summer, but now that the kiddo is back in school the lazy days of summer are long gone for us. So I say, BRING IT ON. :)