Showing posts with label Christmas. Show all posts

The cutest countdowns

Friday, November 7, 2014 0 comments

Hey there everybody! Happy FRIDAY! Can you believe how fast the time is going? It was JUST August. It’s freaking me out.

Did you realize there are less than 50 days till Christmas? Let me repeat…LESS THAN 50 DAYS. Errrrybody freak out! OK, seriously, you won’t see much Christmas decor here till later this month but it’s become a fun tradition for me to share cute Christmas countdown ideas every year.

I share them early just in case you want to DIY one for your family – or if you just want to buy one and make sure it’s still in stock. ;)

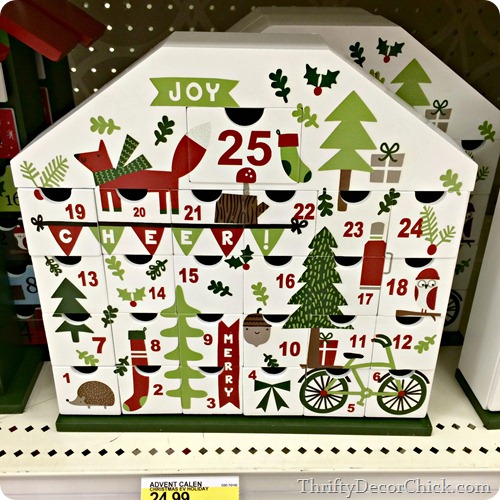
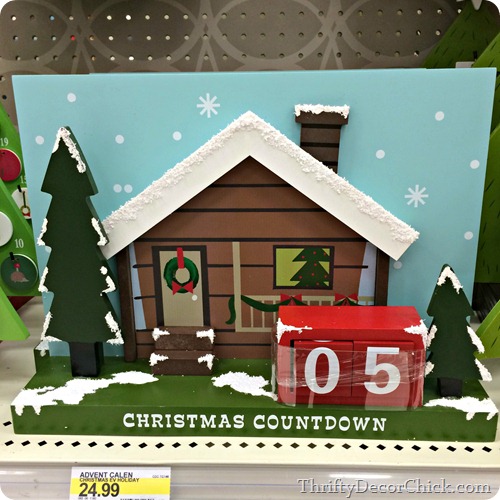
I was in Target last week and they had a bunch of countdowns and all were super cute:

target advent calendar

I thought this little house was adorable. And it’s an easy one – no stuff, no candy. Just a countdown. :)

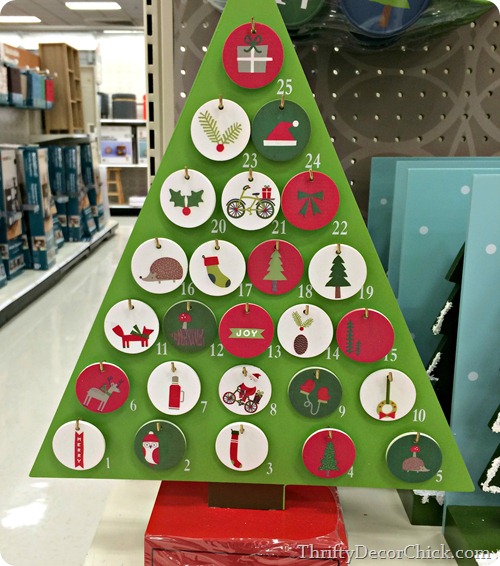
This one was cute and the back of each ornament had an event or treat you can do with the kids:

tree advent calendar

I’d check them each out just to make sure you are willing to do said things. Ha!

And because little trinkets and candy are just fun – this one had little drawers just for that:

target advent calendar

They were REALLY small though. If you have more than one kiddo it may not work. ;)

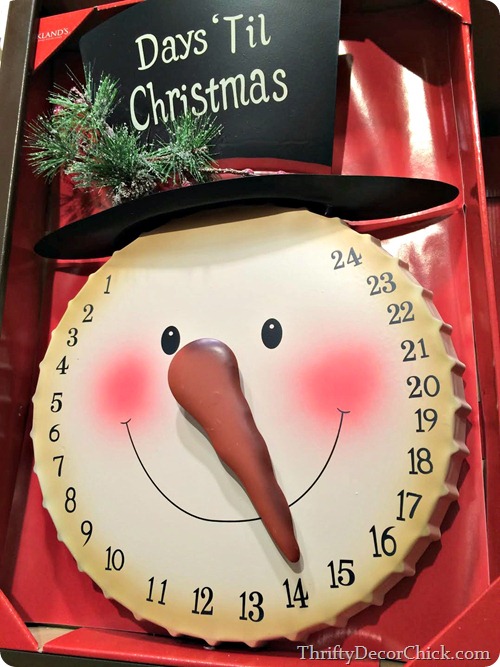
I saw this one at Kirkland’s weeks ago and had to share:

snowman advent calendar kirklands

I just think he is the cutest!

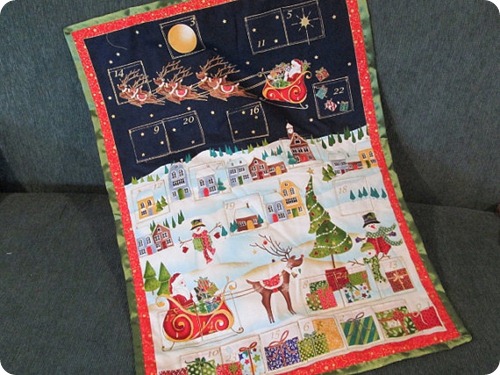
I found this beautiful hanging advent on Etsy:

fabric advent calendar(source)

There’s so many details to it! I just love this one – it reminds me of something similar I had as a child.

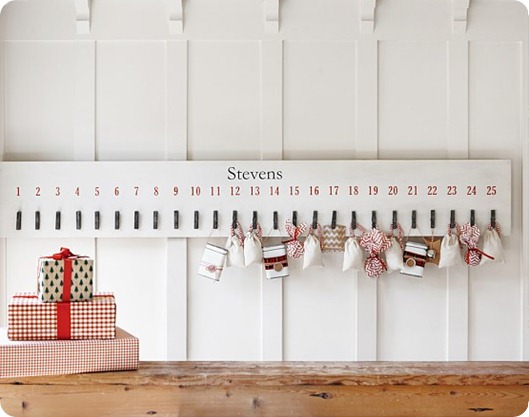
Pottery Barn never disappoints with their advent selection:

pottery barn advent calendar

(source)

Seriously…I’m going to make this one and save myself the $150. For real. But if you don’t want to DIY I’m not mad at ya – I think this is super cute and you could add whatever you want to the clips!

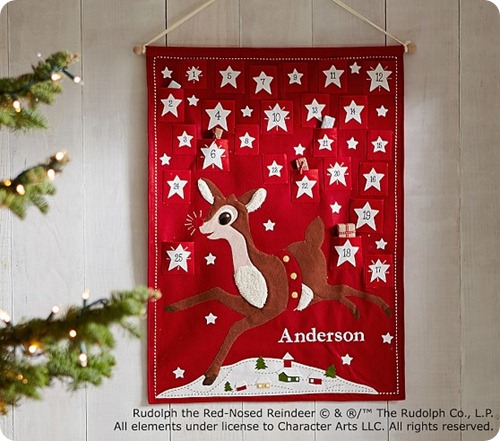
I loved this Rudolph one from PB as well:

rudolph advent calendar

So cute!

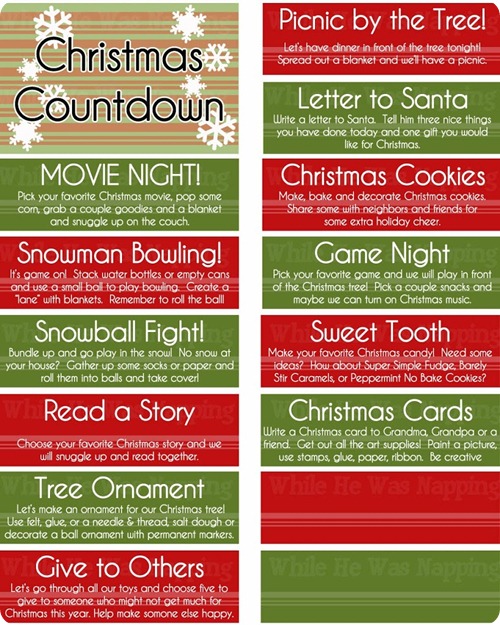
Let’s talk DIY versions, shall we? The easiest one by far is printing off fun projects/events for each day. Well the easy part is just printing and cutting them out – the hard part is in actually doing each event. ;) I loved these ideas you can print out and use:

WM-Kid-s-Activity-Jar-2blank1

(source)

The best part about these is you can determine what event goes with what day – so read a story could be a week night and movie night could be over a weekend. I love the idea of these – it’s all about being with family and making memories, right?

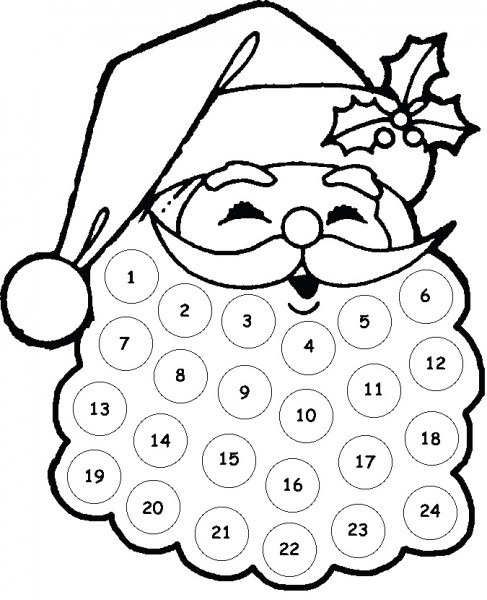
I’ve shared this idea before but it’s so dang cute I have to share a couple new versions. This one’s pretty easy too – just print out the Santa head and grab some cotton balls:

santa beard advent printable

(source)

That one you can print out and let the kids color.

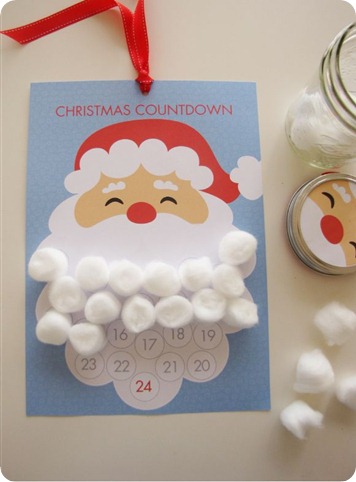
If you want one already ready to go check out this cutie:

santa beard advent printable

(source)

LOVE the Santa face on the mason jar as well. :) Super easy right? Print it out and pile up some cotton balls!

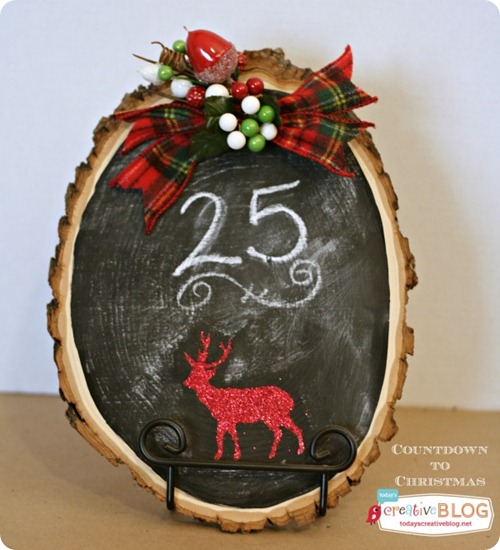
If you’re looking for a countdown that’s a little more decorative I love this chalkboard idea:

chalkboard advent calendar

(source)

It may not be as fun for the kids but you know, I haven’t met a child who doesn’t like any kind of countdown. The anticipation is half the fun!

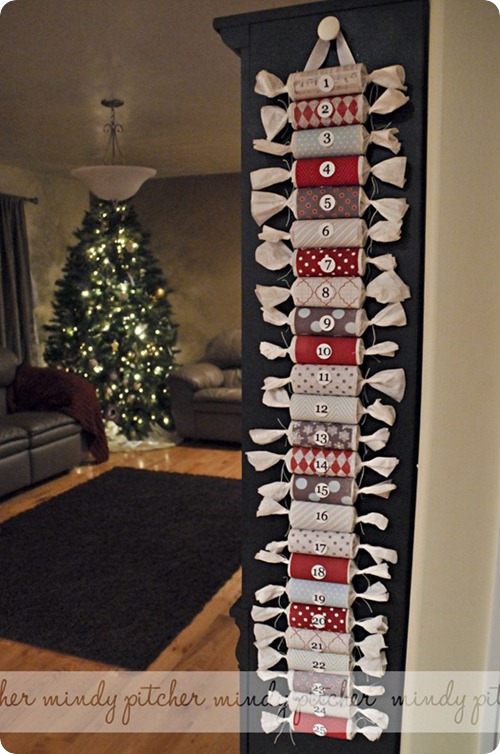
I think this idea is pretty and probably tons of fun for you the kids to open up everyday:

DIY roll advent calendar

(source)

She used toilet paper rolls but paper towel rolls cut up would work as well. Or just simply rolling some card stock to make the tube. I like that you can use festive papers to customize it too. The kids could help decorate it after you fill them up. :)

Years ago when the Bub was just a little babe I decorated these little boxes:
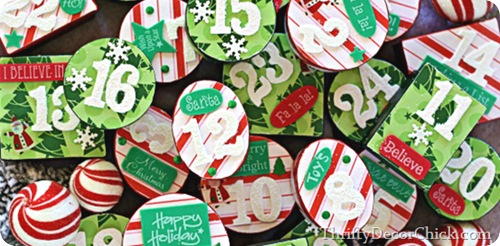
DIY Christmas advent boxes It was a labor of love – they took a while. But they are still doing great and we pull them out every year. I think they are so adorable!

We do a mix of treats and things like “drive around a look at Christmas lights” kind of things. Every year I plan on attaching them to something but I kind of like that we can put them out anywhere:

advent box craft

I gotta say…looking at these gets me excited. :) :) We are Christmas nuts around here so it’s hard to wait!

Do you have an advent calendar? Have you ever made your own? You can see more of my advent posts from years past here, here and here for more inspiration. Have a wonderful weekend!
Christmas Party, 2013!

Wednesday, December 18, 2013 0 comments

Well it’s a week away! And I’ve finally started my shopping. My wallet is begging me to stop already. ;)

As I mentioned yesterday, this is the sixth year I’ve hosted this holiday linky party – I’ve done it since the first Christmas I was blogging. Awww. Pretty cool, I must say.

treeparty2013

We have a total of four trees in the house – technically. The fourth is a small one I put in our bedroom, with intentions of decorating with DIY ornaments every year. I always run out of time. So we just use it as a pretty nightlight. :)

The other three are decorated though. The biggie is the 12 footer in our living room. But first things first -- I’ve had quite a few of you ask how week keep our cats out of the trees. Well…


We don’t. :) It’s something I’ve long since given up on. They don’t chew on anything, they just like being in there and playing with the ornaments. You may notice that the bottom of each of our trees is sparsely decorated and that’s not because I have a toddler who takes them off, but three cats instead. I gave up on trying to put them all back on about 25 ornaments ago. I’ll be finding them till next summer.

When I took those pics of our kitten in the tree I scooted him out and started taking pictures again…only to see the tree still moving. I then found another cat SLEEPING in the bows of the tree. Seriously. Sleeping.

Anyway, no good advice here. :) (Although a reader mentioned a thing you can get at the pet store that shoots a puff of air out and deters them from going under the tree – may have to try that.)

Let’s talk about the pretty stuff now!

I’ve always used gold and red on this tree but wanted to try something a little different this year. I’ve been thinking of trying a more “natural” look – but with a 12 foot tree there’s no way I’ll be able change it all out all in one year. So I started by adding a new color this year to see if I liked it – brown:

My sis was all, “Ewww. Brown??” And I was all, “Trust.”

Honestly I wasn’t sure how it would look either. I got a container of brown bulbs at Hobby Lobby for 40 percent off and then used a few larger sparkly ones I’ve had for years.

I stood back after we added some and actually quite loved it. It adds a kind of deepness to the tree – it’s hard to explain. It’s actually really pretty:

While at Hob Lob I also picked up a few packages of that tulle stuff – it’s sparkly and it comes in really wide nine foot sections. But I’ve always cut them up so they go further:  IMG_7419

That way I get three nine foot sections out of each one instead of one. They are still really full and fluffy.

OK, funny story about this monster tree. We got it a few years ago at Lowe’s – they still have it, it’s just more expensive now. I really do love the tree, it’s great quality and easy to assemble.

Soooo, we got a 12-footer because my husband wanted to. The man could care less about everything else I do in this house, but he wanted a huge tree. HE LOVES IT. I love it too but I feel like I’m risking my life to decorate the top. So a couple years ago we’re putting it together and accidentally put the second from the bottom section of the tree on the stand first, and it still looked great. It just wasn’t quite as tall and full at the bottom.

And when I say not as tall, I’m talking a foot shorter. But he really wanted the whole thing up so we fixed it, even though you seriously couldn’t even even tell! Fast forward to this year – my sister is helping me put the tree up since he was out of town and we did the same thing again – using the wrong bottom piece (I need to label these things) and I was kind of over it so I said let’s leave it. It’s still beautiful and tall and he won’t even notice.

Husband gets home a couple days later, looks at the tree, goes on with his business, then later we’re heading to dinner and out of nowhere he says, “Why is the tree smaller this year?” HOW? Then my stepdaughter came over a few days later, looks at the tree and asks, “Why does the tree look smaller this year?”

People. It’s still almost 12 feet tall. They both noticed. I just couldn’t believe they both noticed. I can’t tell to save my life. Hilarious! The man and daughter love the tall tree!

You’ll notice my furry friend nemesis in this shot:

Like I said. I do love the tree, really I do. It’s huge, and it’s spectacular:

tall christmas tree Lowe's

We always put the “kid” tree upstairs – we have a lot of his/family ornaments on the big one too, but this tree is just dedicated to pure fun. We get a Hallmark ornament every year in July the fall:

hallmark ornament hallmark ornament hallmark ornament hallmark ornament   

That last one is my favorite – we found it this year and it’s PERFECT, since we went to Disney this year (the first trip for both my son and I). The castle is my favorite part of the park and it lights up and the fireworks go off on the ornament. It’s wonderful. :)

I’ve had a real tree every year of my life up until we got the beast a few years ago. There’s pros and cons to each one, real and fake, but overall I do like the fake for ease of use. But goodness, I missed the real tree smell. So we decided to do a (small) real one for the kiddo’s tree every year from now on.

We always go with a Frasier Fir, my absolute favorite:

Frasier Fir

Since it’s smaller I’m hoping the mess won’t be too bad. We’ll see about that. :)

Finally, I purchased a green flocked tree for our newly finished basement last year:

flocked fake tree

I fill it with white, blue and green ornaments and I LOVE it. I’m super happy with it – the flock doesn’t fall off like crazy and it’s just a beautiful tree overall. I got it from WalMart and I noticed they had them again earlier this year. I say it’s my favorite but they’re all my favorites, depending on my mood. :)

OK, now it’s time to see your homes/trees/decor/whatever! Everything goes this year, not just trees! Have fun and please visit and comment on a few of those linked up if you have the time.

If you are new to linky parties and would like to add a link, you’ll just want to go to the title of your blog post and “copy” it by right clicking on the title – then paste that code into the box that asks for the url. You are welcome to use my button in your post, or a link back is always appreciated.

Have a great one and enjoy!


Party time, excellent!

Tuesday, December 17, 2013 0 comments

Hey hey! It’s about that time again! Did you think I’d forget? Pushaw. No. way.

This is the 6th year I’ve hosted my Christmas Tree Party here on TDC – pretty cool right? Kind of crazy.

This year I’m changing it up a bit – pretty much anything goes. Well, Christmas-related anyway. It’s still a tree party, but if there’s a picture of a Christmas tree in the post, it’s good. Got a tree in your front yard? You’re golden. Like trees? Well, then join in. All holiday decor is welcome. :)

For those just looking, you can sock away ideas for next year (helloooo Pinterest!) or maybe implement something fun before the holiday.

Here’s the graphic you can use in your post if you’d like: 

Christmas Tree party, Thrifty Decor Chick

I will do my best to have the post up by 11 a.m. EST. If you’d like to reminisce till then, you can see the 2008 party here, 2009 here, 2010, 2011 and then last year’s here.

For those of you new to a blogland “party” – it’s simply a way for bloggers to link up their projects and ideas in one spot. So you’ll have a bunch of beautiful pics to check out. Plan some free time – it sucks you in. If you’re a new blogger I’ll explain a little more on linking up tomorrow.

And I’ve updated all the links to the Christmas Tour of Homes too:

blogger Christmas tourYou can see all of those beautiful homes at the end of the post here!

Hope to see you back here tomorrow! :) 

Easy Christmas paper craft

Friday, December 13, 2013 0 comments

Guess what?! I’m a grandma. :) My stepdaughter had her precious, sweet, beautiful boy yesterday and we are over the moon for them. It was so emotional, more than I even thought it would be, to see him and touch him and know he is finally here. I only have a few pics since it was a crazy day but I want to wait to ask to her before I share any on the blog. (It didn’t seem appropriate to bring up my blog yesterday. Bigger things happening.) I’m sure I will (he’s too precious not to share) but it’s Mama’s decision to make.

I recently put together an ornament craft for my friend Kari’s blog but wanted to share it here too in case you didn’t see it. There seems to be a Christmas theme on the blog this week so I figured I’d just go with it. If you read this over at Kari’s you can just fast forward to see what I did with them all at the bottom. :)

This one is easy folks. There’s very little talent involved here, just good old gluing skills. The only part that takes time is the cutting, but I have a solution for that too.

So here’s the thing – I love using paper for holiday crafts. I do it at Halloween quite a bit (bats!) and I’m always thinking of ways to do more with it at Christmas. I love paper crafts for two reasons – you can get really creative with all the fun papers out there and they are SO easy to store since they barely take up any space. (You just want to be a little gentle with them.)

For these DIY ornaments I gathered some festive paper:

paper ornament craft

The red and cream are the textured cardstock – my favorite! Love that little extra detail.

To do this you’ll need “petals,” so I just free-handed one and then traced it to make a bunch more:

ucreate2

These do not have to be perfect! Is a flower petal ever perfect? Do they all match exactly? No. That’s why we love them. :) Once you get one petal you like you can just trace it over and over.

The trick to cutting out a bunch at a time is to layer your sheets of paper. So I would cut two or three strips out of one piece of paper and then lay the outlined part on top, then cut them out. Does that make sense? So instead of cutting out one each time I was cutting two or three. It helped a ton!:

paper ornament craft

Then you’ll want to do the same thing again, this time with slightly smaller petals. You won’t need nearly as many of these, probably half.

To start building your flower you’ll want to have something as a base you can glue on to. I just cut circles out of a paper plate, but anything will do:

paper poinsettia craft

Just make sure it’s not too big so that it shows behind the petals.

Then start making your flower! I used hot glue but regular glue would work fine. You just need a little dab on the back to make it work. I actually looked at photos of poinsettias to see how many “petals” I should use:

paper poinsettia craft

I put six larger ones on the bottom and then three on top. The middle is where I got creative:

paper poinsettia craft

I ended up using three jewels on them instead of one, to look more like a real poinsettia bloom.

I only used one piece of each color paper and got eight large flowers:

paper poinsettia craft

You can see here how I used a paper punch and scrapbook paper for the centers on some of them:

ucreate9

I kind of pulled the petals up on each one as well to give them some dimension – not a fold really, just a slight bend. I’ve folded the petals down the middle before to make them before and that makes them look even more authentic. But with this many it was going to take forever, so I went easy.

I added some little glittery jewels I found in the scrapbook area to the others:

paper poinsettia craft

Those are my favorites. I always say – I’m a non-scrapbooker who LOVES the scrapbook section. ;)

The best part? All of these were just a few bucks. The paper was less than a dollar (half off) for three sheets and the sparkly jewels were a few dollars with coupons.

OK, so my favorite thing about these is you can do whatever you want with them – to use them as ornaments just tuck them into the tree, no string needed! You could hot glue twine or ribbon to the back and turn them into a garland. Stick tape to the back and put them on windows, mirrors, whatever. Or make a bunch and create a paper wreath with them – the possibilities are really endless!

I ended up sticking them inside the Goodwill shadow box I first showed you here. I turned it on it’s side and it’s instant holiday art. :)

paper ornaments as art

I love these things – they are so versatile and they take up next to zero storage space! Major score.

I’m off to squeeze the baby some more right now and then I’m hosting our annual ornament exchange tonight with my girlfriends. This girlfriend needs to clean her house. :)

Hope you have a wonderful weekend, stay warm!

Christmas Home Tour!

Wednesday, December 11, 2013 0 comments

blogger christmas home tour

Hello all and welcome! If you are coming over from Donna’s tour, hello! And if you haven’t been to it yet, be sure to check it out. So much inspiration!

OH my goodness. I gotta say, this wore. me. out. When I decided to do this Christmas blog tour I was all, how fun, I’ll share my holiday decor! And then yesterday I was all, CRAP, I have to clean my whole house!

But is wonderful to have all of our Christmas decor up and done! I took a load of pics, so bear with me people. Here’s the thing – every year I get rid of more holiday decor (don’t cry for me, there’s a ton to start with) because I just don’t wait to store it all anymore. This year I’ll get rid of a bit more, but overall we have good storage for it all now so I’m not as focused on getting rid of much. I have created a new rule of one item in, one out though.

The older I get the less I want to pack up half of my house to decorate for Christmas. I don’t mind a little bit, but years ago it was like we were moving back in in January, I had to put so much back where it belonged. So, my point is, I try to use what we have an add Christmas touches to it. It’s not always in your face Christmas, but it’s fun and festive and we love it.

I’m not going to talk too much, so if you half any questions let me know and I’ll answer them in the comments. We’ll start with the kiddo’s spaces:

book nook

I had to dress up the book nook a little. :)

santa hat craft 

Every year the Bub and I set out his Christmas village. Some of it is Goodwill finds from years ago and the rest we have picked out – one a year. It’s his absolute favorite thing to set up at Christmas:

Christmas village

The cats regularly walk through the town knocking down trees and people, it’s just general havoc. :) We turn it on at night and the Bub falls asleep to the lights. It’s lovely.

The powder room got a redo this year so I had to add a few holiday touches:

  preserved boxwood wreath 

white wood planked walls

My only holiday decor purchase this year was an expensive one. Yowza. I’ve wanted the Willow Tree nativity for years and I finally bit the bullet.

It is so pretty:

willow tree nativity

Up till now we’ve only had the Little People nativity so this is a step up. :) I hope to add to it a bit every year.

I leave most of my accessories as is and just add to them. Greenery ALWAYS does the trick:

I just used pieces of Frasier Fir cut off our tree – just ask for scraps and they’ll give them to you! Keep them spritzed with water or just leave them – as long as you don’t touch them you won’t know the difference.

One of my favorite (and easiest!) additions this year is an idea I got from Ann Marie’s Instagram feed. I changed it up a bit to work for the frames above the sofa:

Easy Christmas art

I’ve had the frames up for two months without anything in them – I have a plan but I’ve obviously found more important things to do. ;) I think I’ll keep these print outs and put them up again next year! I think it’s so stinking cute.

I’ll share more about our trees next week (more on that later), but here is our BEAST:

That’s nearly 12 feet of awesome right there. We have a total of four trees in the house and this is the largest by far (by about five feet).

I didn’t do too much to the dining room -- we still have our old kitchen table in there so I put together a simple centerpiece: 

Simple Christmas centerpiece

Then I added some sprigs of greenery on half of the shelves:

DIY bookcases

And just a few touches of Christmas using ornaments:

DIY built in bookcases

And lights:

Christmas lights in jar

I had lights from IKEA (they’re years old, not sure if they still have them) that are teeny tiny and don’t burn hot, so I stuck them down in my vintage jar. It’s SO pretty, especially at night.

The kitchen got a few bits of Christmas:

Christmas in the kitchen

There’s my glittery reindeer, so pretty.

   fake snow

Dang it gets dark so early! I was running out of light. 

I got some simple white dot vinyl from my friend Shelley and went a little crazy with an idea she had:

Chalkboard with "snow"

It “snowed” on our chalk board and I LOVE it. How fun is that? I have one more thing to add to that wall that I will show you soon. :)

I shared our Christmas mantel hereChristmas mantel

And how I make my Christmas pillows on the cheap here:

placemat pillows

I went minimal with the rest of the family room:

DIY silhouette

wood box for decor

Dresser as entertainment center

I used my Ball jars (yeaaaah Ball State!) on the stairs and filled them with fake snow and a few small ornaments:

Christmas stairs

That fake snow is another staple this time of year!

Wood stairs, white risers

Of course my favorite time during the holidays is the night time. This is my view as I type:

tall chirstmas tree

This isn’t all of the decor and I still have a couple more projects I hope to accomplish, but this is most of it! As you can tell by the 200 pictures. :) I hope you enjoyed it and were inspired! NOW I can sit back and relax!

Next today head on over to Holly at Storywood Designs to see her beautiful home! Check out the others too -- I’ll update the rest of the tours as they go live:

Monday
Just a Girl
Nesting Place
Hi, Sugarplum
Tatertots and Jello

Tuesday
Life in Grace
A Thoughtful Place
Funky Junk Interiors

Wednesday
Thrifty Decor Chick
Storywood Designs
Decorchick
Southern Hospitality
Our Fifth House

Thursday
Sand and Sisal
A Place for Us
Songbird
Pretty Handy Girl 
Beneath My Heart
All Things Thrifty

Friday

I Heart Organizing
My Blessed Life
Emily A. Clark
Not Just a Housewife
Remodaholic