Showing posts with label before and after. Show all posts

November before and after!

Monday, November 3, 2014 0 comments

Welcome to NOVEMBER! What? I can’t even believe it. I gotta tell you – I’m SO excited about Christmas and I’m one of those who loves seeing the stuff out in the stores already. But I’m already feeling behind! My Instagram feed is full of holiday projects and decor already. It doesn’t help that everything I’m seeing is beautiful and cute and I want to make every single thing. :)

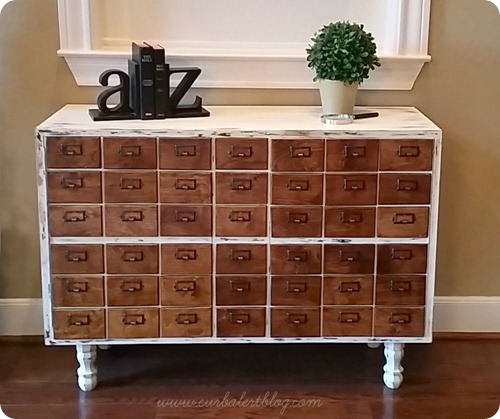
It’s time for another before and after link up! Before you check out the new links, I like to share a few that caught my eye from last month. Tami knocked it out of the park with this one – her knock off card catalog:

DIY faux card catalog

You won’t even believe how this one started out! (Hint: it wasn’t a card catalog.)

Here’s another brilliant project – Karen took a raised garden planter and turned it into a functional coffee table:

DIY wood slat coffee tableYou guys are so smart!! That would look beautiful in a dark stain as well – and you can create storage inside. Awesome.

Joan DIY’d a countertop for her laundry room and it turned out so well:

DIY wood countertopLove that stain in combination with the black cabinets!

You know how much I love my black interior doors! I have always loved the look of a gray door too – Sarah shows just how good they can look:

gray interior doorsIt’s a beautifully neutral twist and still adds some dimension to the space.

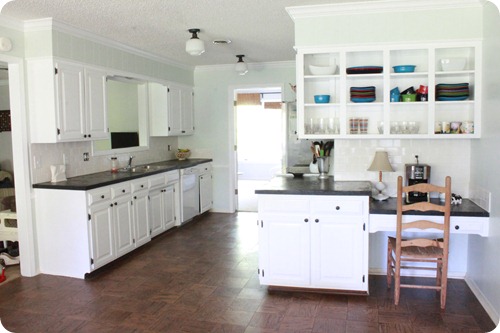
There were some bigger projects shared last month as well – Hayley shared some GREAT tips on how to paint your cabinets:

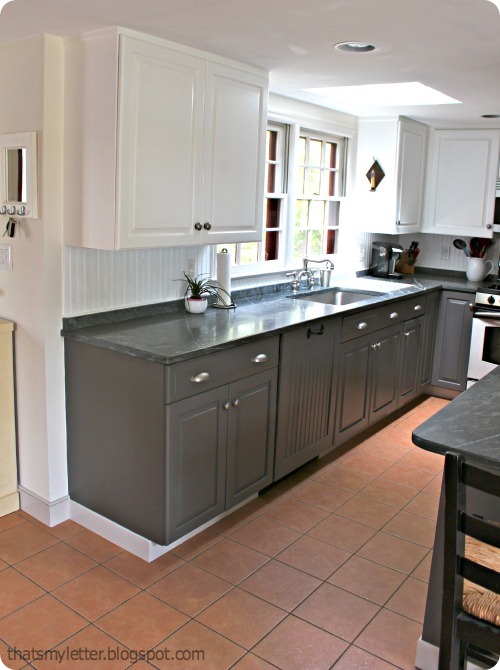
painting kitchen cabinetsAnd Jaime shared some as well – love her two toned look:

dark base cabinets white uppersLaura’s bathroom renovation turned out beautifully:

black and white tile beadboard bathroom

That tub!! Love the smart hidden storage they added when the lost a linen closet in the space, be sure to check that out.

Karah’s new rustic bathroom is a beauty too:

rustic wood vanity with shelvesI’ve always been drawn to an open shelving vanity like this. If you are a DIYer this is something you could definitely make yourself to fit your space perfectly. I’m considering something similar for when we redo our master bathroom…years from now. ;)

There you go – more fabulous projects! If you are linking up and would like to be considered for a highlight next month, go ahead and include a link to TDC or this code in your post:

<div align="center"><a href="http://www.thriftydecorchick.blogspot.com/" title="TDC Before and After" target="_blank"><img src="http://www.homestoriesatoz.com/wp-content/uploads/2012/03/beforeAndAfterButton_thumb1.gif" alt="TDC Before and After" style="border:none;" /></a></div>


And now let’s see what you’ve been up to lately! Link up your projects here:


Family room reveal!

Wednesday, October 29, 2014 0 comments

OK. I’m done. I can’t even believe it!! The family room expansion/renovation is DONE. GoodNESS, I worked my butt off on this room! I will go into a bigger background recap later, but long story short is that we wanted to add on to the back of our house, decided against it when we got the quotes (choke) and then decided to knock down a wall instead.

That wall was the one between the family room and my office, the one with the corner fireplace and the wall to the left: corner fireplace

Our original expansion plans were just to move out from that window wall and make the back part of the house more of a sunroom to extend the family room. We were never going to touch that office wall because I really wanted to keep my office. Turns out I don’t even miss, not at all. Isn’t that funny? It was a BEAUTIFUL room but no one ever saw it anyway! Except you guys, ha!

When my mind started working and the thought that taking down this wall might work, I sent this “real life” shot from my phone to two realtor friends to see what they thought. This really shows you a better angle:

The area to the left is our walk way from the mud room and garage and is where we had the TV. We reconfigured the space like this years back and it did help – but I didn’t like the corner fireplace and didn’t like that the room had different focal points.

It’s funny because I look at that photo and we had a much wider space when it was like that. But now, it’s SO MUCH BETTER because the family room is bigger and the kitchen doubled in size as well.

The space is long and skinny – we didn’t get any additional width to the room at all. In fact it’s skinnier now because everything is situated towards the back of the house. But we absolutely positively love it:

dark gray fireplace

From the day we took down the wall we both said – it was supposed to be like this from the start. Actually every single change we’ve made in this whole great room (moving the kitchen table, switching out the doors, all of it) we’ve said the same every time. It should have been like this all along.

Taking down that wall brought in an insane amount of natural light – we gained two windows from the office. We also added six new overhead lights to the space:

family room renovation @thriftydecorchick

The focal point of the room is now the grand fireplace and built ins:

gray fireplace herringbone tile @thriftydecorchick

We had to built it into the room to accommodate the size of the gas insert – we dealt with that by building out the entire thing and adding storage for electronics and all kinds of other stuff.

I went dramatic and gray with the whole thing and I adore it:

fireplace with built ins I am debating moving the rug down so it’s centered on the fireplace. I like how the sectional sits on it now though – if I move it the sectional will sit half on and half off.

To get an idea of how this renovation opened up the space – the old wall went right down the middle of the new fireplace. Because of the angle of the old fireplace we had about two feet, then windows. There was nowhere else to put furniture but right in front of that double window.

I can’t believe that our family room used to go that far into the kitchen! It actually went almost to the right side of that étagère:

Crazy! The final frontier in this renovation is the double doors that will take the place of that window – it was supposed to happen last week but we had a hiccup. :) More on that soon! (And those drapes will be replaced with some that match the other side of the room soon. These are up for privacy now.)

There are little things we noticed right away when we started this process. First, the animals LOVE IT. They are in this space way more than before. It’s weird. Secondly, we love that there’s one focal point in the space. I used to hate TVs over fireplaces but I’m actually falling in love with the look (and I really disliked it!). There’s no competition for your attention, it’s clean and makes the space feel even bigger. Finally, our view in here is SO much better.

I love love LOVE to sit down on this sofa during the day:

new family room @thriftydecorchick

Everything is oriented to the outside. Before our view from the sofa was the front door and the TV. Now’s all the light and the trees and our pretty deck and patio. I absolutely LOVE that. It’s completely changed how this room feels.

We have more seating in the room now too – the chair to the right is my new “office.” It’s a super cozy spot! The newly painted dresser and the built in to the left of the TV hold my office supplies:

analytical gray sherwin williams

We get so much light in here now it’s hard to get good shots! I’ll take that problem any day. The natural light is why I knew the space could take the darker pieces. I love how they add some drama.

I have a lot of favorite spots in this space and this is one of them. That spool chair was the only furniture purchase for this room and I ADORE it:

board and batten walls

I looked for months for the perfect chair and found it a few weeks ago at HomeGoods. It is spectacular. :)

spool chair

See? Spectacular. And incredibly comfy too!

I moved what used to be used as a sofa table to the wall where the TV was before:

world market everett table

Since the sectional is floating in the middle of the room the dresser I had on this wall felt too deep. This table is perfect since it’s nice and skinny.

The big mirror was a happy accident – I leaned it up there to see how it felt and it makes the room feel even brighter – when I’ve taken it down to paint behind it there’s a noticeable difference in the room:

decorating a sofa table

I thought this walkway would feel tight but it’s actually perfect:

walkway behind sofa

Before the walkway was right in front of the TV and again – this just feels “right.” I told you we keep saying that! It’s how it always should have been. :)

And finally, this is my view as I sit and write:

That view will look even better when the kitchen renovation starts…next year…a long time from now…cause Mama needs a break. :)

I still want to share more details and photos of the space, some before and afters and all of the sources as well – I will share those very, very soon!

For now I think I’ll join him:

butter dog

If you have any questions about anything let me know and I’ll be sure to address it!

THANK YOU for coming along for the ride! I don’t think I’ve ever worked harder on a space but not sure I’ve ever been prouder of a space either. :)
October before and after!

Monday, October 6, 2014 0 comments

Hello everybody! How are you on this fine fall day?

It’s going to be a good week my friends – it’s my birthday week and today is the monthly before and after link up here on the blog. Both equally awesome. :)
As always I picked a few of the beautiful projects shared last month to show you here and then you can take a look at all the new links at the end of this post.

September was the month for pretty rooms for girls, that’s for sure! Anita’s redo is absolutely stunning:

sophisticated girls' room

I think the eggplant color is so sophisticated but still pretty – perfect for tween girls. And the origami art on the wall is just the coolest.

Amy also designed a sweet, fun room for her five-year-old:

girls-room-pink-aqua-gold

The paper poofs and the vinyl dots are such inexpensive ways to make a big impact in a room – SO cute. (I shared how to make those poofs yourself here.)

And this gorgeous nursery belongs to Cristina’s niece – her mama is talented, yes?:

Baby girl nursery stenciled wall

There are so many lovely little touches in this room, you have to go check it out. Love it!

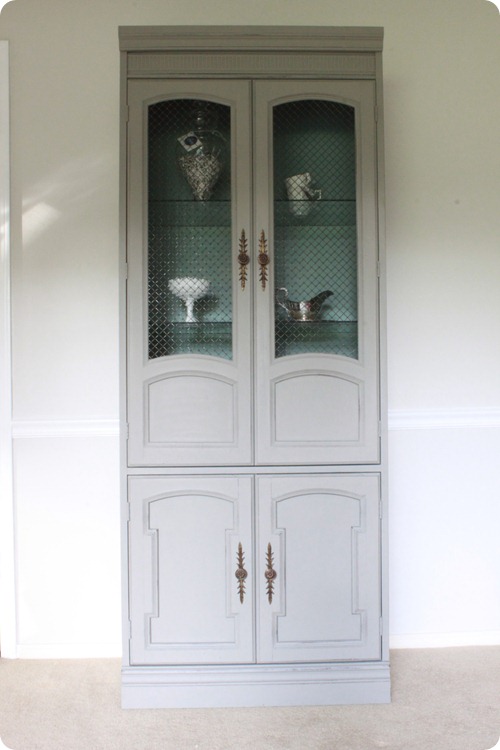
Looking at this hutch now you would NEVER guess what it looked like before:

annie sloan linen

Hayley really did this piece justice – sometimes painting is definitely the right move for older furniture.

Jennifer tried something I’ve never attempted – using dye to change the color of a lampshade:

dying a lampshade

It came out so well, now my wheels are turning!

With all those girl rooms I couldn’t leave out the boys! I loved the inexpensive and easy touches Tamara added to her boys’ room:

boys shared bedroom decor

Those headboards only cost $20 each to make – awesome! (You can see my tutorial for a tufted headboard here.)

Nicki’s paper bag floors are so cool looking!:

paper bag floors

She shares how they have held up in that post – worth checking out if you are interested in trying this flooring treatment.

I have to say, I think this next makeover may be my favorite for the month! Julie helped out her music teacher friend by making over her room and it is AWESOME:

music room decorAs a wife of a musician/composer/band director this room makes me SMILE big. Absolutely love it. Think my husband would want big piano keys on his office walls? ;) 

Well there you go! Now it’s time to see what you’ve all been up to over the past few weeks! If you’d like to be considered for a highlight next month, please link to TDC in your post or include this button:

<div align="center"><a href="http://www.thriftydecorchick.blogspot.com/" title="TDC Before and After" target="_blank"><img src="http://www.homestoriesatoz.com/wp-content/uploads/2012/03/beforeAndAfterButton_thumb1.gif" alt="TDC Before and After" style="border:none;" /></a></div>


You can link up here for the next week, share away!:


September before and after!

Monday, September 1, 2014 0 comments

Hello all and welcome to the before and after link up, Labor Day edition! Hope you’re having a lovely holiday weekend!

I’m kicking this month’s highlights with a few kitchens that caught my eye – yes, I’m now unabashedly in love with white kitchens. I think they are classic and never age – you have SO many opportunities to play with color, textures and wood tones in a white kitchen.

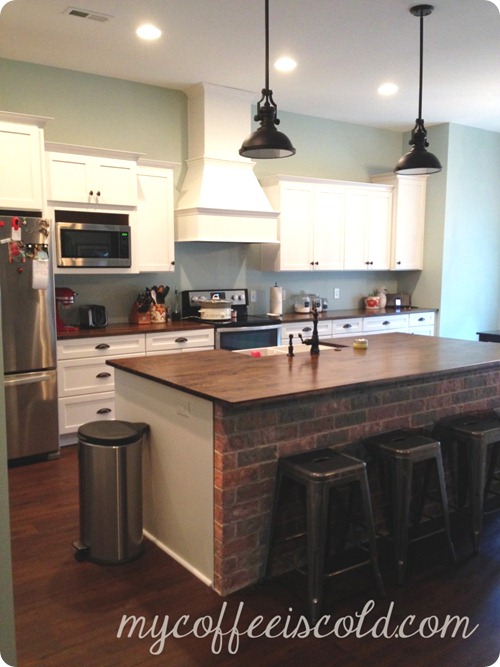
I love Jessica’s touch of brick on her kitchen island:

DIY brick wall

The brick is an unexpected touch that adds some warmth and color that I love!

Laura’s kitchen is gorgeous as well – she painted her cabinets and the backsplash and the difference is astounding:

painted cabinets glass doors

Her floors, decor and countertops keep a warm feel in this space. It is gorgeous!

I’ve been watching Sally’s kitchen renovation for months and the final result did not disappoint!:

white kitchen long island

That big island has all kinds of storage and functions, love it all!

OK, I’m done with the kitchens for today. ;) I’ll always love a good DIY orb light fixture and Kristi’s turned out beautifully:

DIY orb light fixture

Saving a couple hundred bucks is always a good thing!

I have a feeling I’ve highlighted some of this room before, but it’s so good I don’t even care. ;) Jennifer shared her son’s finished room and it looks SO good:

wood plank wall boys room

I LOVE that wood wall and the colors she used throughout. There’s some great storage in there too.

And finally, I was shocked when I read that this floor in Jessica’s bathroom wasn’t tile:

hexagon vinyl floor

I LOVE it! You can see what it is and how to install it here.

As always, there is so much talent at this party every month! If you’d like to be considered for next month’s round up, copy and paste this code at the end of your post or just include a link: 

<div align="center"><a href="http://www.thriftydecorchick.blogspot.com/" title="TDC Before and After" target="_blank"><img src="http://www.homestoriesatoz.com/wp-content/uploads/2012/03/beforeAndAfterButton_thumb1.gif" alt="TDC Before and After" style="border:none;" /></a></div>


Now it’s time to see what you’ve been up to! If you’ve been up to any fall projects already feel free to include those. ;) I am so excited for my favorite season of the year!!


It’s time for some board and batten

Monday, August 25, 2014 0 comments

Hey heeeey! Hope your weekend was great!

I got SO MUCH DONE in the family room over the weekend – so much that I’m crazy sore today. Me thinks I’m getting too old for the days of nonstop DIY. We’ve been living with our family room half way done for a couple weeks now – I’ve gotten very little done up till now. I was out of town for a trip three days, then I was sick for most of last week with a crappy cold. I didn’t feel like doing anything.

Yesterday was the first day I felt good and had a mostly free day to get things done. I can live with half way for a while – then all the sudden I can’t handle it one. more. day. and I go into beast mode. There’s something about this time of year – I want to NEST like you wouldn’t believe. I want to decrapify my entire house, fluff everything, start thinking about fall decor…all that stuff. And none of that is happening if I have the family room taunting me. :)

There’s so much for me to do in the room, it can become overwhelming. So I’ve been focusing on a few walls at a time. I painted the walls in one end of the room already and I’m still patching some of the board and batten and touching up paint there. But the biggest area that’s been bugging me is this side of the room:

It was really a mess, as you can see. My first plan of action yesterday was to finish up extending the crown molding. This is a little trick I use to make the crown appear thicker. You all know how I love me some chunky trim!

I’ve seen a method where they attach baseboards to the wall, I think upside down? And then you install the crown over it. A few things though – I already had the crown up in the room, so I’m not taking it down just to put it back up. Also, that’s a BIG added expense in a room this size. Third – I had already done this trick in the office so I needed to continue in throughout the space anyway. :)

It’s quite easy – it just takes a lot of trips up and down the ladder. (I should have legs of steel at this point, really.) I use this inexpensive decorative trim:

beefing up crown moldingYou can find it at Lowe’s and Home Depot. I just place it about an inch below the current crown. You can use a piece of wood or something as a spacer so you have the same distance around the room – I just use my level as I go around so it’s fairly consistent.

The great thing about working so high up is when you cut the piece too short for the third time and just put it up anyway cause it’s making you cuss, nobody will know:

DIY thick crown molding

Caulk and spackle people. Caulk and spackle.

It took three coats of semi gloss white (legs of steel) until it was covered, but it looks so good! Chunky!:

making crown molding look thicker

The day we tore down the wall one of the guys mentioned how I was going to have to redo all the crown in the family room to match up with the office because I had used the baseboards underneath. It fooled him, it will fool others. ;)

So I mentioned I was in beast mode yesterday and this is where the rest of the work came in. Here’s a shot of this wall just after I finished installing the small trim:

It hadn’t been painted yet, obviously. We had to patch a few holes from the TV hanging there before and the darker rectangles on the wall were from the molding I had had up there forever. Nearly eight years – I’ve been ready for a change for awhile.

After caulking the baseboards in three places, painting them, painting the bottom part of the wall three times in semi gloss white, installing all the board and batten and most of the decorative trim, finishing up the crown and painting the walls their new color, I ended up with this:

white board and batten

And I LOVE IT. Whoa, I LOVE how the white looks against our floors and the furniture. Yummy.

OK, so this spot is still far from done. I still need to finish that small decorative trim at the top of the board and batten – I ran out:

The door trim in the background still needs to be finished and painted. And the biggest thing is caulking and painting all the boards on the wall.

But it’s closer and it looks SO much better so I’m celebrating that!:

long table world market

I’m trying not to think much about the decor just yet – but the accessories will change up on that table. It’s a bit too neutral for me. And I want to paint that mirror a fun color, I just have no idea what it will be. :)

But the wall looks a ton better and I’m SO excited about the direction of this room. I still need to patch a few spots on the other wall, finish up the board and batten on the other side of the room (there’s not much) and then I’m putting all of my attention on the fireplace. I want this space done by the end of September – that’s my goal. Sooner would be awesome!

**To see my how to install the board and batten look, go here.
**For more about that awesome table and where it used to sit go here. :)

August before and after!

Monday, August 4, 2014 0 comments

Hello everyone! Can you believe August is here? It’s always a confusing time for me –I’m a little excited about some structure to our days again but sad that the kiddo heads back to school. For some here school has already started…crazy!!

The first Monday of the month means the monthly before and after party, and yet again it was so fun to browse through your projects. I picked a few favorites but you can see them all here. Link up your own for this month at the end of this post!

Laura’s kitchen table redo turned out SO well – I was so impressed:

how to refinish a table

Her kitchen is so pretty with those windows too. She shared how she refinished the base and the stained tabletop in this post.

I’m loving the industrial look and have wanted to DIY a table – I just couldn't figure out the metal legs. Cristina figured it out for me!:

diy industrial table with wooden top

She used a wine crate as the table top too – brilliant! Love the look!

I thought this outdoor idea was SO SMART – Marie used some old louvered doors to hide their trash cans:

uses for bifold doors

Awesome, right?? And I love her little added touch of the bird houses at the top of each post. :)

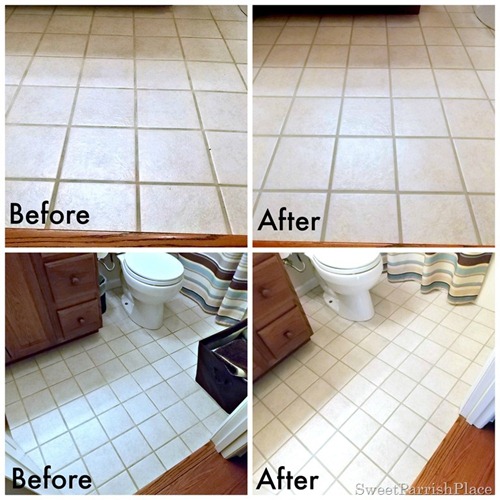
Nicki shared a simple, inexpensive solution for getting grout looking good again:

how to refresh grout

I really need to try this in our foyer – it’s looking rough out there.

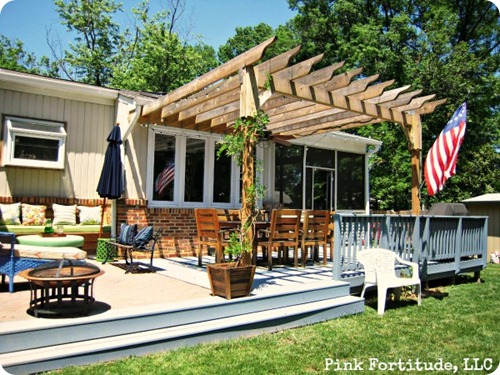
I’m all gung ho about the outdoors in May and June, then my excitement wanes. But the early fall is my absolute favorite time outside so Holly’s deck transformation was inspiring:

shade on deck

The difference from the before is really amazing, be sure to check it out.

The start of school has me completely obsessed with organizing our house again. The fall gets crazy around here and then the holidays bring in lots of STUFF, so I like to get the house cleaned out early. I loved Christina’s craft closet organization:

craft closet organization

She didn’t spend a dime on it and shares some great organizing ideas!

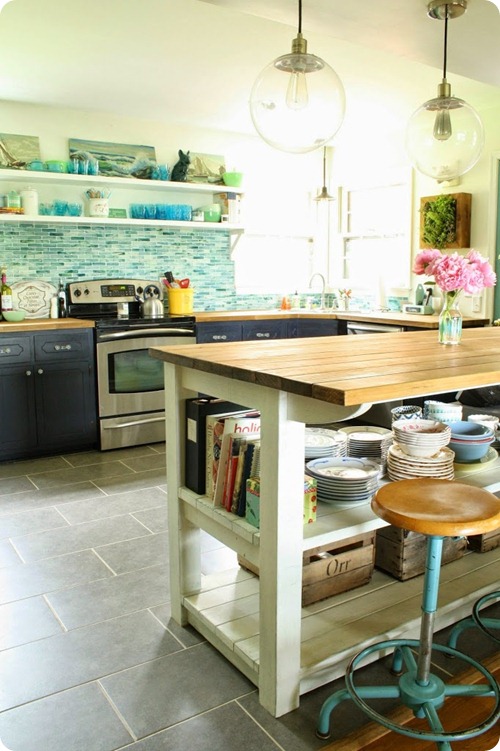
Cassie shared her kitchen redo – it is SO fun and the colors of that tile are fantastic:

aqua tile in kitchen

That island is pretty amazing too, yes?

Love them all, as usual. If you’d like to be considered for next months’ recap, be sure to link to TDC at the bottom of your post or copy and paste this cute button:


<div align="center"><a href="http://www.thriftydecorchick.blogspot.com/" title="TDC Before and After" target="_blank"><img src="http://www.homestoriesatoz.com/wp-content/uploads/2012/03/beforeAndAfterButton_thumb1.gif" alt="TDC Before and After" style="border:none;" /></a></div>


Now it’s time to link up your current projects! The link up will be open for a week: